-
-

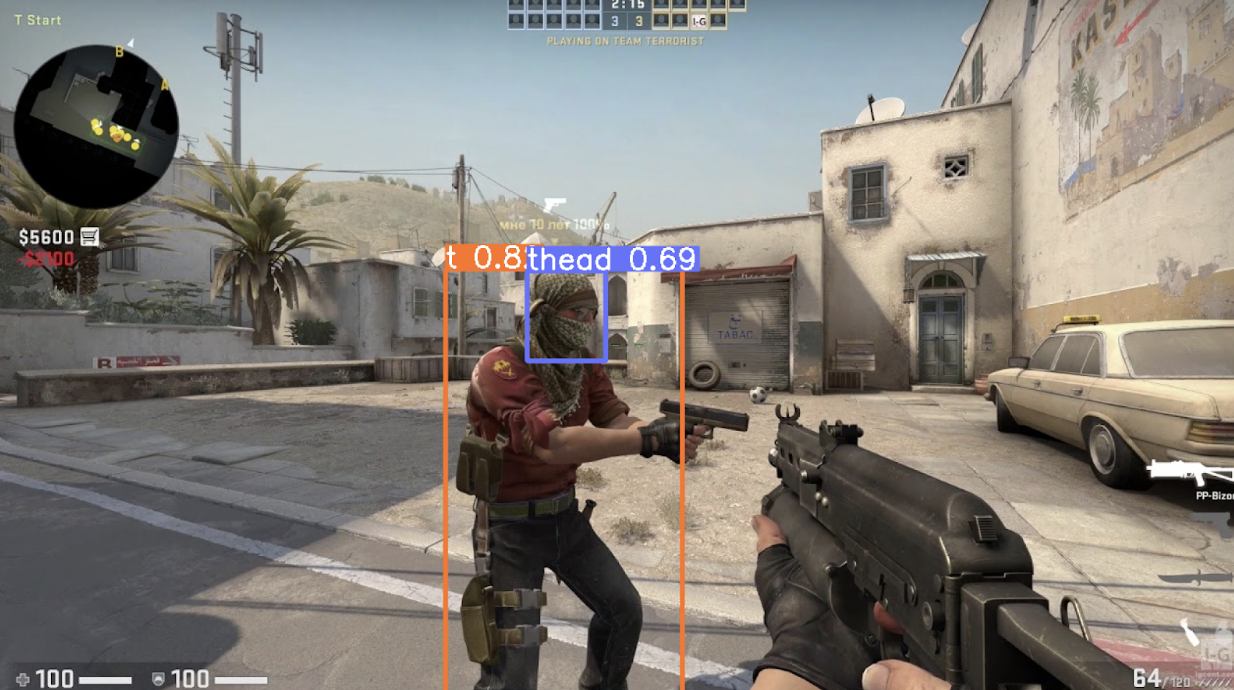
Computer vision system detecting an enemy player
Inspiration
Counter Striker is hard! The game is notoriously tough to aim in, and the spray patterns are menacing. My project will solve both of these problems by creating a robot to play the game so you don’t have to! I have long been a passionate Counter Strike player, and applying machine learning and creating a robot that can perform tasks faster than a human is super exciting.
System Overview
The final design of my Counter Strike bot system consisted of a Raspberry Pi 3b+, a Picam 2.0, an Arduino Leonardo, and a breadboard with feedback actuators. The Raspberry Pi ran the vision and machine learning inference of the system. A Picam is pointed at the laptop running the Counter Strike game. The image is then fed into the machine learning model which determines the bounding boxes of enemies in the current image. The nearest target is calculated and sent to the Arduino Leonardo via UART. The Arduino Leonardo then interfaces as a USB mouse with the computer and moves the cursor to the enemy and clicks the mouse. Simultaneously, the Leonardo activates the bells and whistles on the breadboard to stimulate and awe the user.
Raspberry Pi + Picam:
The Picam plugs into the Raspberry Pi with frame resolution 1000x600. I used a pre trained YOLOv5 model to inference the images. I tried to augment the model with new player skins released after the training dataset was collected, but ultimately I could not achieve the same performance. The model inferences a camera frame roughly every 2 seconds, and gets the bounding boxes of the enemies on the screen. A python script then calculates the closest enemy head hitbox to the crosshair and finds the (x, y) offset from the crosshair in pixels on the image frame. It is important to calibrate the setup so that the middle pixel of the camera image lines up with the crosshair in game. This coordinate pair is then transmitted to the Arduino Leonardo via UART.
Arduino Leonardo:
The Leonardo receives the x, y coordinates from the Pi via UART in two bytes. The Leonardo then interfaces as a USB mouse with the laptop using the Mouse.h library. A Leonardo was crucial to this project because it has an integrated USB driver in the microcontroller chip, so unlike the Arduino Nano it can interface as a USB device directly from the microcontroller. The x, y coordinates from the Pi are not x, y coordinates on the screen, but rather on the camera image. Thus, some conversion and calibration must be implemented in order to transform the coordinates into internal mouse coordinates on the computer. The calibration is achieved via the process mentioned above by aligning the crosshair in game with the center pixel of the camera frame. Then, the offsets are aligned at one endpoint, but the other endpoint still differs in reference frames. Through tuning and testing, I found that multiplying the camera offset by a constant (6) before feeding into the mouse library yielded accurate mouse movements. However, this constant needed to be updated every time the camera was set up, due to millimeter inconsistencies in the camera position from session to session yielding drastically different results. The Leonardo then interfaced as a USB mouse to the computer, moved the mouse the desired (calibrated) offset, and clicked - resulting in an enemy kill.
Actuators:
The Leonardo also activates two LEDs and a buzzer depending on its state. While it is waiting for coordinates to come in from the Pi, the blue LED is lit. When a value is read and the mouse is moving, the red LED is lit. When the Leonardo clicks the mouse, then the buzzer sounds.
Demo Videos
https://youtube.com/shorts/-2U1AQZexDI

Log in or sign up for Devpost to join the conversation.