Inspiration
As a team, we've always been drawn to the places where engineering directly improves someone's life. One of us is part of the Neurotech Club at UC Davis and built a prosthetic leg controlled by the user's intent rather than by raw muscle signals. When we talked about that project as a group, it stuck with all of us: a well-designed assistive device doesn't just do a task; it gives someone back their independence.
We started thinking about how many everyday tasks put strain on people's shoulders and backs. For someone recovering from an injury, living with limited mobility, or doing physically demanding work, those tasks can be exhausting or even impossible. We asked ourselves a simple question: what if you had an extra hand that moved the way you wanted, without having to learn a complicated controller?
That question became our project. "Atlas"
What it does
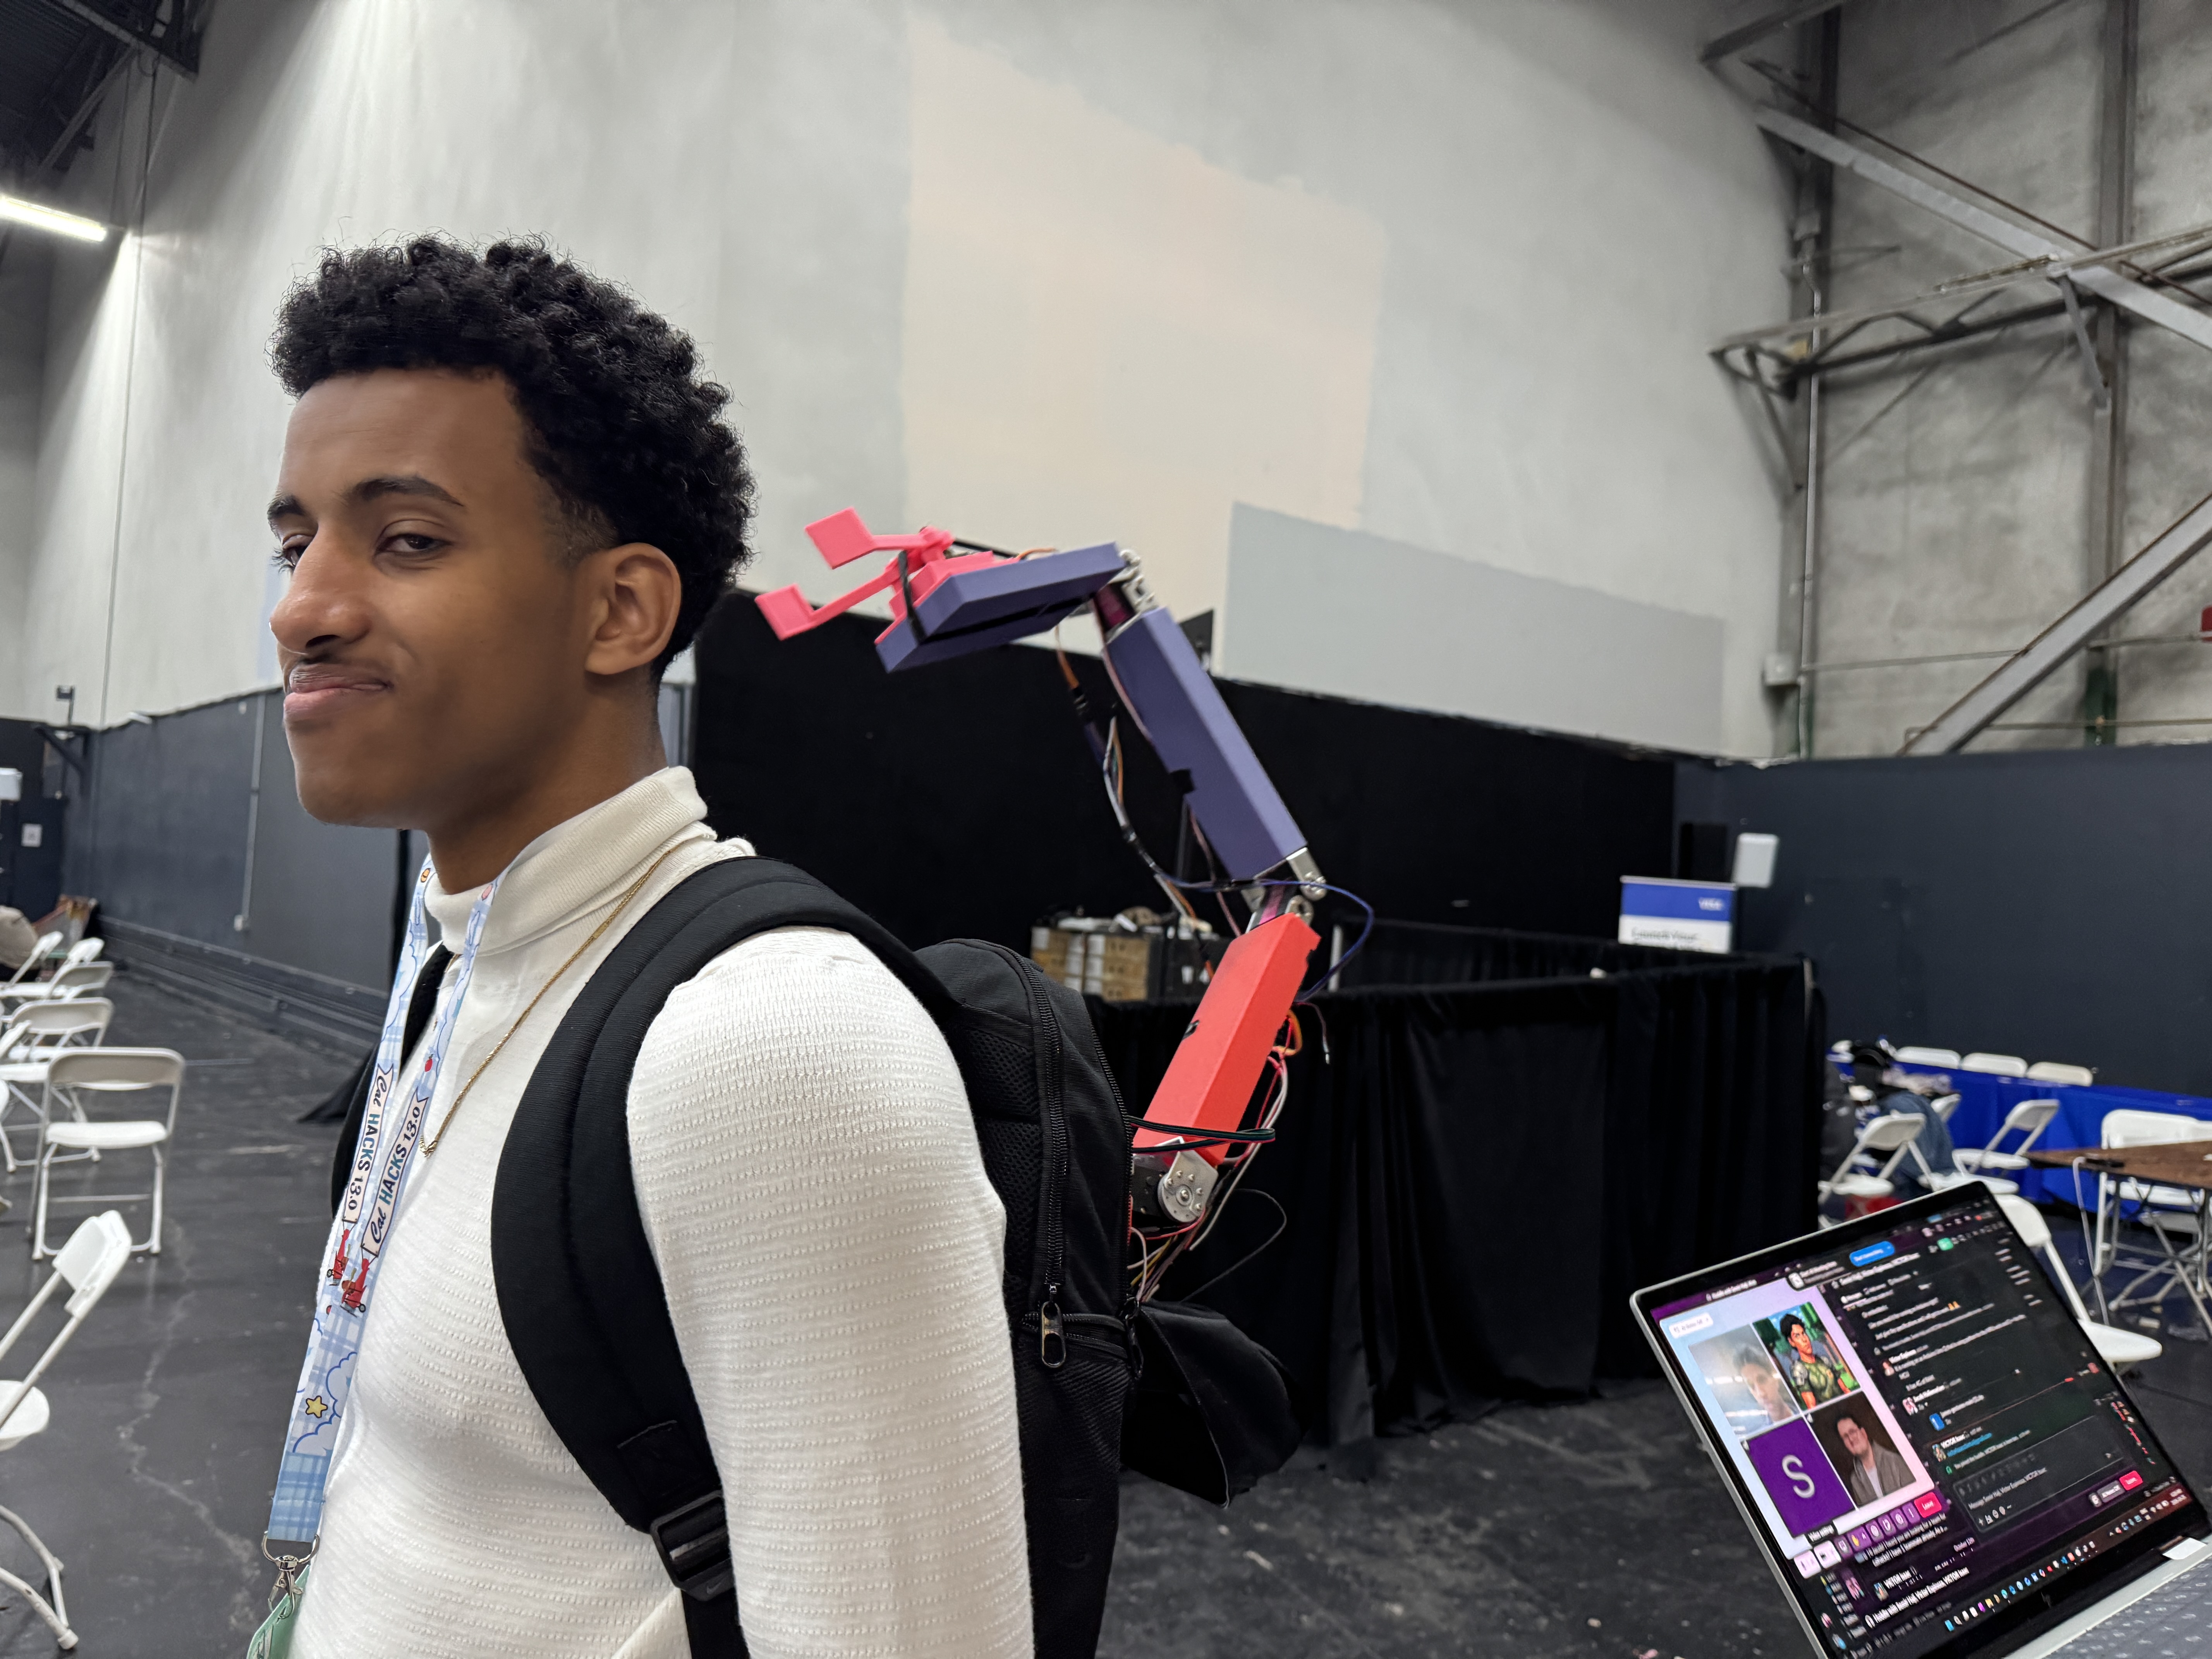
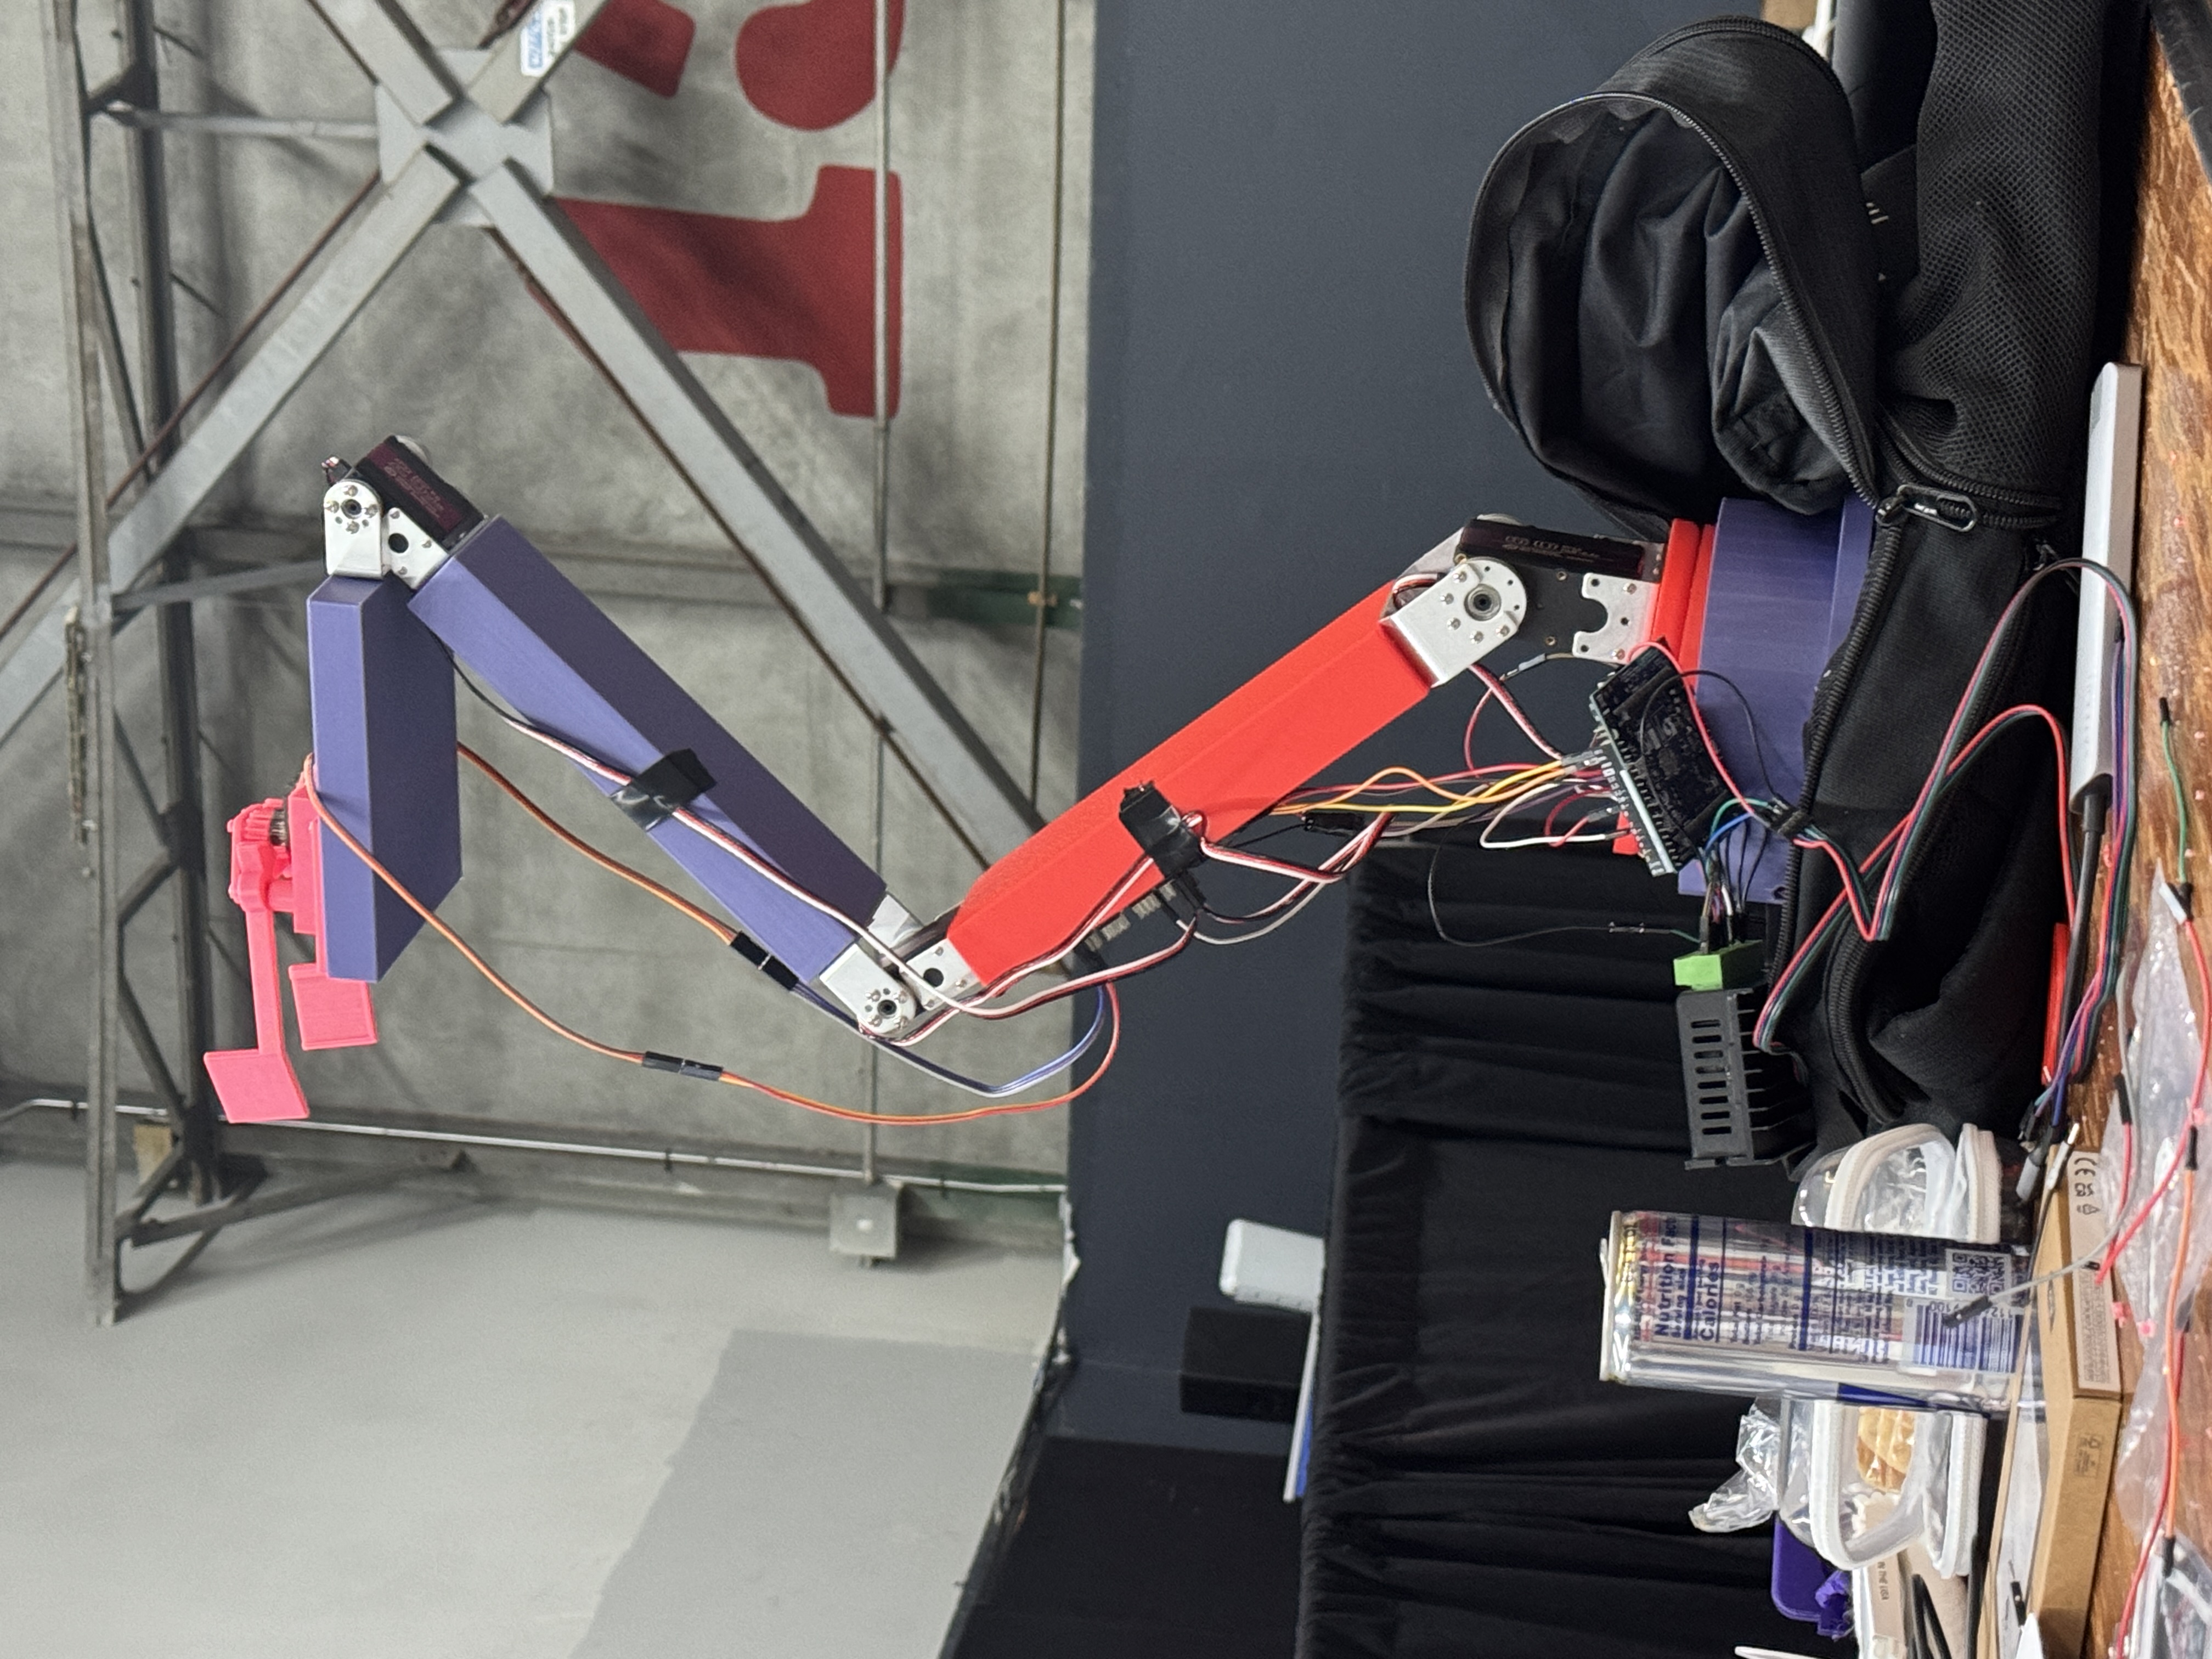
Our project is an assistive robotic arm that acts as an extra hand for the user. Instead of a joystick or remote, it follows the user's own voice and hand gestures, so controlling it feels as natural as moving your own body.
How we built it
Brainstorming We kicked things off by sitting down together and talking through what the arm needed to do and how we could realistically build it in a weekend. Each of us brought something different, from kinematics and mechanical design to software and electronics, and we used that to sketch out a plan. We worked out how many degrees of freedom the arm needed to reach and hold objects, then hand-drew a concept of what we wanted it to become.
Dividing the work. Once we agreed on a direction, we split up so we could build in parallel. We checked in regularly so each part would fit together at the end.
Mechanical design. We turned our sketch into a full CAD model in SolidWorks. Every joint has to hold the torque created by the load at the end of the arm, roughly
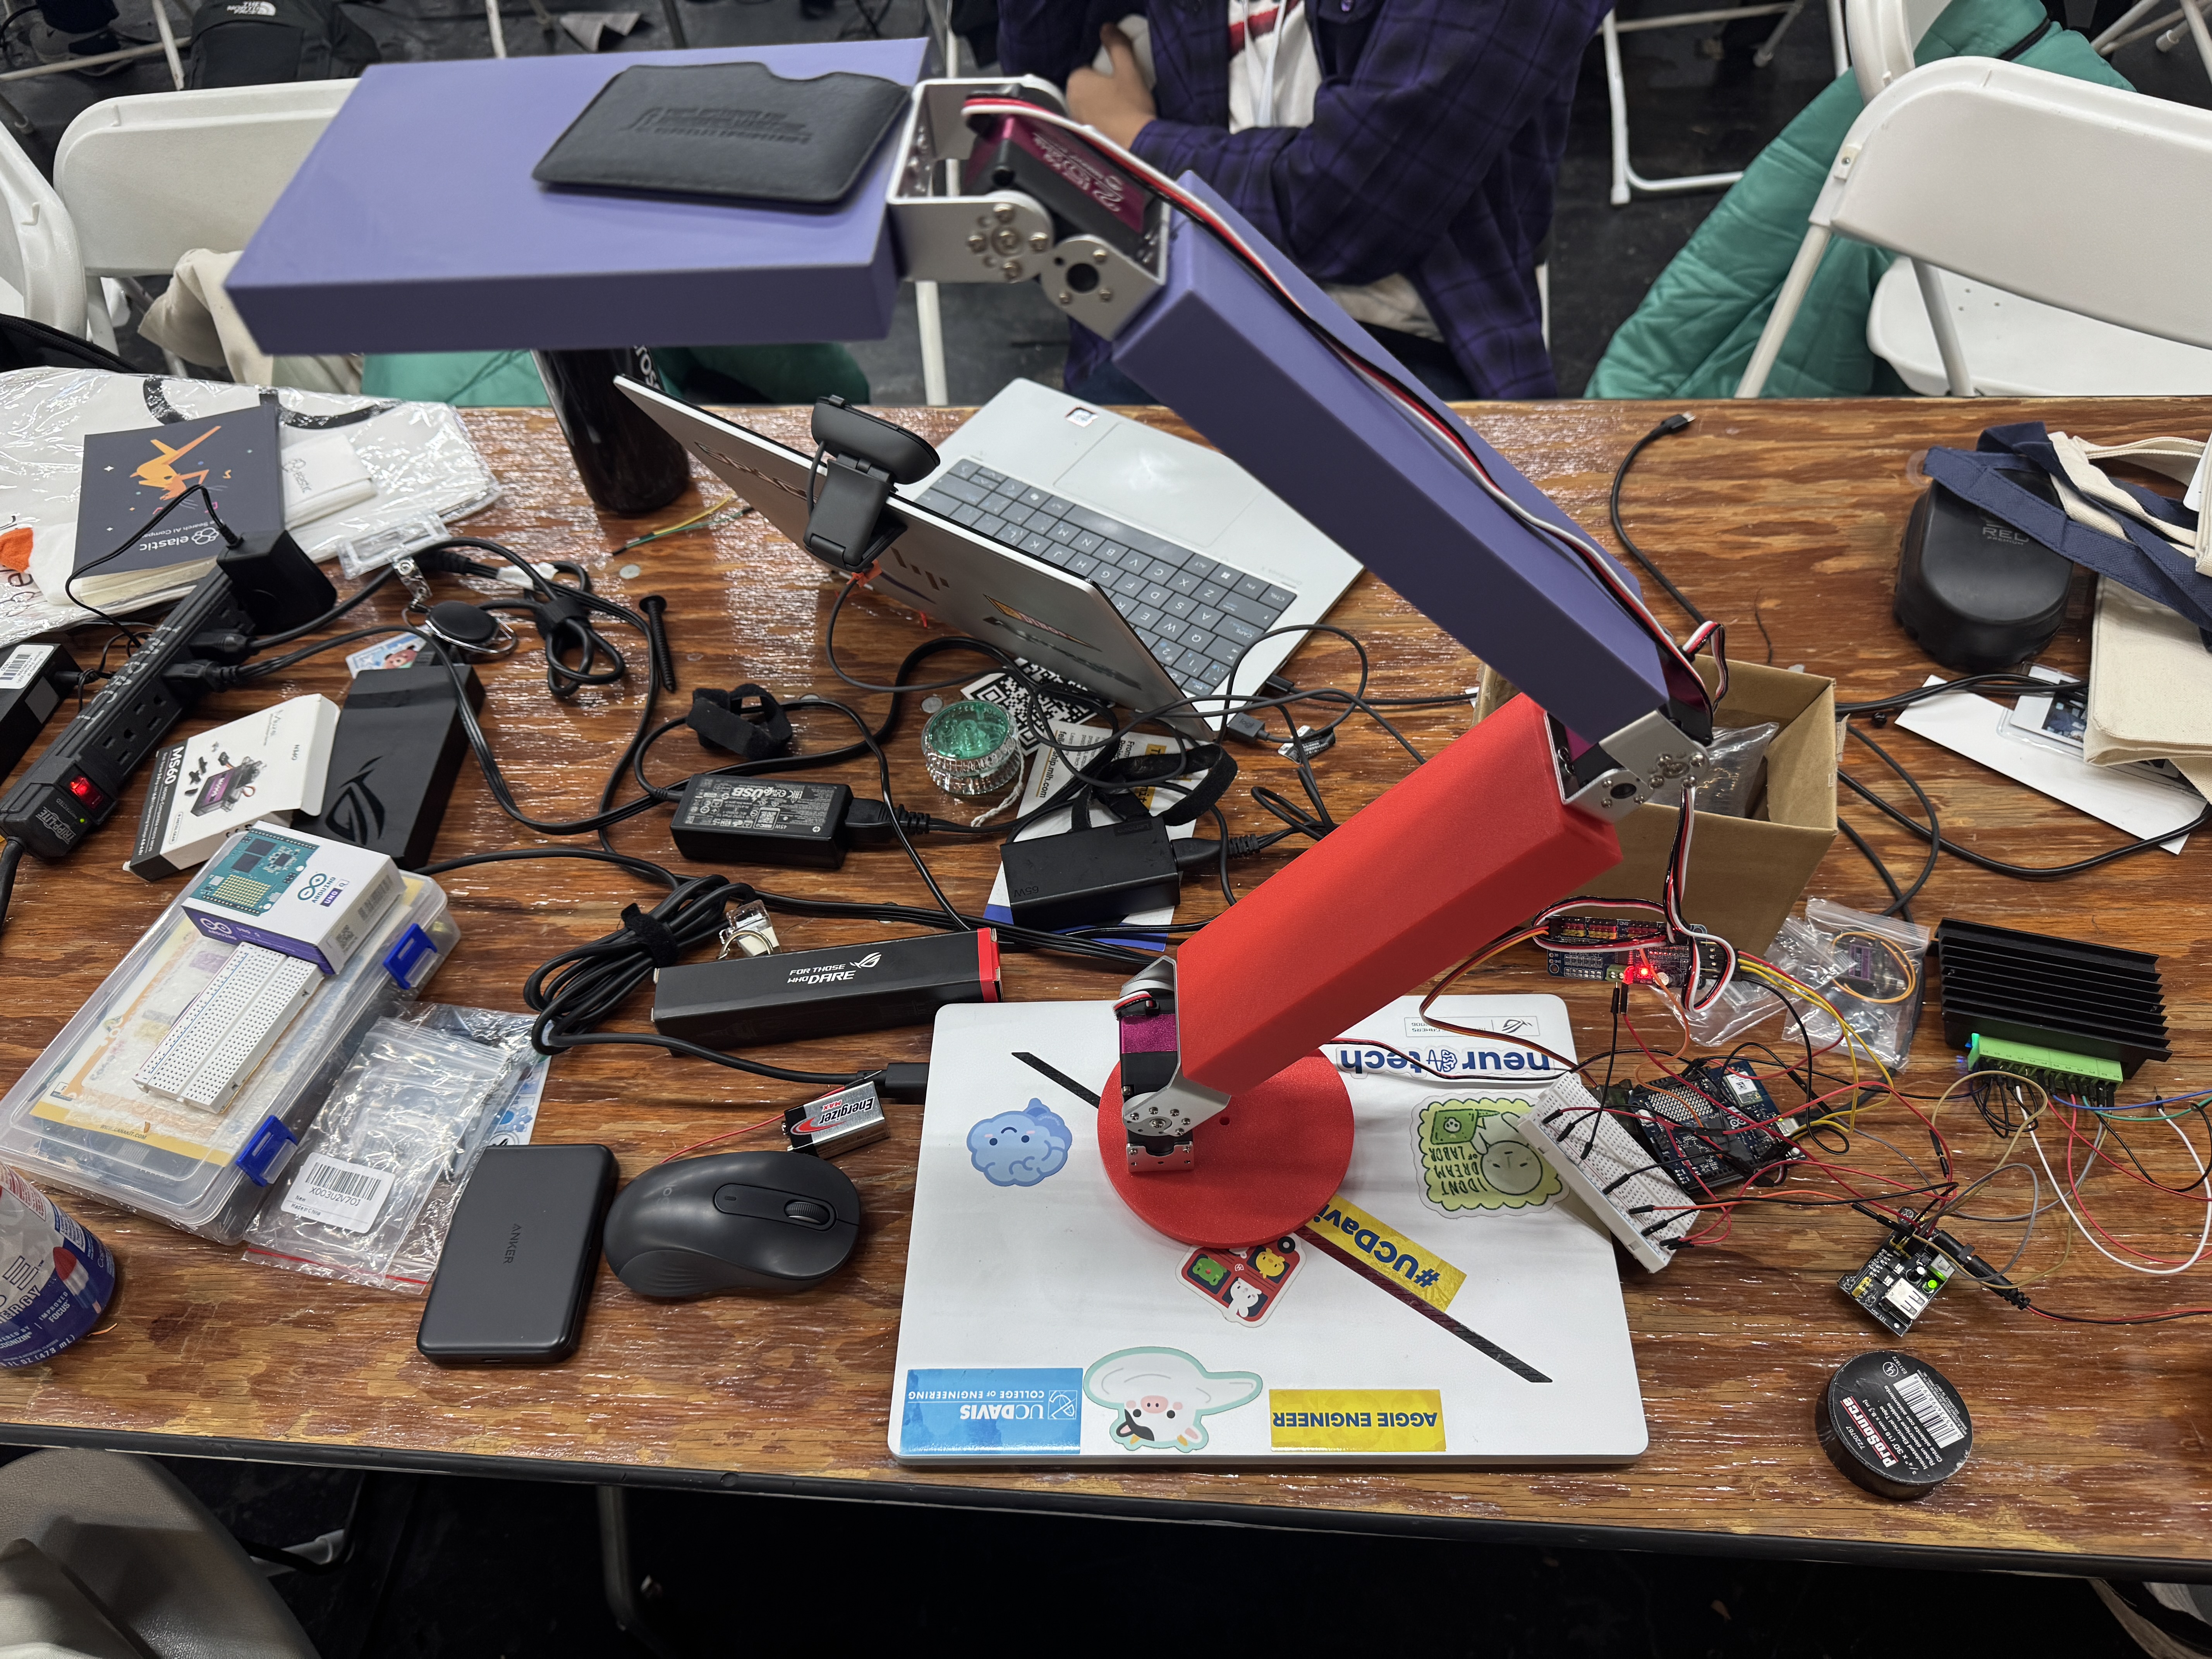
Gesture tracking. For control, we used the JAMES gesture module, which uses MediaPipe hand tracking and OpenCV to follow the user's hand and arm through a camera. We mapped those tracked movements to target positions for each joint of the arm.
Testing in CAD. Before printing anything, we tested the arm's motion on our CAD model together, checking its range of movement and catching collisions early so we wouldn't waste print time.
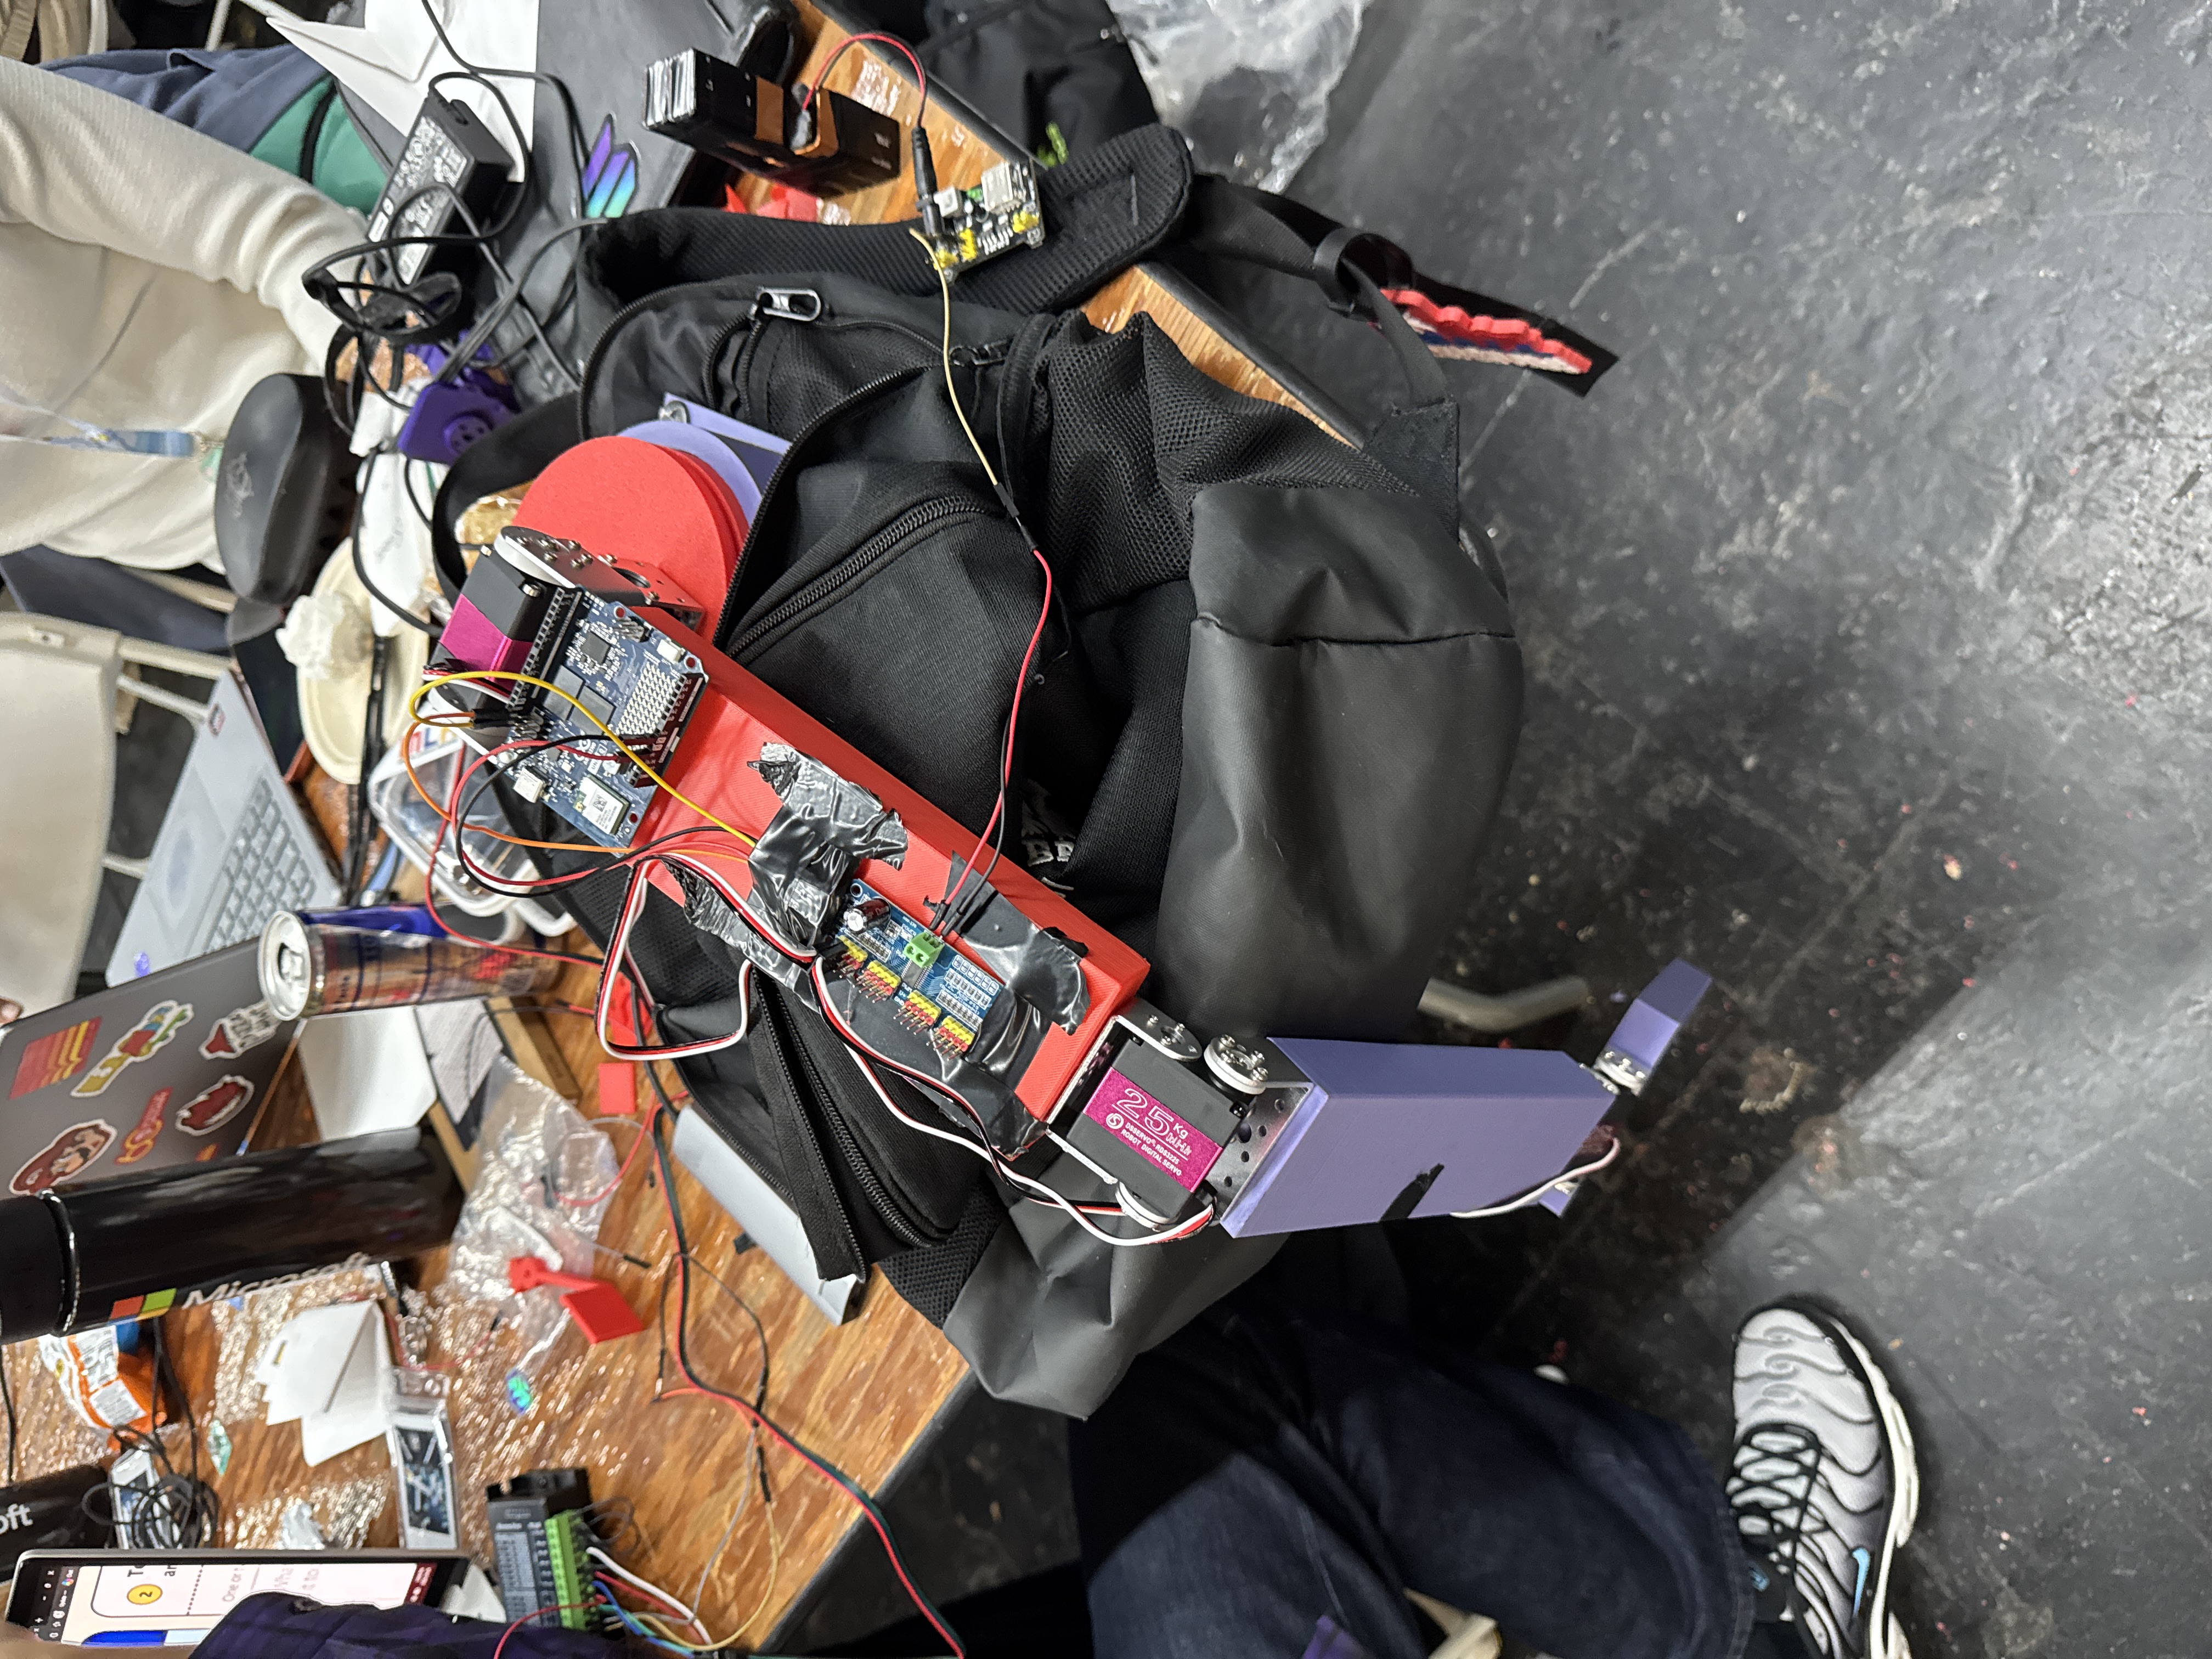
Fabrication and assembly. We 3D printed the structural parts [in PLA] and assembled the arm as a team around 5 servo motors and a stepper motor, driven by an Arduino Uno Q.
Tuning Finally, we brought the mechanical, electrical, and software pieces together and tuned the motor control so the arm moves smoothly instead of jerking, even while carrying a load.
Challenges we ran into
Dynamic loads. Holding a load still is very different from moving it. As the arm moves, the torque on each joint changes, and a shifting load makes it even harder. Getting the motors to move smoothly under those changing forces took a lot of trial and error from all of us.
Limited printing resources. With more than 3,000 hackers sharing the venue's 3D printers, we couldn't count on the print queue to get our parts in time. Waiting would have put our whole build schedule at risk.
Accomplishments that we're proud of
Taking initiative together. Cal Hacks offers a lot, from sponsors giving us feedback on our design to the organizers' 3D printer and hardware rentals. But with thousands of hackers sharing them, depending on those queues was risky. Instead of waiting, we split up and went looking for other options. We looked into printing at the public library and asked other hackers who'd brought their own printers to print parts for us in exchange for a favor. Relying on ourselves gave all of us a real sense of pride, because we built this with our own hands.
Working as one team. We're proud of how well we worked together under pressure. We trusted each other with our parts of the build, helped each other when someone got stuck, and brought everything together into one working arm.
What we learned
Theory into practice. Much of what we knew came from the classroom: kinematics, statics, and mechanical design. This project let all of us apply that theory to a real machine and see where the textbook ends and real-world engineering begins.
Designing for real forces. We learned how much time and iteration it takes to design a robotic arm that can stand up to real forces. The structure has to support the weight of dense objects without flexing or failing, and motor selection has to account for the worst-case torque at full reach, not just the average case.
What a team can do in a weekend. For some of us, this was our first hackathon. We learned how much a team can build in a short time when everyone is driven to make something that actually works, not just a design concept or a paperweight. This arm works, and we built it together in a single weekend. It's inspired all of us to keep doing hackathons.
What's next for Atlas
Our goal is a comfortable harness that mounts Atlas to the user's back or shoulder, with an onboard battery and microcontroller so it works untethered, wherever the user goes.

Log in or sign up for Devpost to join the conversation.