-
-

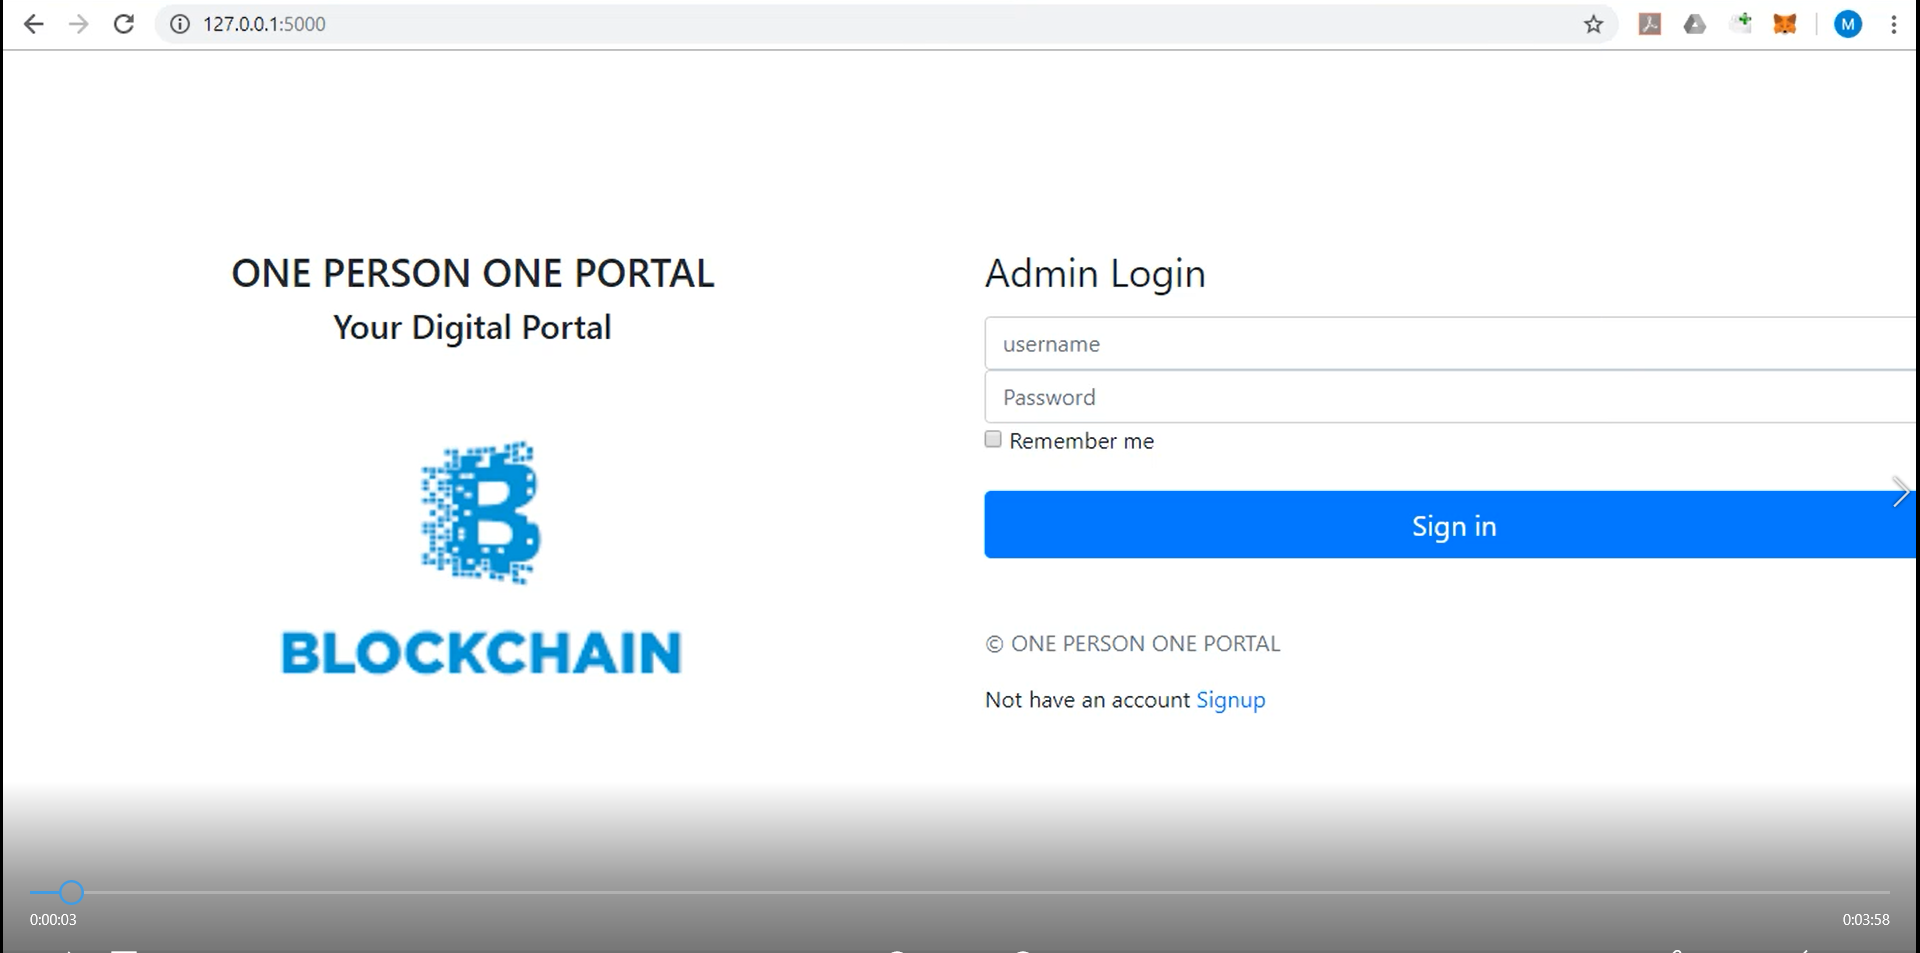
The homepage
-
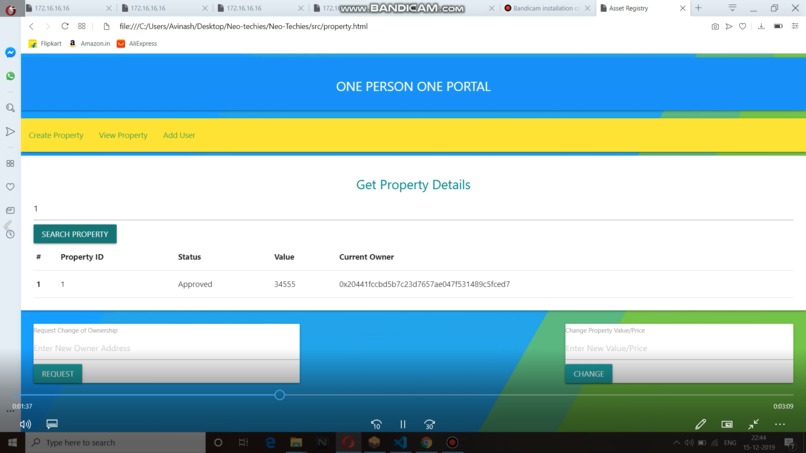
Asset page

ONE-PERSON-ONE-PORTAL
our idea is one person one portal ,one blockchain id multiple uses at single platform interconnected internally .It is at present deployed on ethereum test netwrok .In this portal a user can do kyc ,do asset/property management and track health records.In this portal you ned to upload documents and do first time verification of a document uploaded and after that you just have to send the documents.we have ocr working in backend that will fetch details like name ,dob etc from the document uploaded for verification and matching credentials .also after that you can create property ,transfer ownership like at present if you want to transfer the ownership of land you need to go to the governemnet offices which is hectic and costly .On this portal once property is created ,you can change ownership in minutes .similarly you can track the health records . There are lot of challenges in this project which needs to be overcome ,but we think if the workis done in rght direction the portal can act as smart governance technique based on blockchain in the future
Steps to do kyc and asset management : 1.Signup on the protal using a valid adharr and put the name same that is on aadharr card 2.Enter the Right address of your ethereum account 3.now login using the username and password 4.To upload kyc document go to kyc panel and upload the document and put the details there 5.To create property/asset enter the details and ethereum address of the property holder(your address) 6.To view property go the view property section 7.To transfer ownership first add the the ethereum address of the next owner in add user panel 8.Approver the added user there only 9.Now go to view Property section and enterthe property id 10.put the address of new owner in chnage ownership box and click the chnage ownership button 11.same way you can change the value of property
Testnet Used:
Testrpc – This is a local network running on your compuetr. 10 free wallet accounts with test ether is allocated.
Wallet
Wallets are very important part of a smart contract. It serves 2 purposes:
- It serves as client to ethereum wallet. To make a transaction on network ether has to be spent and you can authorize these payments using this.
- To communicate with a blockchain and to deploy, you need to either have a full node or a wallet cleint of the network. A wallet can facilitate the communication with the network. Note: We have used testrpc which provides us with 10 free accounts with their private keys and 100 ethers are linked to each account.It is these accounts which we are using for transaction. Tp run it go to : cmd/testrpc
Deployment
To deploy a contract the following steps are to be taken:
- Compile the code and get necessary bytecodes and ABIcodes
- Select a network to migrate to
- Make a deployment with a wallet address as transaction sender
- Authenticate the transaction form the wallet and pay the transaction cost.
Your contract will be deployed and will be assigned a public address which can be used to access it.
Web Interface
A web app can be used to work with the contract. A backend javascript framework, web3.js, can intract with the blockchain. It can connect to the network, identify the contract and perform transactions. There are two kinds of transaction operation on a contract:
Web App
Open src/js/app.js file. This is the javascript file that interacts with the contract.
Paste your contract address replacing 'contract_address in “web3.eth.contract(abi).at('contract_address');
Go to remix page. In the compile section go to details tab. In the ABI section click on copy button to copy your ABI code.
Go to src/js/app.js file and paste it replacing abi_array in var abi = abi_array ;
Open src/index.html to open the web app.
Interacting on web App
Fill up the user details and click add user or add admin. You will find block being created and ether being reduced in remix ide from the account we are using which got 100 free ethers.
In the command window you can see block being created.
Different Operations In the App
1.Intialising Contract
Output
- msg.sender is made as creatorAdmin
- msg.sender is made as superAdmin
- msg.sender is made as verified user
2.Create a new Property
parameters
- CreateProperty- property Id, propoerty value, property owner address
prerequisites
- msg.sender should be admin
- property owner should be verified user
Output
mark property Id, Status as Pending, propoerty value, property owner address
3.Approve the new Property.
parameters
- approveProperty- property Id
prerequisites
- msg.sender should be superadmin
- current owner should not be msg.sender
Output
mark property Satus as Approved
4.Reject the new Property.
parameters
- rejectProperty- property Id
prerequisites
- msg.sender should be superadmin
- current owner should not be msg.sender
Output
Mark property Satus as Rejected
- Request Change of Ownership.
parameters
- changeOwnership- property Id, new owner address
prerequisites
- msg.sender should be the current owner
- new owner should be verified user
- current owner is not the new owner
- No pending ownership change request should exist.
Output
mark property Ownership change request
6.Approve change in Onwership.
parameters
- ApproveChangeOwnership- property Id
prerequisites
- msg.sender should be superadmin
- ownership change request must exist
Output
mark new owner address as current owner
7.Change the price of the property.
parameters
- changeValue- propoerty Id, new property value
prerequisites
- msg.sender should be the current owner
- No pending ownership change request should exist.
Output
change property value
8.Get the property details.
parameters
- GetPropertyDetails- propoerty Id
Output
Status, propoerty value, property owner address
9.Add new user.
parameters
- addNewUser- address
prerequisites
- msg.sender should be admin
- No pending request for the address should exist.(user or admin or superadmin)
- address should not be a verified user.(user or admin or superadmin)
Output mark address as user
10.Add new admin.
parameters
- AddNewAdmin- address
prerequisites
- msg.sender should be superadmin
- No pending request for the address should exist.(user or admin or superadmin)
- address should not be a verified user.(user or admin or superadmin)
Output
mark address as Admin
11.Add new SuperAdmin
parameters
- addNewSuperAdmin- address
prerequisites
- msg.sender should be superadmin
- No pending request for the address should exist.(user or admin or superadmin)
- address should not be a verified user.(user or admin or superadmin)
Output
mark address as SuperAdmin
- Approve Pending User.
parameters
- approveUsers- address
prerequisites
- msg.sender should be superadmin
- Pending request should exist for address
Output
mark address as Verified user
Built With
- css
- ethereum
- express.js
- flask
- html
- http
- javascript
- json
- jupyter-notebook
- node.js
- python
- remix
- solidity
- web3
Log in or sign up for Devpost to join the conversation.