-
-
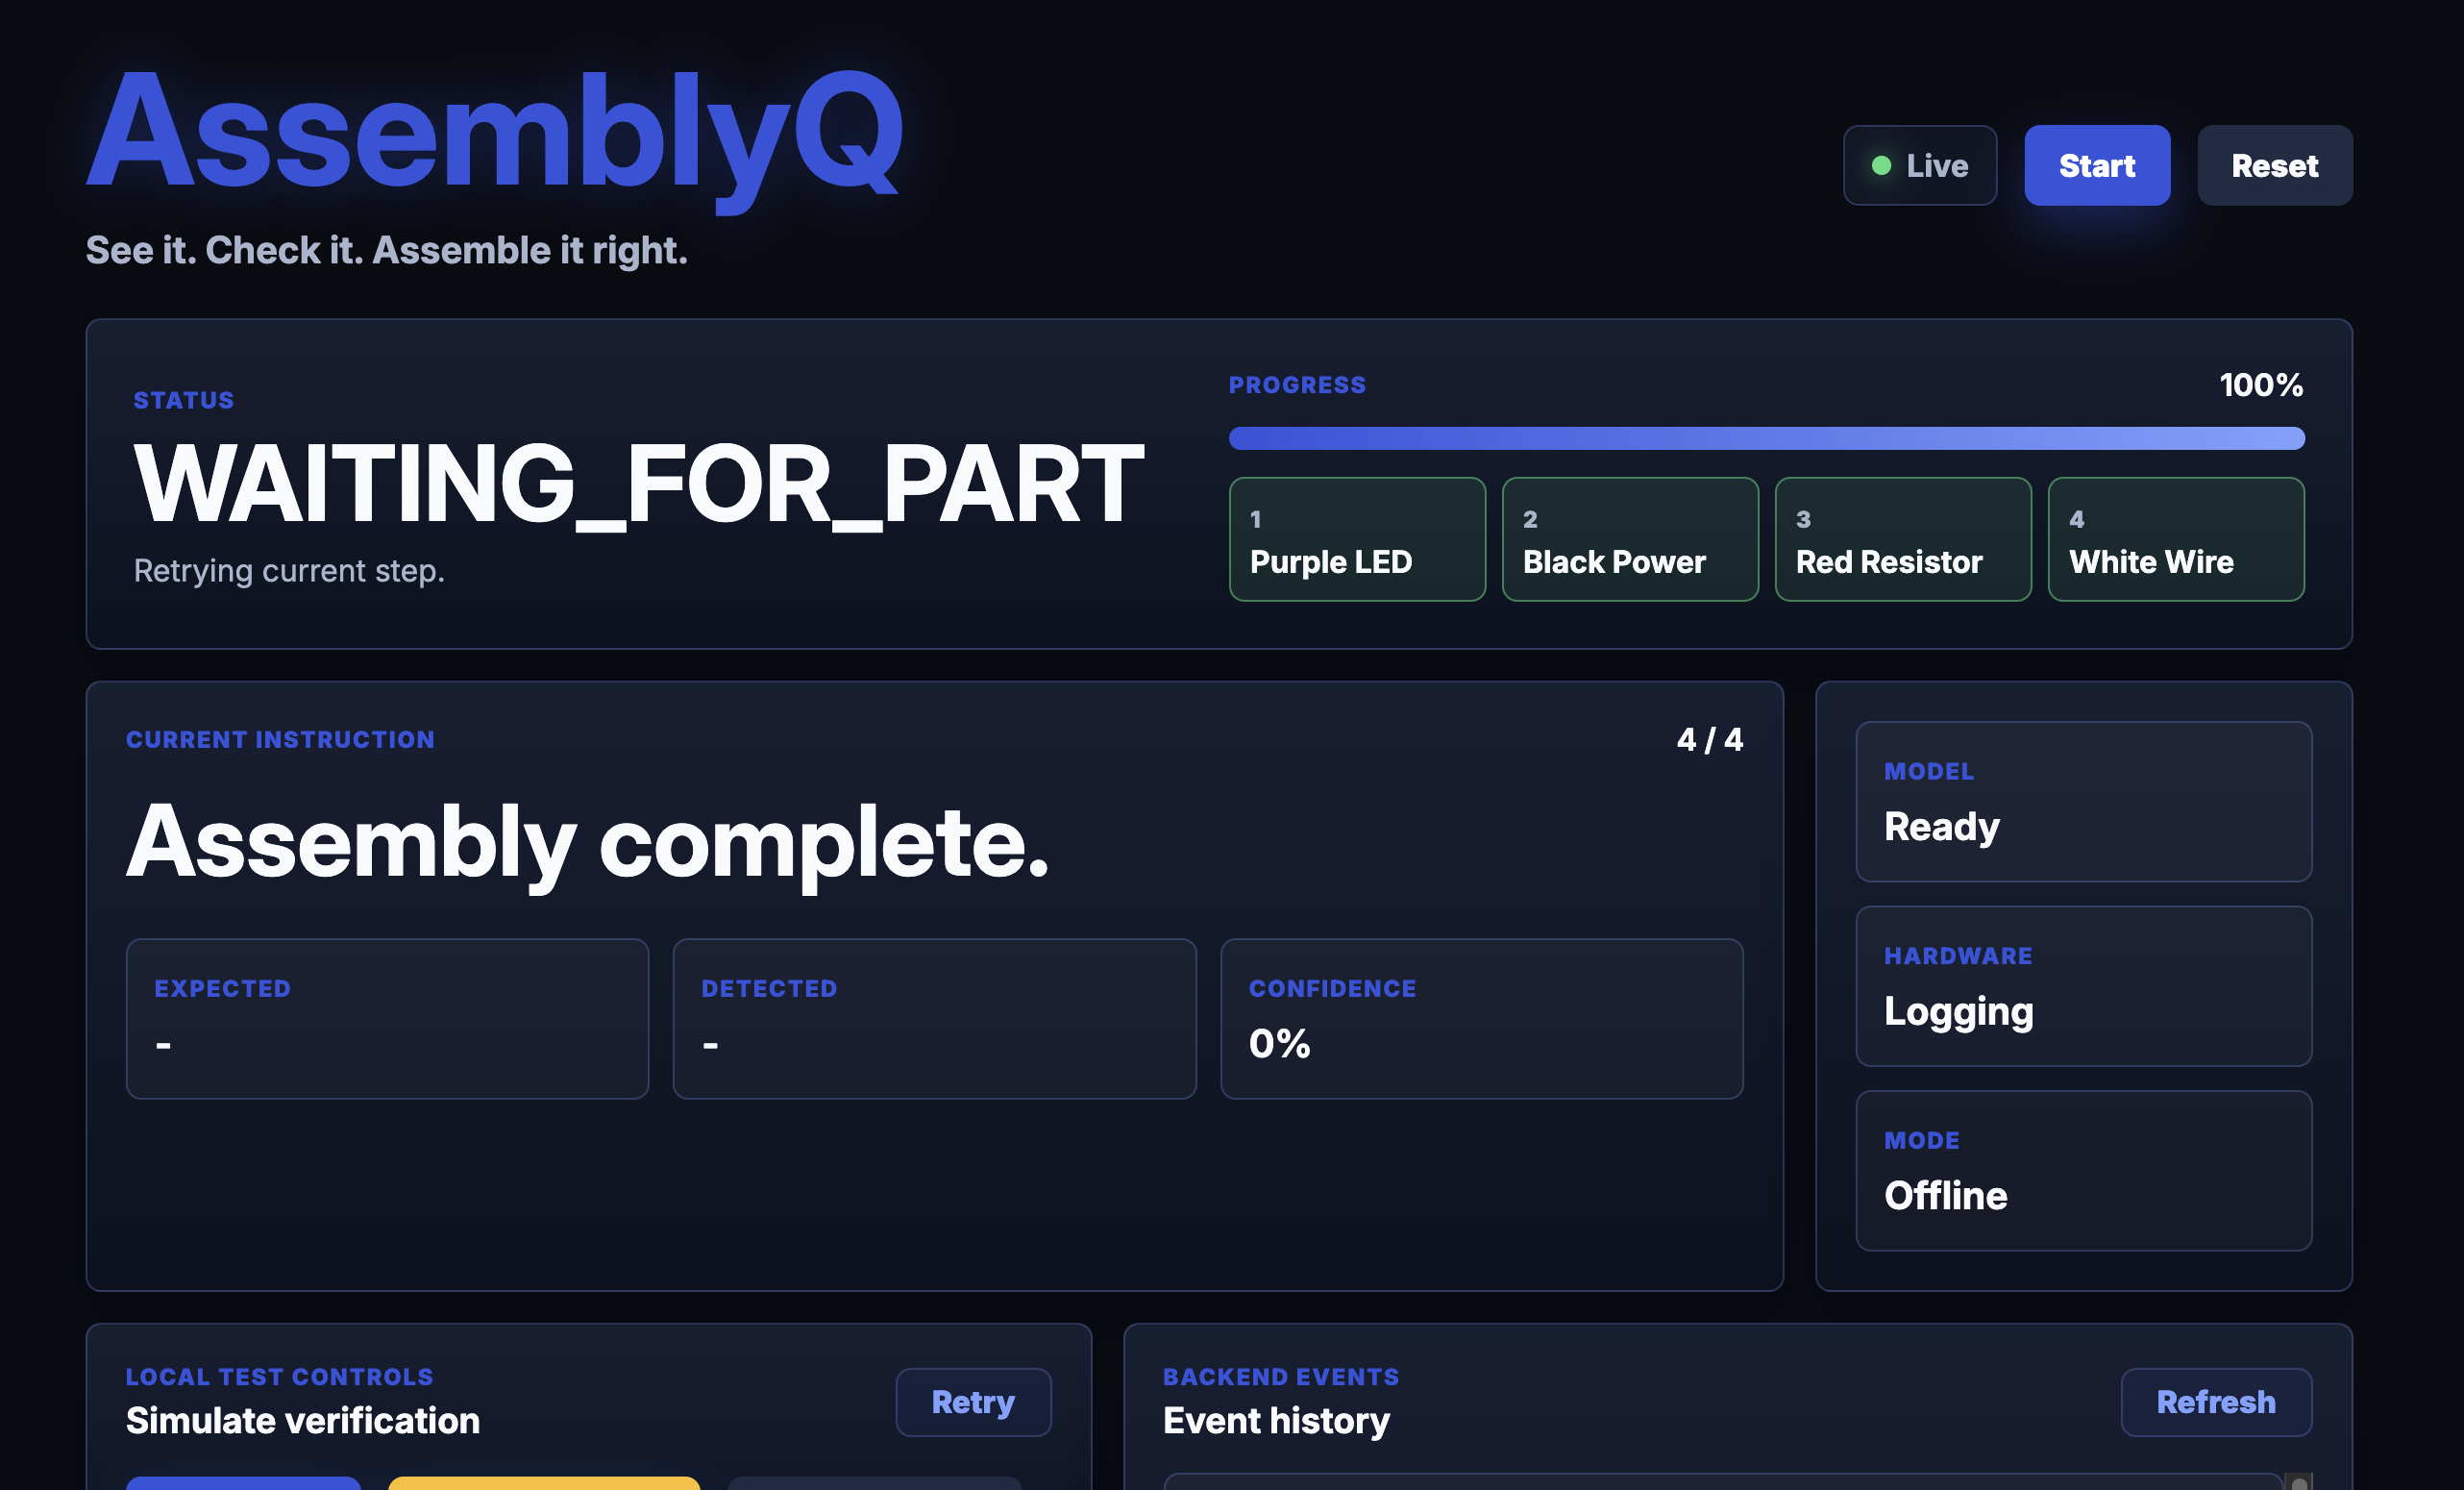
AssemblyQ Dashboard
-
AssemblyQ hardware controller
-
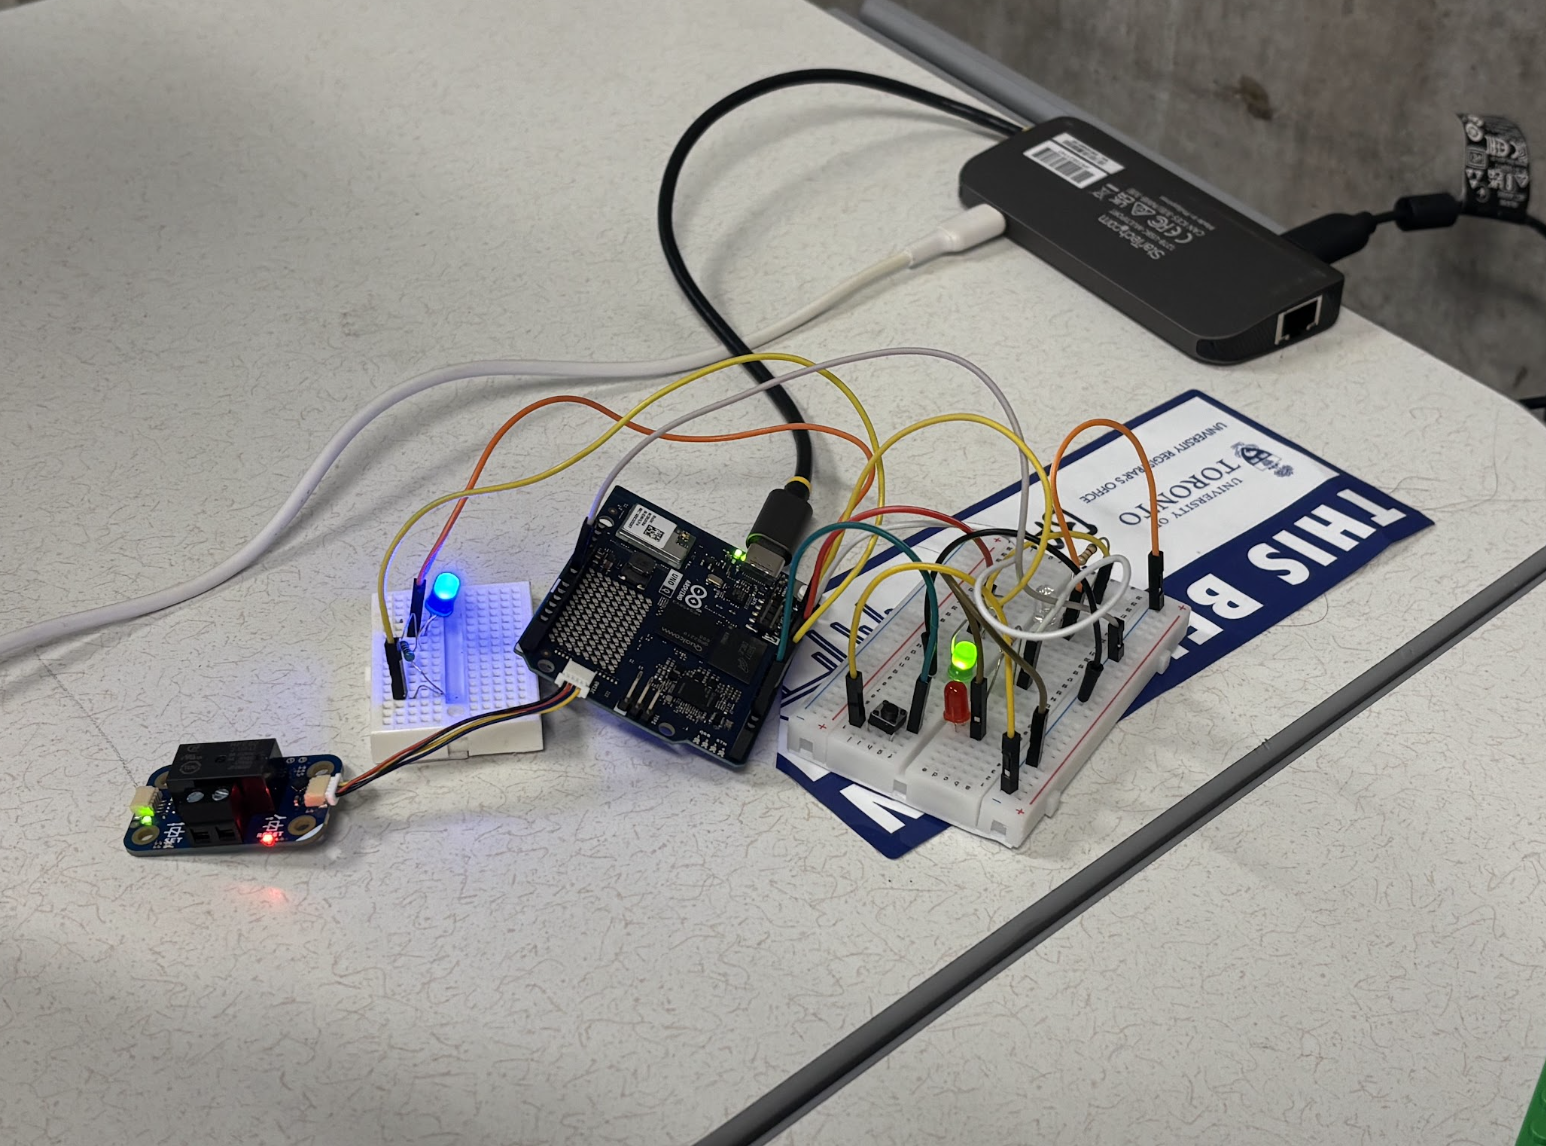
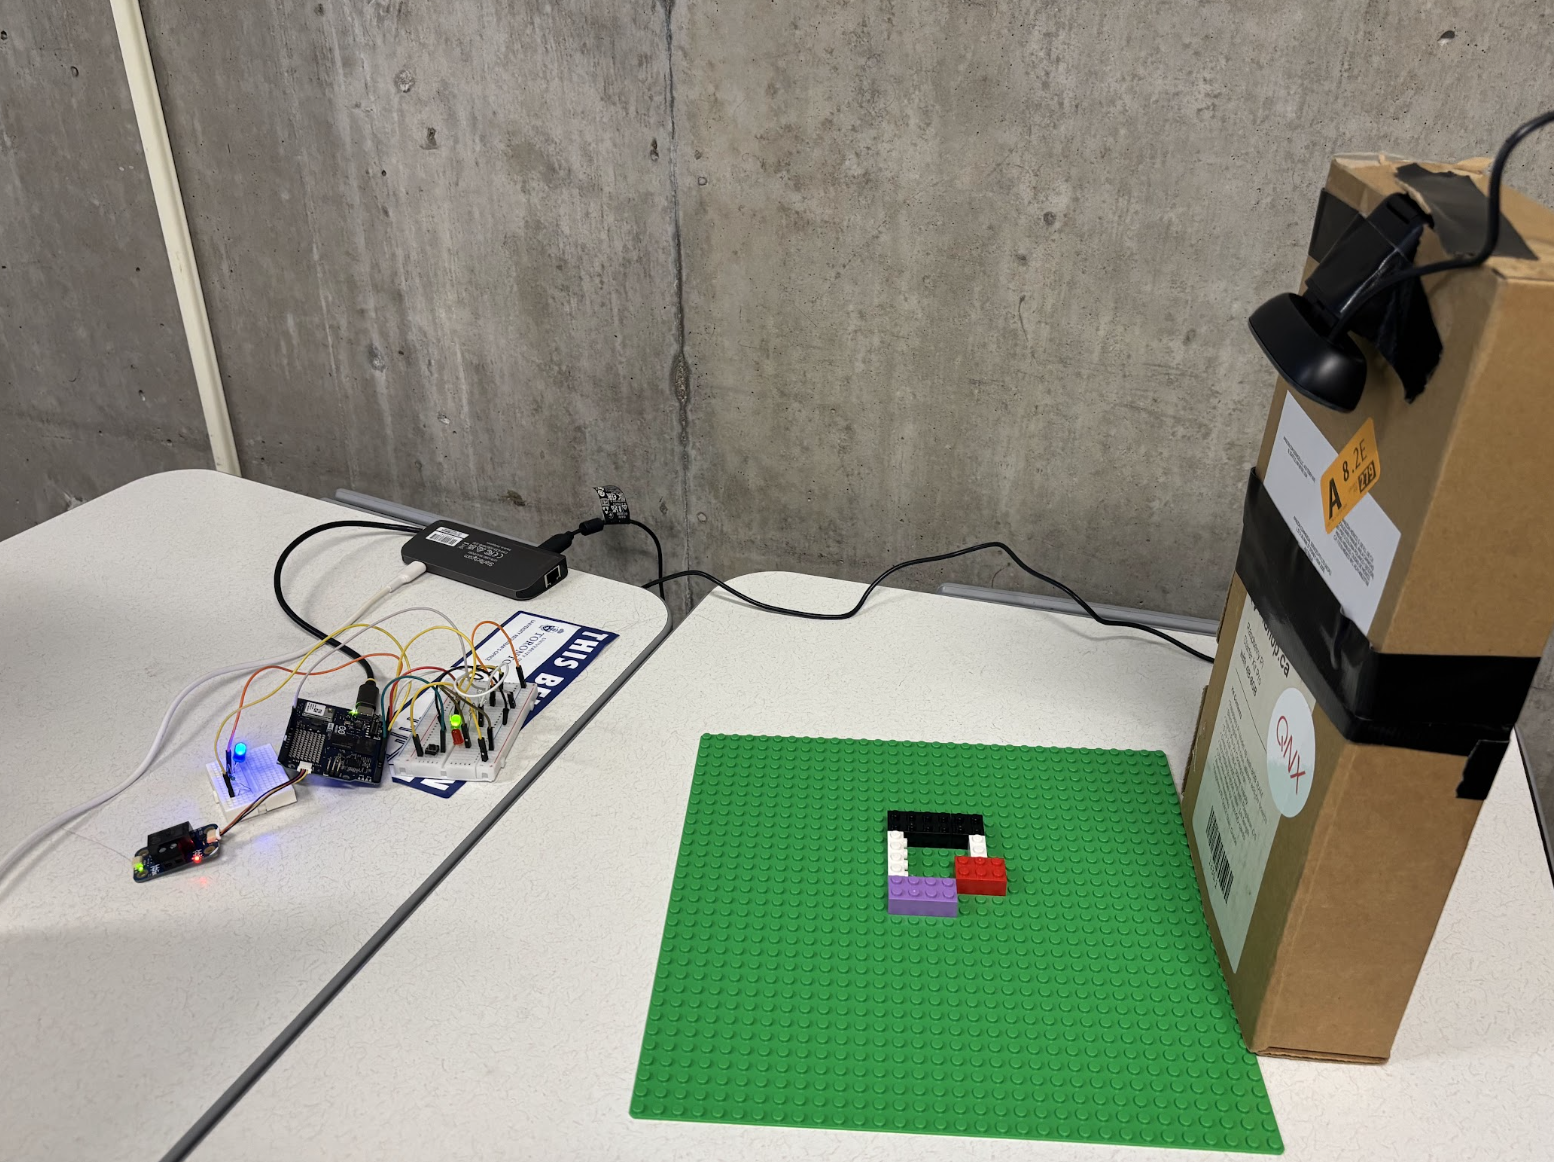
Full AssemblyQ demo setup
-
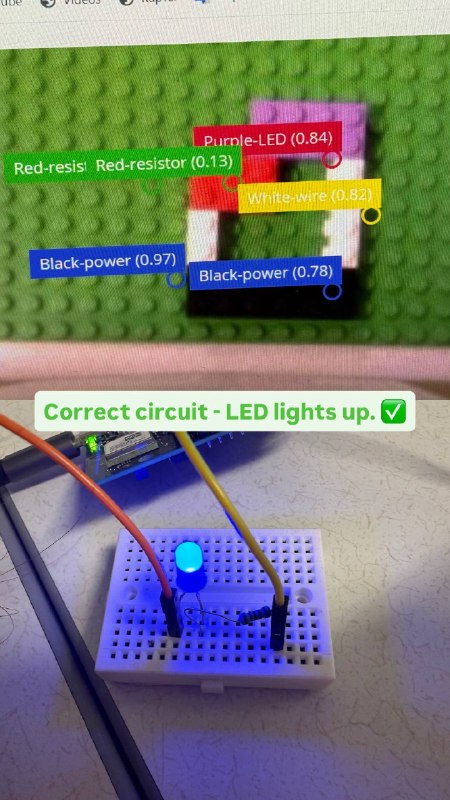
Correct Wiring
-
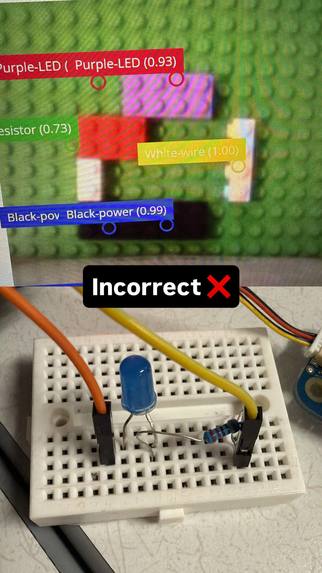
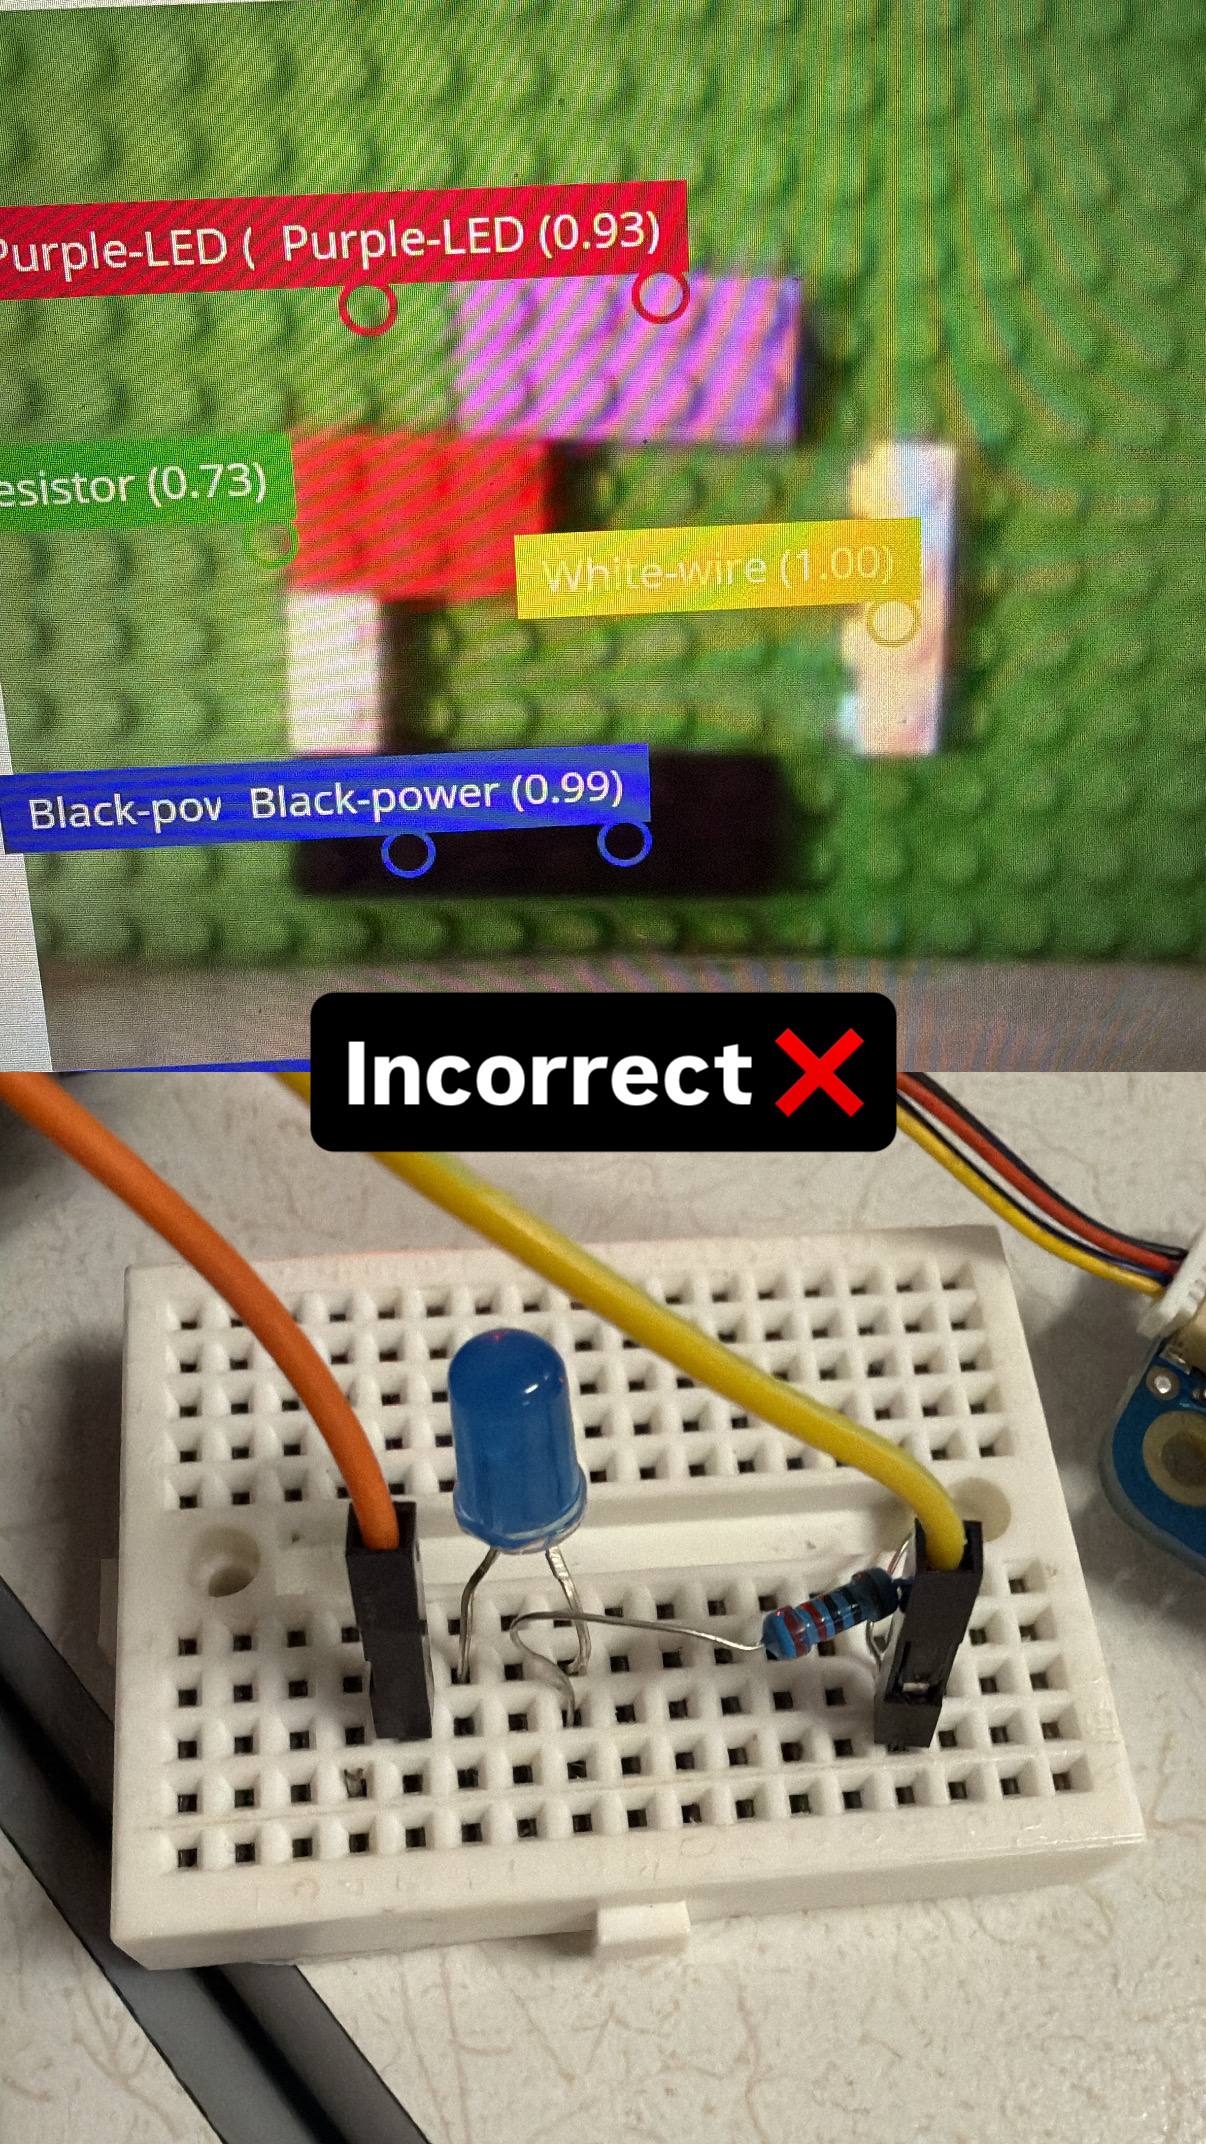
Incorrect Wiring
-
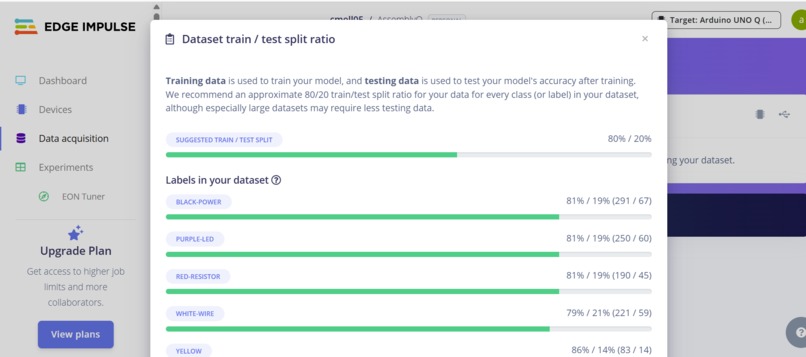
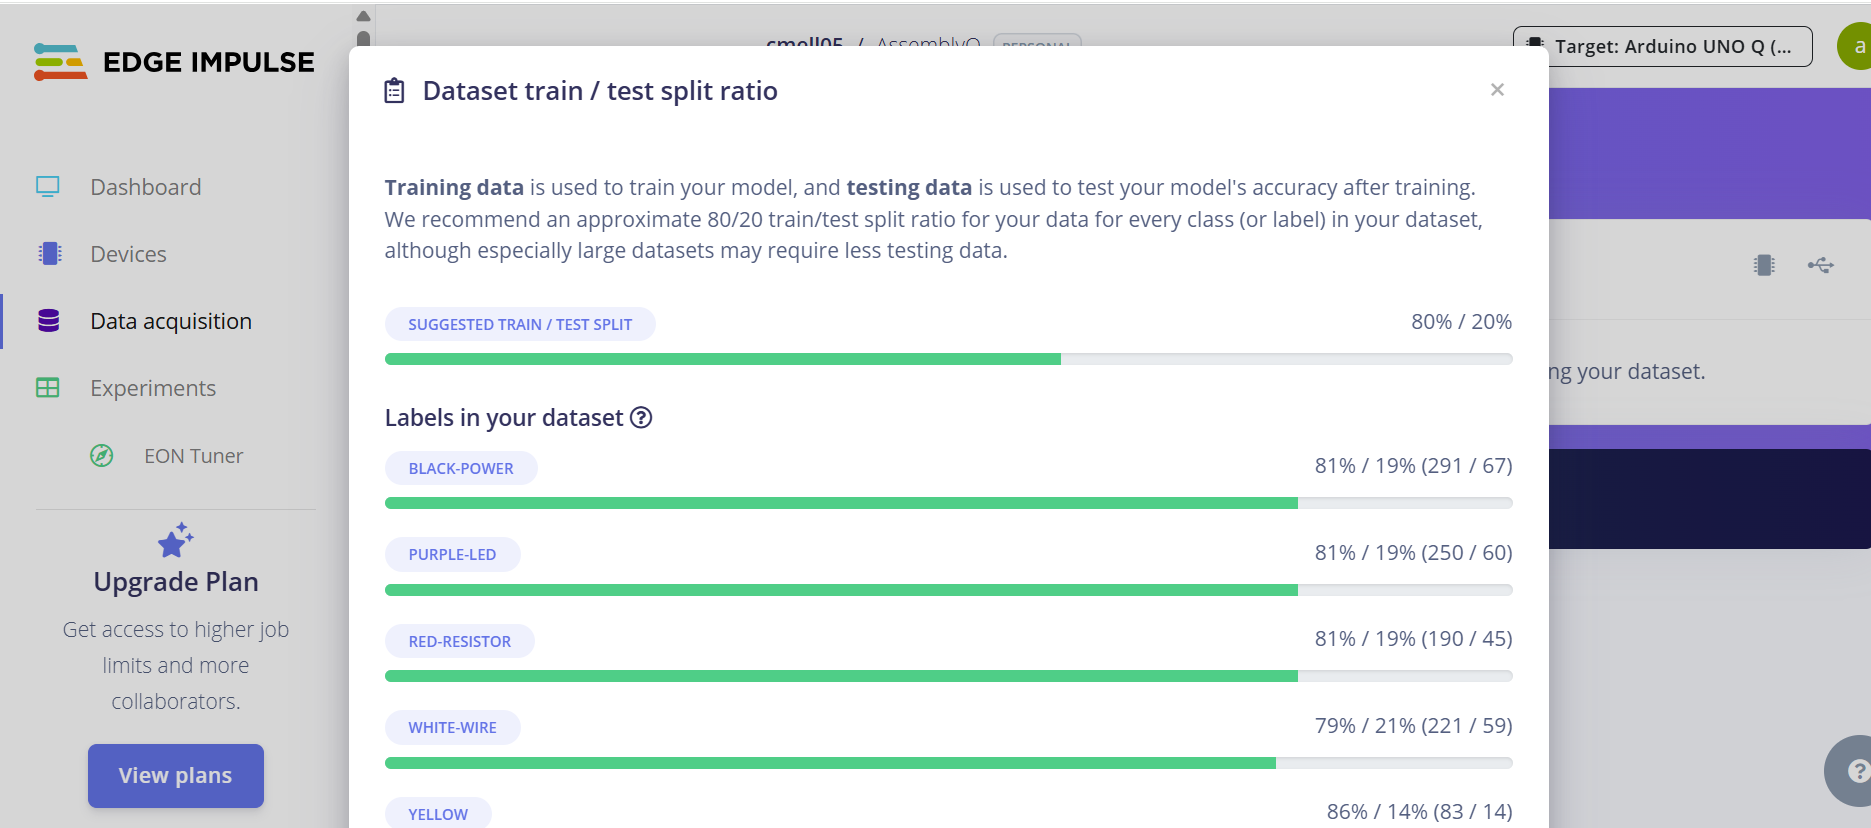
Dataset
Inspiration
Assembly mistakes are easy to miss and expensive to fix, especially in electronics labs, robotics workshops, and manufacturing training environments where one missing or incorrect component can cause a failed build or unsafe power-up. We wanted to build a system that could watch a physical assembly process, understand what parts are present, and give immediate feedback without depending on cloud services.
That became AssemblyQ: an offline AI-powered assembly assistant that combines on-device computer vision with real-time embedded feedback.
What it does
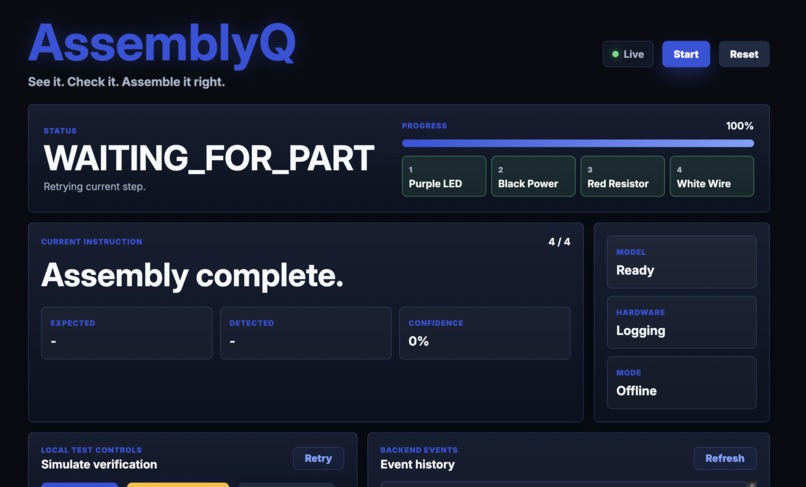
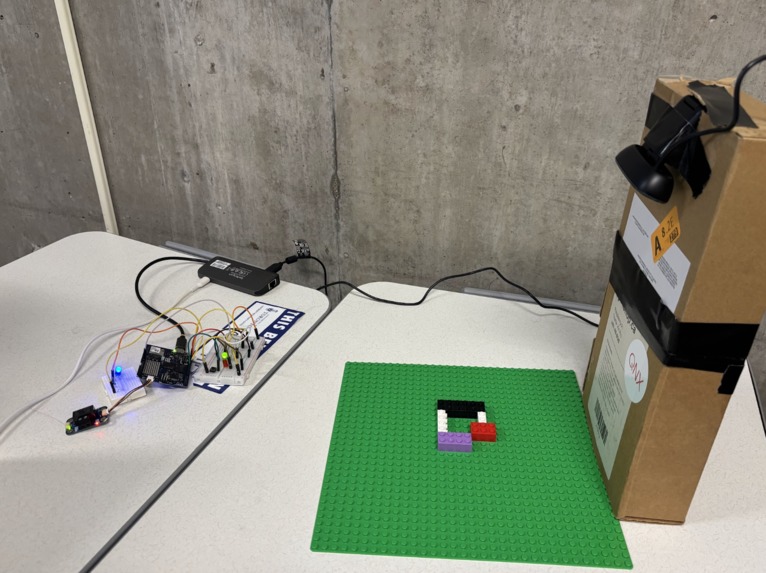
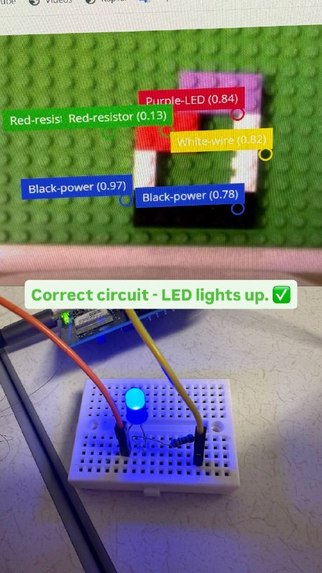
AssemblyQ uses a webcam and a custom-trained object-detection model to recognize physical components during assembly. It verifies that all required components are present with sufficient confidence, updates a local dashboard, and sends immediate feedback to hardware.
When the required components are detected, AssemblyQ triggers a green success state and enables the relay-controlled demo output. If a component is missing, confidence is too low, or the system cannot safely verify the assembly, it triggers a fail-safe warning state and keeps power disabled.
For the demo, AssemblyQ presents the process as a guided assembly workflow, while the verification logic focuses on confirming that the required set of components is present. The system runs locally, so the demo still works without internet access.
How we built it
We built AssemblyQ on the Arduino UNO Q.
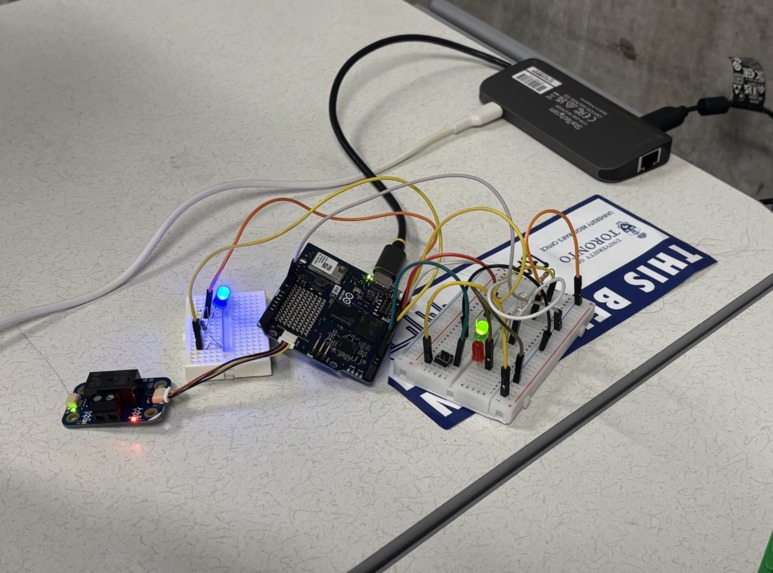
The Qualcomm Dragonwing MPU runs the Linux-side application, webcam pipeline, backend verification logic, local event state, and the dashboard server. We used a GPU-enabled Edge Impulse object-detection deployment to accelerate live computer-vision inference on webcam frames. The STM32 MCU handles immediate hardware feedback through GPIO and relay control.
We collected and labelled our own dataset using the same webcam setup as the final demo. Our images included different LEGO components, lighting conditions, camera distances, rotations, hand occlusion, and cluttered scenes. We trained the model with Edge Impulse, then tuned confidence thresholds and repeated-frame validation so that the system would behave reliably outside a perfect training environment.
The final system connects four layers together:
Webcam
  -> GPU-enabled on-device object detection
  -> Linux-side verification backend
  -> Local dashboard and event history
  -> STM32-controlled LEDs and relay feedback
Challenges we ran into
Our biggest challenge was making the AI reliable in the real world. The model could behave differently depending on lighting, camera angle, partial occlusion, and visual similarity between components. We improved this by collecting data from the actual demo webcam, tightening labels, varying the scene, and tuning confidence thresholds.
Another challenge was latency. A live physical demo feels broken if the camera, model, backend, dashboard, and hardware feedback are not synchronized. We reduced camera resolution, lowered inference load, restarted stale App Lab containers, and simplified the verification logic so the system could respond more predictably.
We also had to debug the full UNO Q stack: Edge Impulse model deployment, App Lab containers, Linux-side Python, local dashboard serving, Bridge communication, and STM32 feedback. The hardest bugs were not isolated code bugs. They were integration issues across AI, backend, frontend, and hardware.
Accomplishments that we're proud of
- Trained and deployed our own object-detection model with 100 images per sample (overall 573 images)
- Ran AI inference fully on-device on the Arduino UNO Q
- Used GPU-enabled computer vision for live webcam inference
- Built a local verification backend that does not rely on cloud services
- Connected Linux-side AI decisions to STM32-controlled LEDs and relay feedback
- Created a dashboard that runs locally and reflects system state
- Built a fail-safe hardware loop where uncertain verification keeps power disabled
- Integrated camera input, AI inference, backend logic, dashboard updates, and embedded feedback into one working physical demo
What we learned
We learned that building a useful AI hardware system is much more than getting a model to work once. Dataset quality, lighting, camera placement, confidence thresholds, frame timing, and physical interaction all matter.
We also learned how valuable the UNO Q’s dual-processor architecture is. The Dragonwing MPU is well suited for Linux, AI inference, backend logic, and dashboard hosting, while the STM32 MCU is better for predictable low-level hardware behavior. Separating those responsibilities made the system more robust: AI can interpret the scene, but the MCU remains responsible for immediate physical output and fail-safe behavior.
What's next for AssemblyQ
Next, we want to expand AssemblyQ from a demo kit into a flexible assembly-verification platform. Future improvements include supporting more kits, detecting orientation and placement more precisely, adding stronger hand/occlusion handling, tracking repeated assembly mistakes, and integrating more sensors for electronics safety checks.
We also want to test AssemblyQ in educational labs, robotics workshops, manufacturing training, and repair environments where offline operation, fast feedback, and low-cost hardware are important.
Qualcomm Technology Usage
DragonWing CPU / MPU
AssemblyQ uses the Qualcomm DragonWing MPU as its main Linux-side compute layer. It runs the webcam pipeline, local AI application, backend verification logic, event state, and dashboard server.
The MPU receives object-detection outputs, determines whether the complete required set of components is present, and sends bounded verification result codes to the STM32 MCU.
DragonWing GPU
AssemblyQ uses the integrated DragonWing GPU through a GPU-enabled Edge Impulse deployment to accelerate live object-detection inference on webcam frames.
This allows the system to recognize multiple physical components in real time while keeping the complete inference pipeline local to the Arduino UNO Q.
On-Device AI
AssemblyQ runs a custom-trained object-detection model locally on the Arduino UNO Q. We trained the model with Edge Impulse using our own labeled dataset of assembly components captured under different lighting conditions, rotations, distances, and levels of occlusion.
During operation, webcam frames are processed directly on-device. No cloud AI API, remote model service, or internet connection is required.
MCU Usage and Real-Time Processing
AssemblyQ uses the STM32 MCU for real-time physical feedback and fail-safe power control.
The inspection process begins when the user presses a physical push button. The Linux-side application sends verification result codes to the MCU, which controls GPIO-connected green, white, red, and blue LEDs, as well as a Modulino Latch Relay.
A strong successful verification activates the green LED and enables the relay-controlled output. A lower-confidence result activates the white LED while keeping the relay disabled. A missing or unexpected component activates the red LED and keeps power disabled.
Specialty
AssemblyQ combines on-device computer vision, offline verification logic, a locally hosted dashboard, and real-time MCU-controlled hardware feedback in one physical system.
It is more than an object detector: AssemblyQ connects AI perception to physical decision-making. It verifies that the complete required set of components is present before allowing the relay-controlled output to receive power.
Personal Comment
The Arduino UNO Q was useful because it combines Linux-based application processing and an STM32 MCU on one board. This allowed us to separate AI inference, backend logic, and dashboard hosting from real-time button, LED, and relay control.
The main challenge was integrating the webcam, custom Edge Impulse model, App Lab containers, local dashboard, MPU-to-MCU communication, and physical hardware within a short hackathon.
More complete examples covering custom AI deployments, hardware acceleration, App Lab container behavior, and end-to-end MPU-to-MCU communication would make the platform easier for new teams to adopt.
Built With
- arduino
- edgeai
- javascript
- python
- qualcomm
- stm32


Log in or sign up for Devpost to join the conversation.