-
-

Antimentia - A fun arcade retro type memory game
-

Circuit Schematic of Antimentia
-

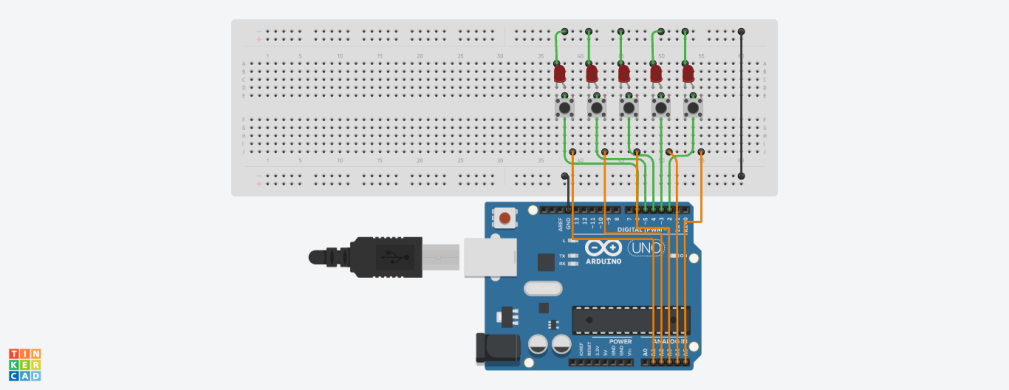
Tinkercad simulation of Antimentia
-

PCB design of Antimentia
-

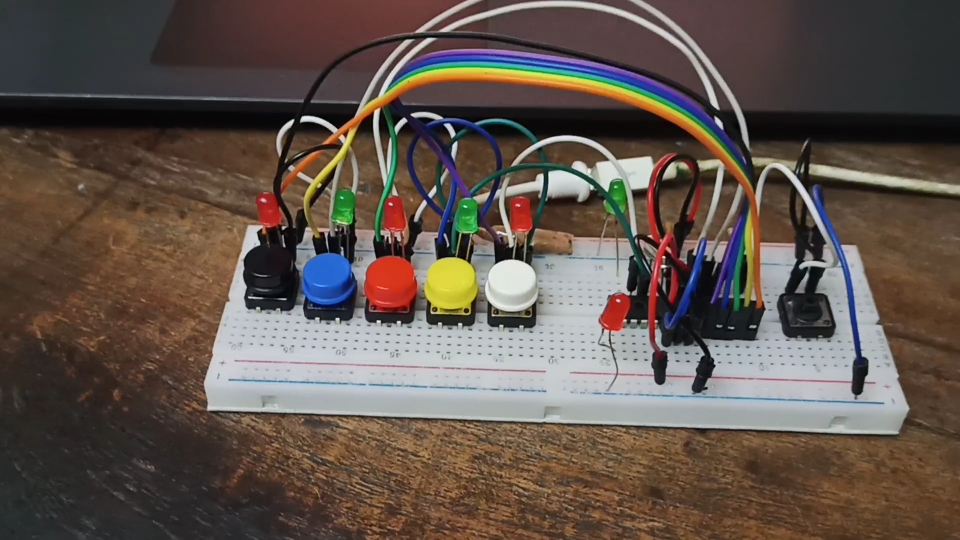
Antimentia working prototype
-

Wrong sequence entered by player being indicated with red LED light
-

Right sequence entered by player being indicated with green LED light
-

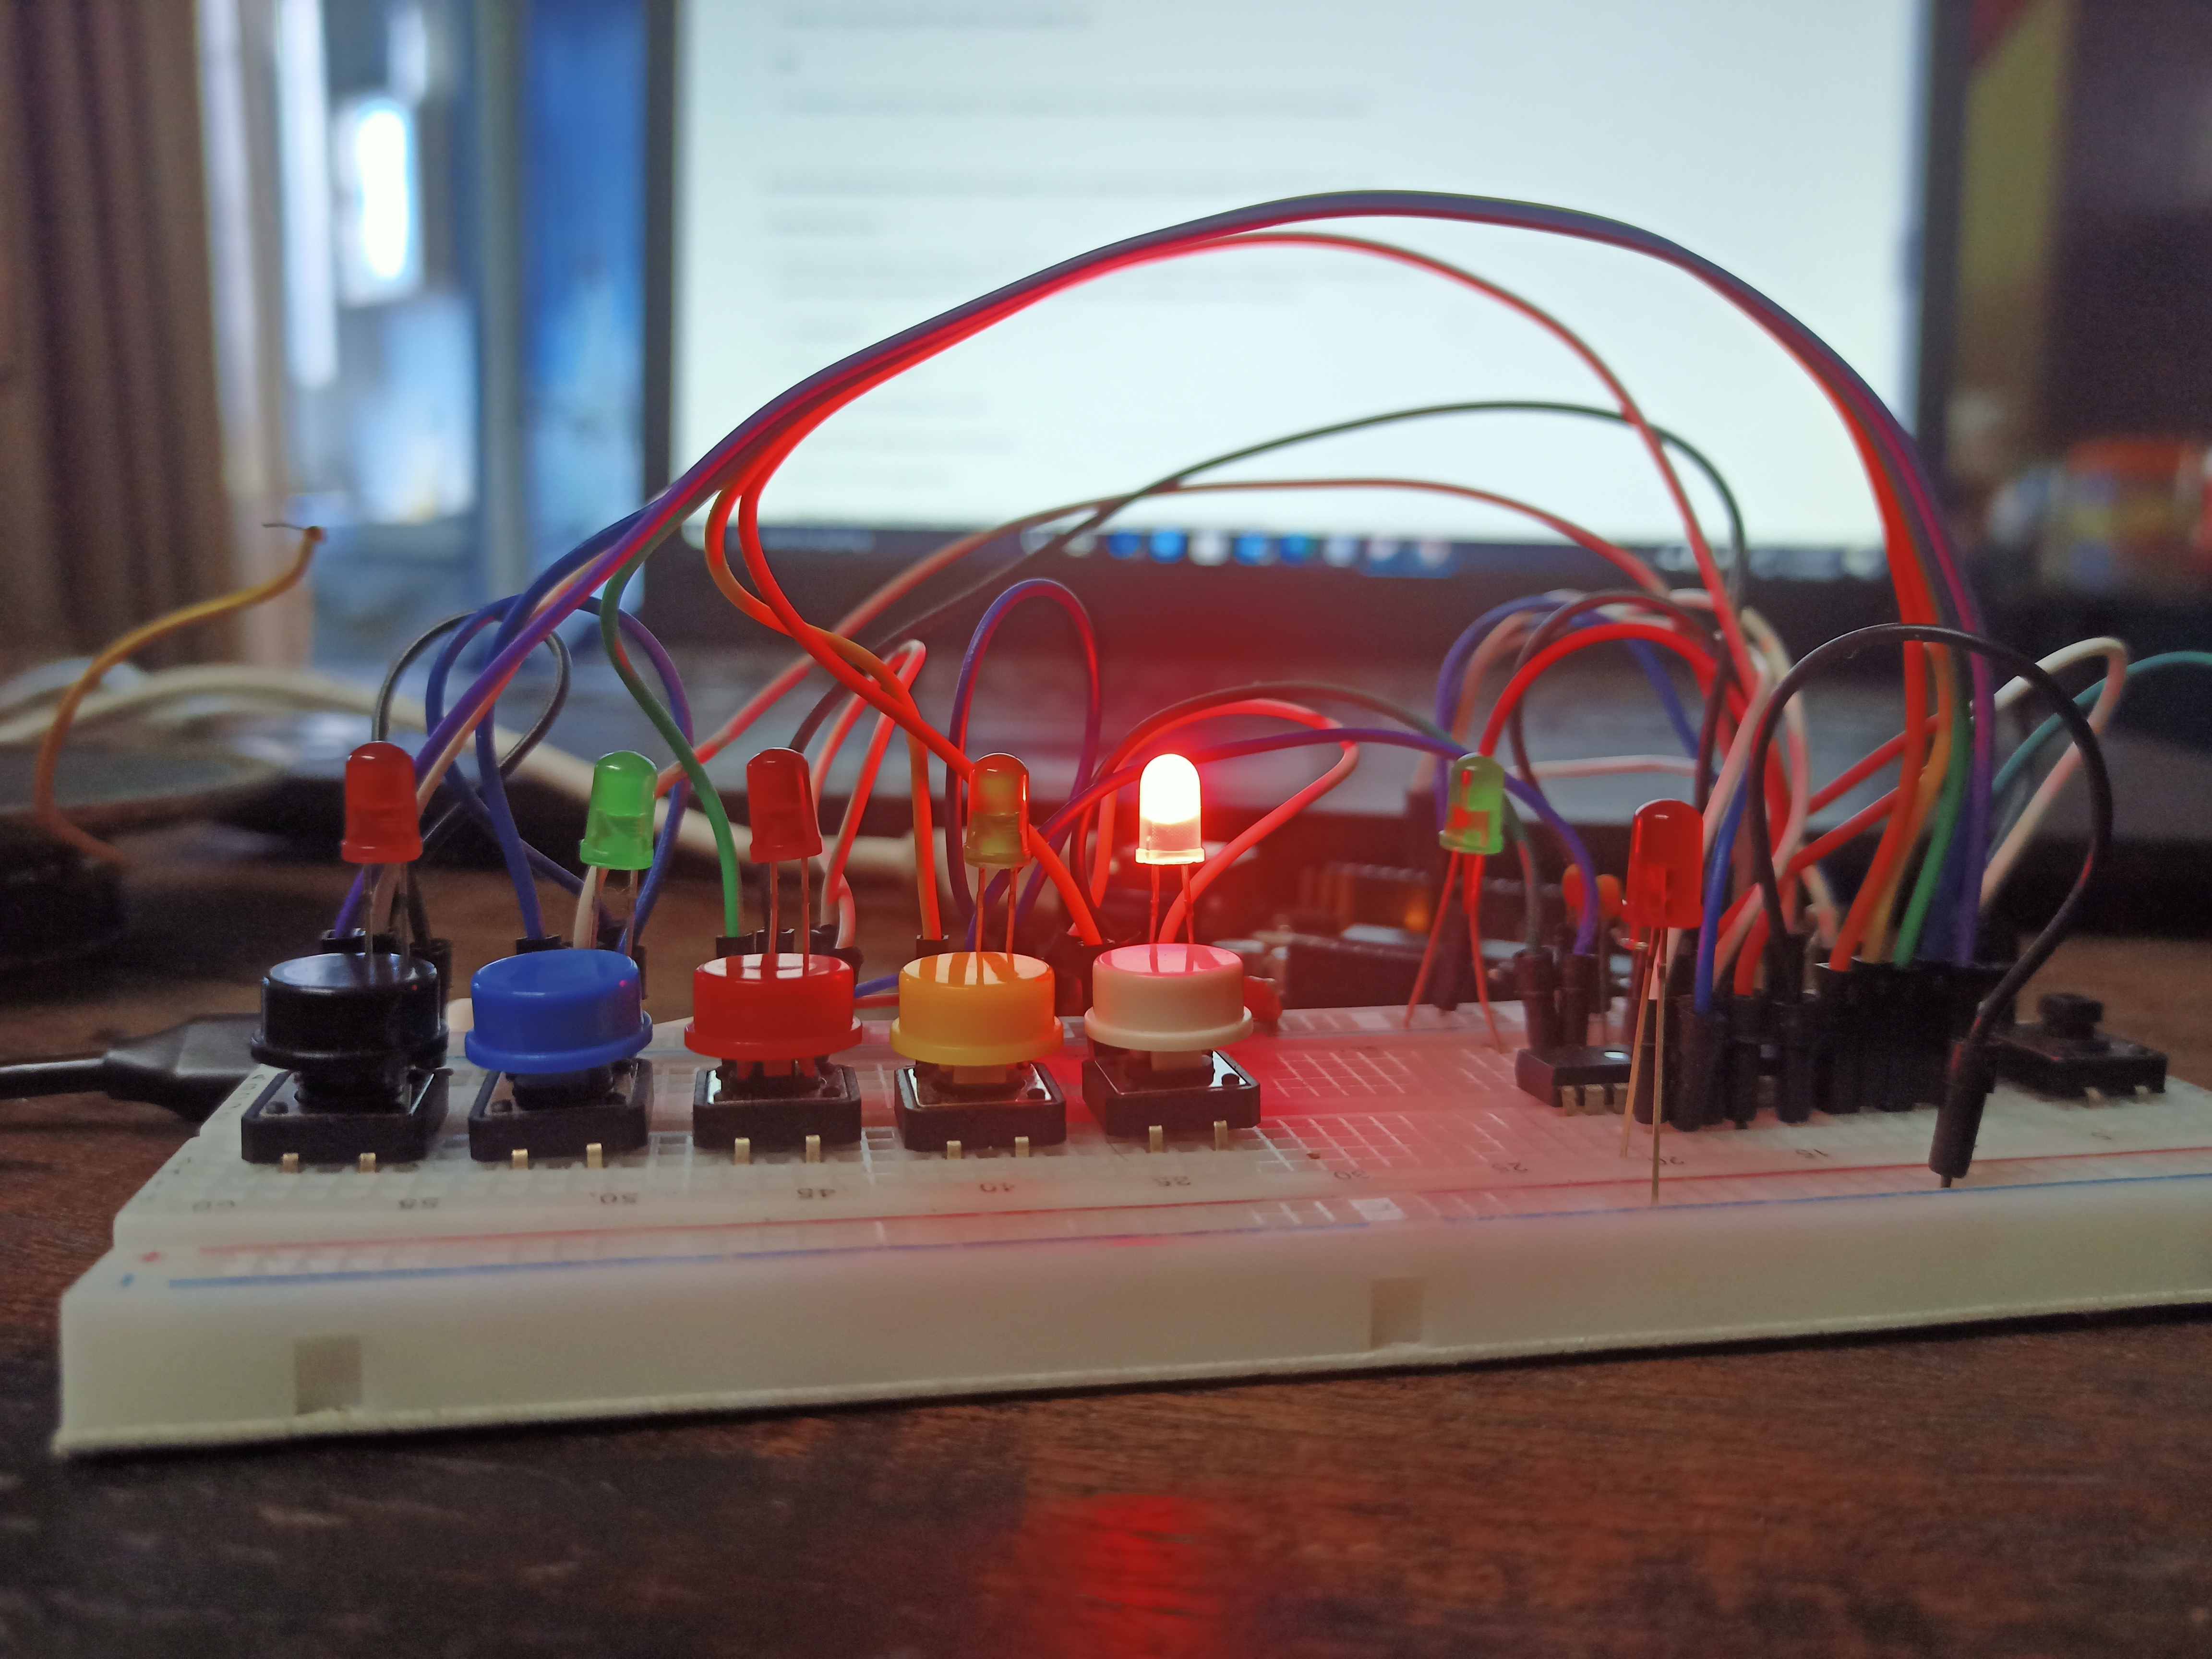
Antimentia showing a sequence with LED
-

Antimentia showing a sequence with another LED
-

Another LED being lit up, to provide the sequence to the player


Inspiration
The theme itself was an inspiration for the whole project. Being electronics enthusiasts, we thought of building a fun project from scratch by using laying around components that can keep people engaged as well as help children, adults or elders who have a forgetful memory.
What It Does
Antimnetia is a memory arcade game that shows a sequence of lighting LEDs. After that, the LEDs goes off, and the player has to repeat the correct sequence accordingly by pressing the corresponding buttons placed next to each LEDs. If the player gets all the sequence correct, the game levels up, and it tests one's memory even harder thereafter. On failing to repeat the correct sequence, the player has to restart the same level they were stuck on. For example, if a player makes a mistake in level 5, they will get a new sequence of level 5 to try again. Despite having the latest smartphones with similar games in the form of application nowadays, many of us are still keen on nostalgic retro devices. Antimentia will surely give you a feeling of retro arcade gaming and, at the same time, benefit your mental health. Also playing this memory game will keep one's mind active and might help to prevent or at least delay the onset of memory loss with age, the decline of thinking skills, Dementia, Alzheimer's, etc. We bet now you know the meaning behind the name of the project (hint: It is 'Anti+Dementia').
How We Built it
Antimnetia was built with a microcontroller, five LEDs, five pushbuttons, and a bit of code. The microcontroller was so programmed, at first, it will show a random sequence of glowing LEDs. To do that, it required a random number generator with random seeding, which was done by reading a value from a floating analog pin of the microcontroller. Since the pin is floating, the voltage at any instant is unpredictable, thus making the distribution of numbers more random. The total five pushbuttons are now interfaced with the microcontroller accordingly. Now this part, i.e. reading the correct pushbutton input, required some debouncing and state change detection, which we did by writing some more code. Upon doing that and comparing the button pressed with the expected button which was needed to be pressed for winning the level(which was stored in the random array), it decides the result whether it's a win or a loss. We added two more LEDs, one green and a red, which flashes after winning or losing. Well, obviously, the green for winning and the red for losing.
Challenges We Ran Into
The first challenge was to prepare the setup for burning the program inside the microcontroller. It does not have a handy connection like Arduino. Due to a faulty rail in the breadboard, the microcontroller was not running, which was expected. Now then comes generating fairly distributed random numbers that don't repeat by themselves after a period, and also, when you start the microcontroller, it doesn't start with the same value. In spite of using random() from the C library, it was giving some predictable results, so we need to seed the random() periodically to get a fairly random sequence. Now talking about the input from the pushbutton was not that easy, though. It requires a lot of cleaning and tuning before you can process a push from a pushbutton. Debouncing and state detection was the process to clean them. Last but not least, it was difficult to debug the results from the microcontrollers since we didn't have an ISP debugger, and we were using an Arduino instead so, whenever something was going wrong, we had to change codes and make the Arduino once a debugger and a programmer, which was a tedious part.
Accomplishment we were proud of
Able to burn the program to the microcontroller successfully, being able to generate fair random distributed samples. And finally, when we were playing the game ourselves, and it worked like a charm, that was the best accomplishment and the joyous moment for us. Also, it is our first electronics retro game that was built from scratch and considering that 50% of our team has first-time hackers it is a considerably big achievement.
What We Learned
First of all, building the whole project required a whole lot of patience, which was got tested by debugging what was effectively going wrong. We learned how to make a microcontroller standalone and burn a program inside it. We got to know a bit about random samples and how do a computer generates a random number, more likely a pseudo-random number. Implementing the data structures was real-time learning, dynamic memory vs preallocated memory. We learned the types of memory a microcontroller has and where they store which part of the program data. We learned how a piece of music is sampled and how resampling affects the quality. How to encode and store the music samples (say the opening sound from the Star Wars arcade game) as an unsigned 8bit array, that too in a very tight amount of memory. Unfortunately, we weren't able to add this feature to our project right now since, due to COVID lockdown in India, we didn't have any good speakers to test this feature out, but we learned how to handle these sounds and play it using a microcontroller.
Whats Next For Antimentia
Creating a 3D printed casing and fabricating the PCB design for commercializing this project as a toy product. Further up-gradation will contain an LCD screen that will display the High scores and current Level. Adding the sound feature that gives an authentic retro feeling with the addition of external EEPROM to store higher resolution of music notes for better sound.


Log in or sign up for Devpost to join the conversation.