-
-
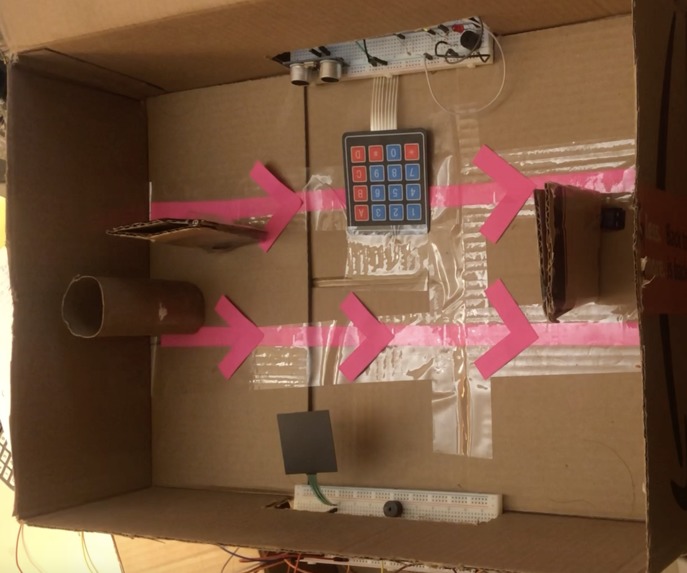
product image

Inspiration
A terrible access system can cause big damage to a company. According to a survey investigated by Security Management Research and HID Global in 2020, some professionals in the security field believe that their current physical access control system is not secure enough to protect important facilities or personnel, data and intellectual property rights. Hence, how to improve the security of the access control system has always been an urgent problem to be solved.
Meanwhile, group 45 also noticed that once a criminal sabotaged the access control system and steal something, it could be both time consuming and energy consuming to find and arrest them.
So, in our design, group 45 tries to build an access control system that is secure to a certain extend. One of the highlights is that it can detain some trespasser.
What it does
In this project, group 45 decides to design an access control system. This system will include following features:
- Password User will have to set the password when the system is initialized. Users will have to input correct password on a keypad to get access. User can reset the password as well.
- keypad illumination The system will turn on a LED light to illuminate the keypad when it detects a user is nearby.
- Alarming If a user makes three wrong attempts entering the password, a buzzer will go off and an LED light will blink three times.
- Trespasser detaining If a user tries to trespass or break the second door. The first door will close so that the trespasser will get detained. In the meantime, the alarm will set off and LED will blink until the system is reset manually by administrator.
In summary, the access system is protected by a password. A user will have three attempts to enter the correct password on a keypad or an alarming buzzer will go off. Trespassers will be detained if they tried to break into the building using this system.
How we built it
- Keypad illumination Group 45 will use the ultrasonic sensor in lab3 to detect if a user is nearby the keypad. The ADC will read the echo value from the sensor to determine if a user is near the keypad. If the user and the sensor is within 5cm, an illuminating LED will be turned on.
- Trespasser detaining The system will have two doors (one on each end) in total. The first door will always keep open unless an interrupt happens. An interrupt is triggered if a user tries to break the second door (i.e. there is an abnormal force acting on the door). The force sensor will be used here. And the system will convert the force on the door to corresponding ADC value. The ADC interrupt will be enabled here to accomplish the above goal. And there will be a threshold value that will trigger the event.
- Door opening When a correct password is entered, a positive rising edge will be detected by using input capture (Timer1 on Arduino Uno 1). And then the motor will open the second door. The motor will be driven by a PWM signal generate by Timer0 and Timer1 (on Arduino Uno 2).
- Timing When the door is kept open for 5 seconds, the door will be automatically closed.
- Alarming Two active buzzers are used as the alarm.
- Password The system will use a keypad as user interface where users can input password. Initially, the system has no password. A user will need to set a password. In order to set the password, the use needs to enter “ABCD#” where “” is the start symbol of resetting the password, “ABCD” is the reset key. And “#” is the enter button, which indicates the end of the password input. Note that, a legal password is 4-digit.
In summary, ADC, Timer, Interrupt topics are used in the project.
Challenges we ran into
Physical model building process and the password system building process are two main challenges we ran into.
Accomplishments that we're proud of
The final product meets our expectation. We are proud of our password system and how the two Arduino Uno boards interact with each other. For example, if the correct password is input, Arduino Uno 1 will set the port HIGH. The rising edge will be detected by the Arduino Uno 2 so that the door will open successfully.
What we learned
We learned the essential process that is needed to design a real-life product. When encounter a huge real-life problem, we learned how to break the problem into several small tasks. Moreover, we learned how to cooperate with each other. We also learned how to properly arrange ISR so that they do not interrupt with each other. Technically, we understood how the access control system operates.
What's next for An Anti-theft Access Control System
The next step for this project is to add an LCD screen which can show the prompt. We can build an LCD library that is similar to that in lab4. With this function, the user can clearly see the password that they input.

