-
-
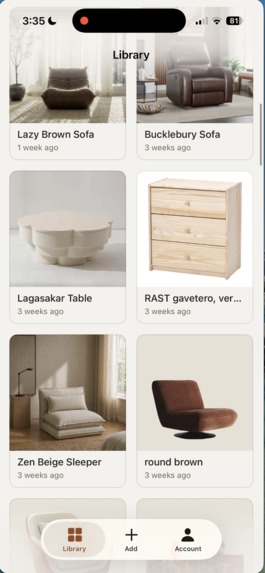
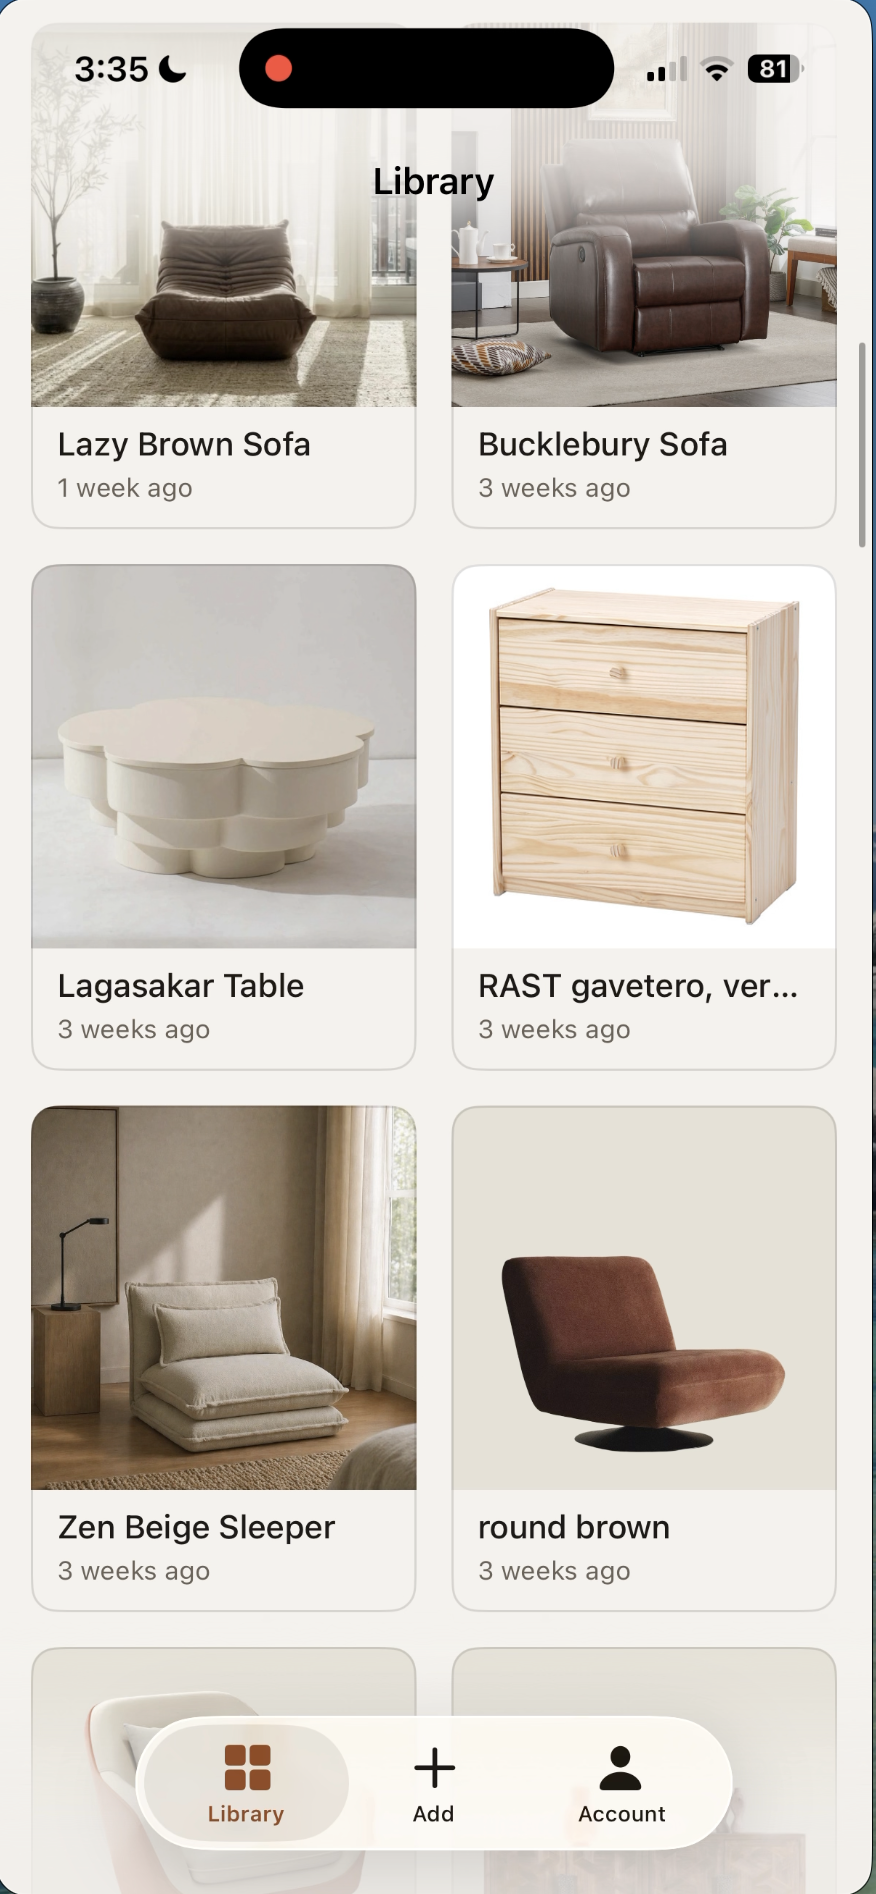
Library, see all your pieces in one place
-
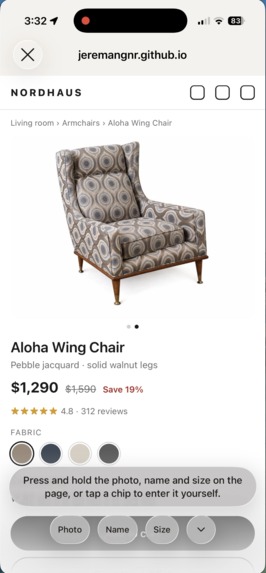
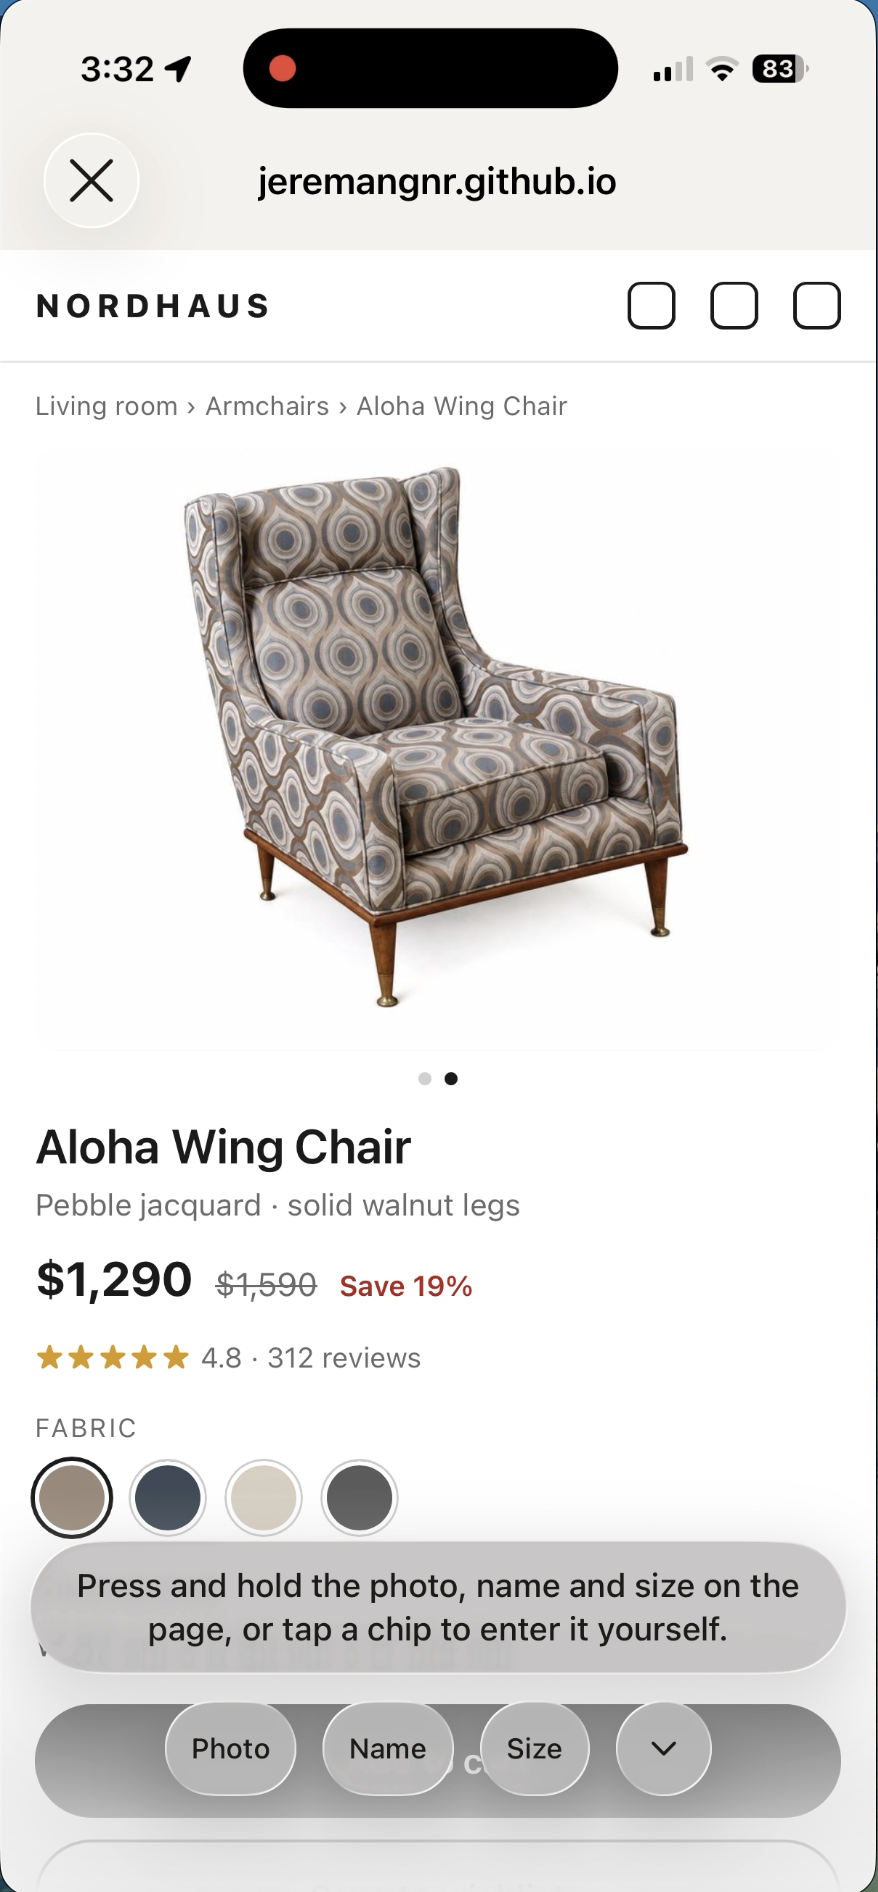
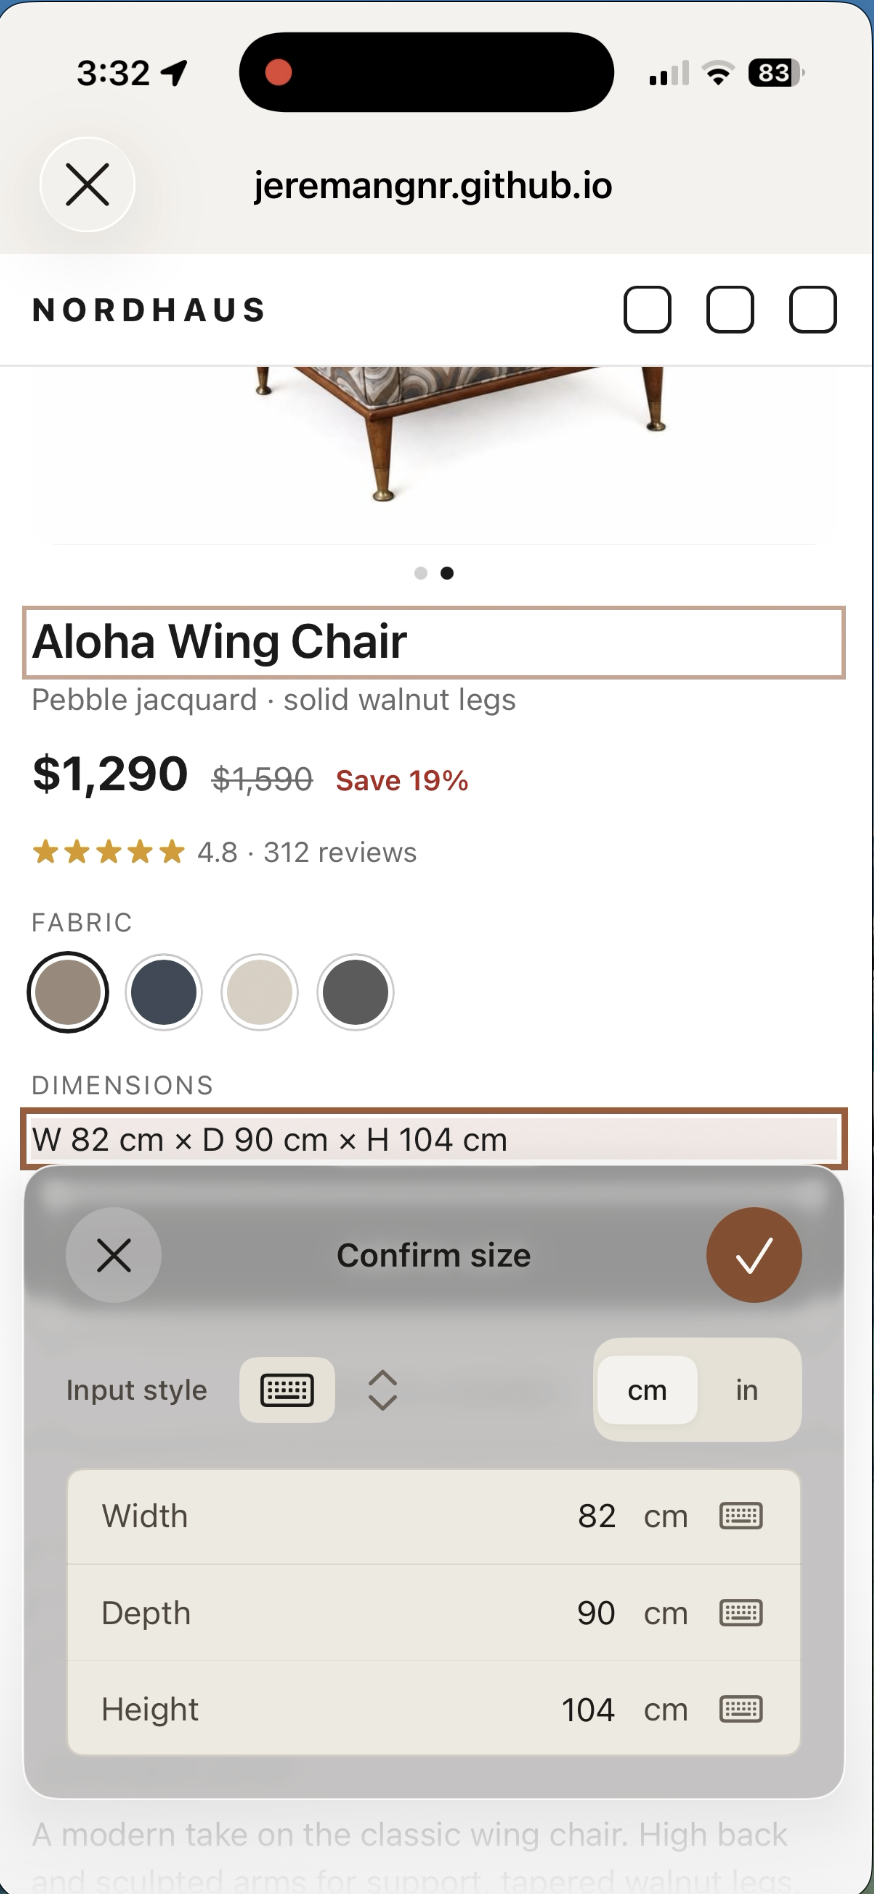
Link tagging flow: long press each value on the page
-
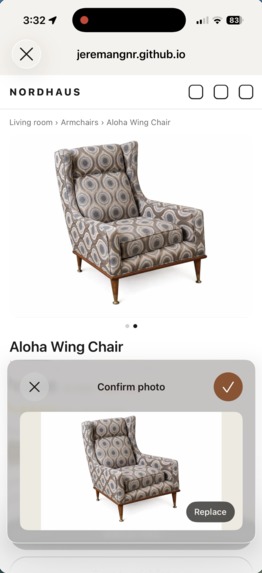
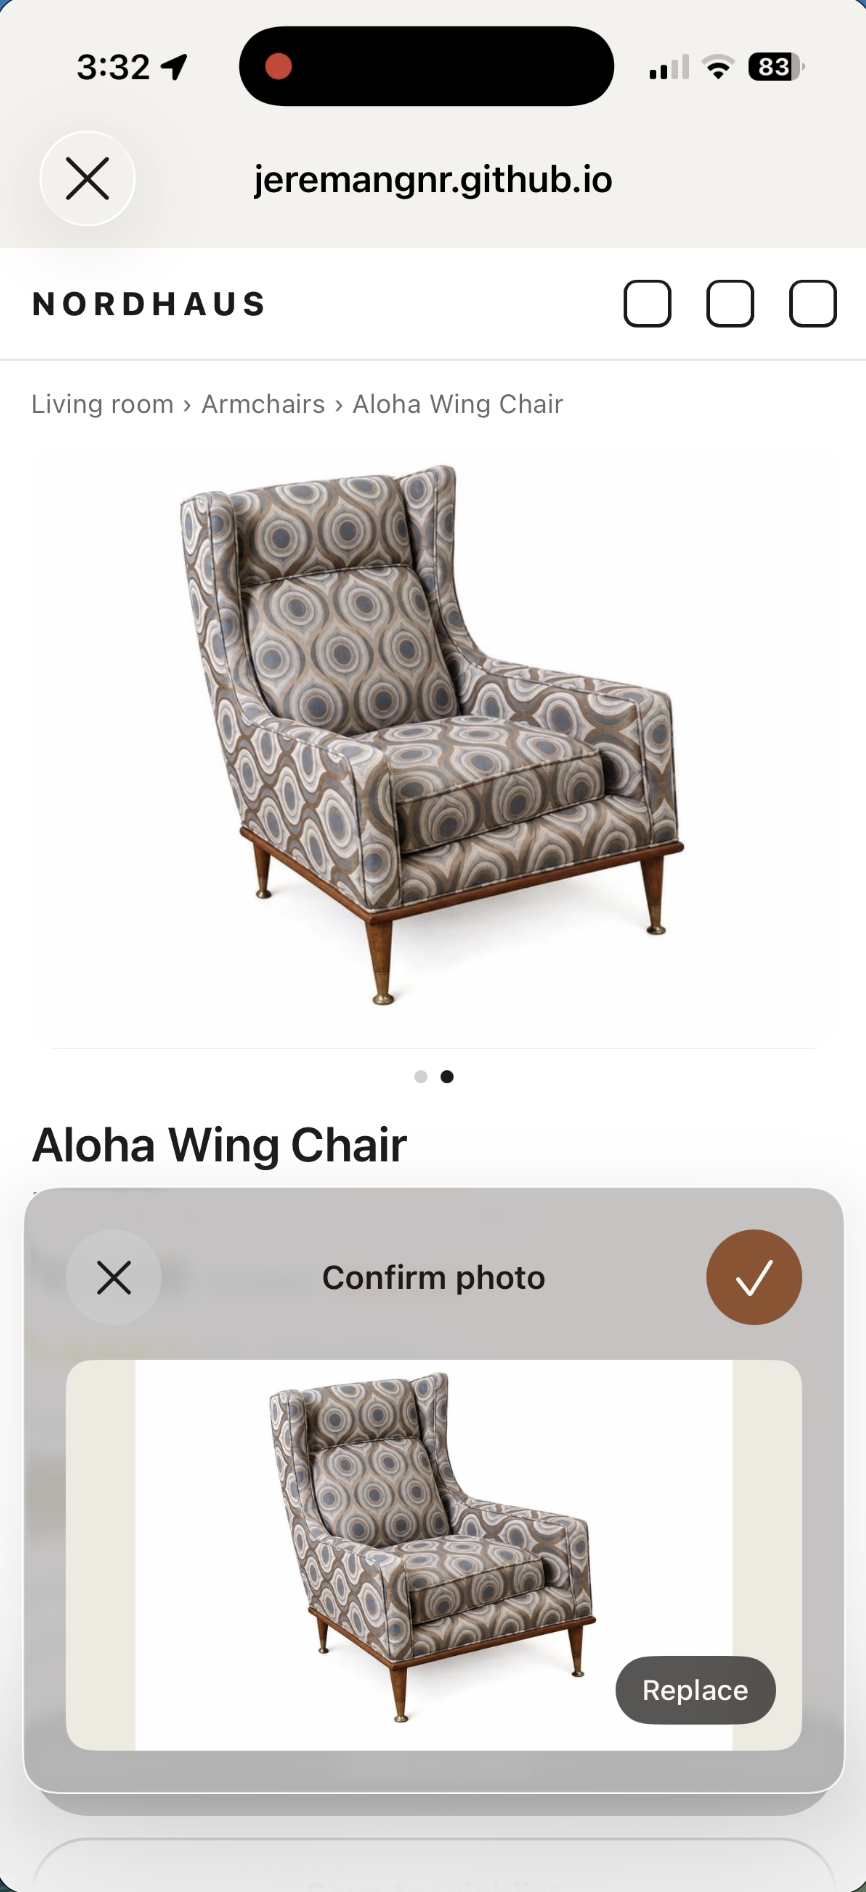
Link tagging flow: image selection
-
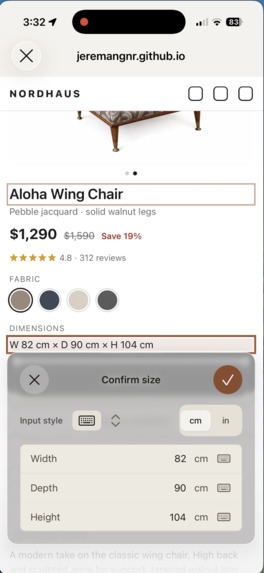
Link tagging flow: measurements
-
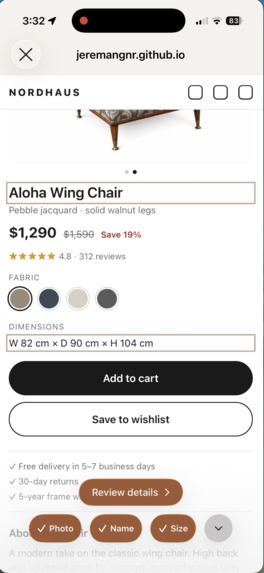
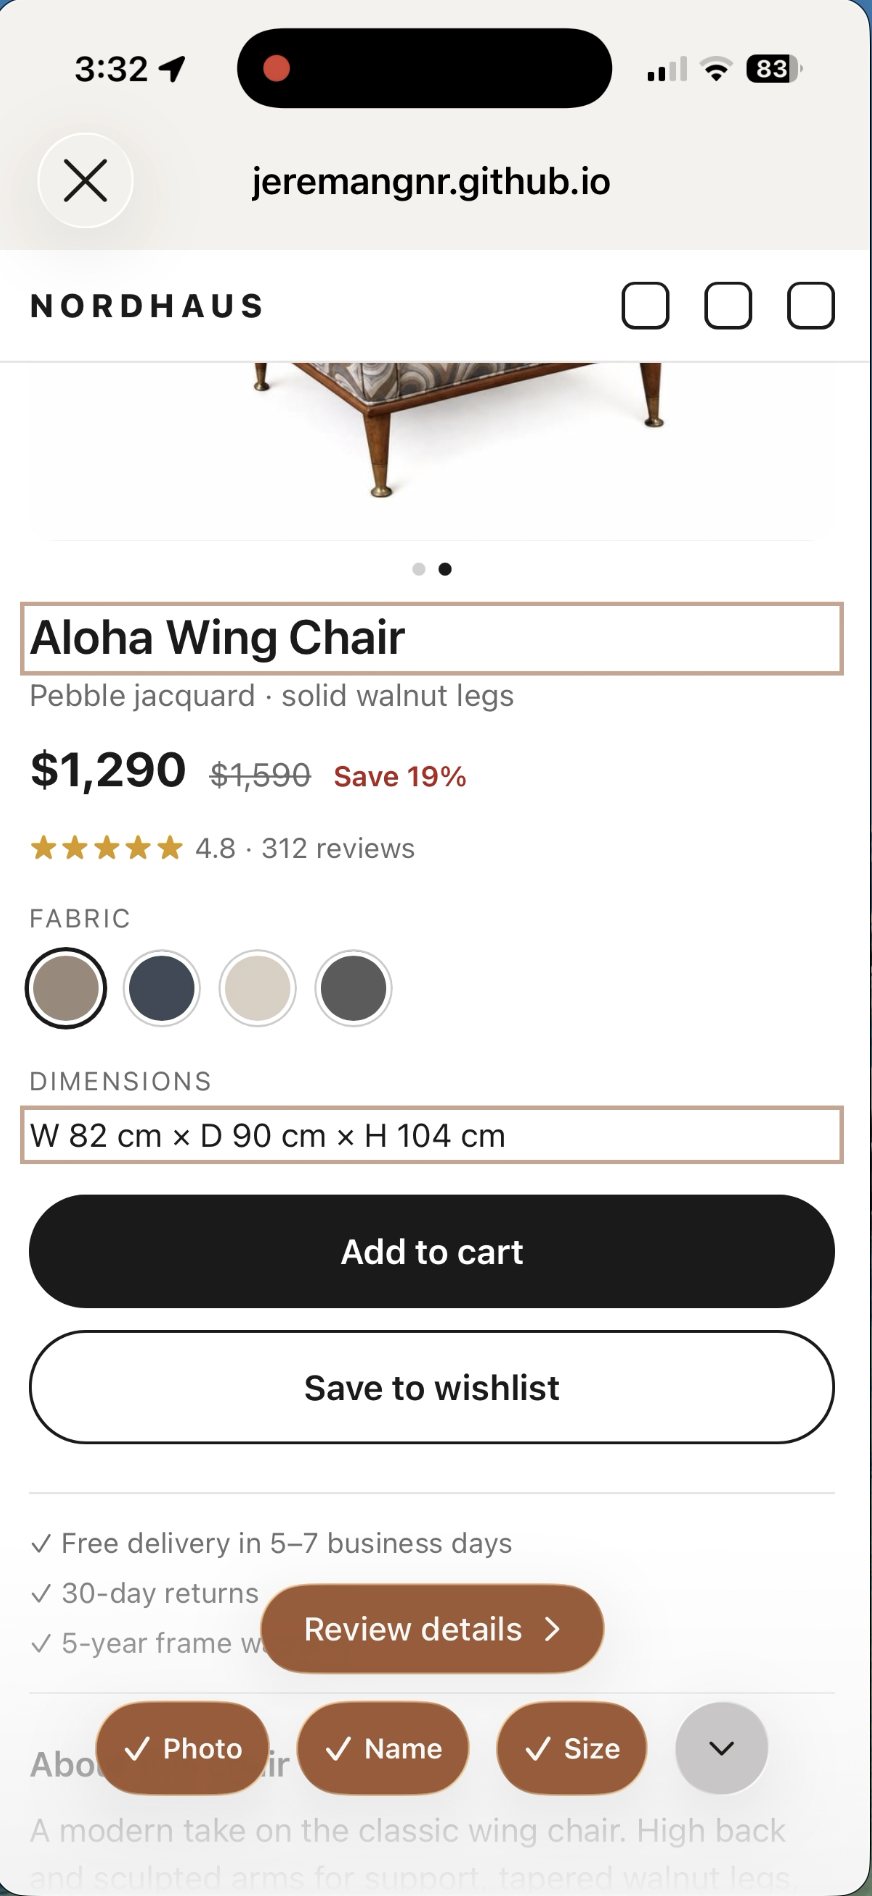
Link tagging flow: all values selected
-
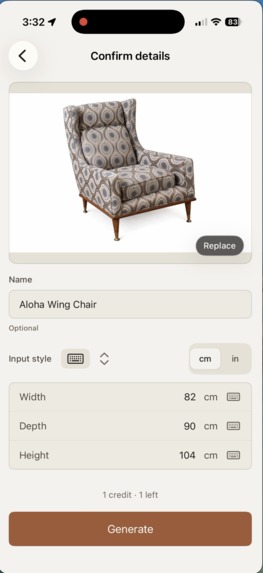
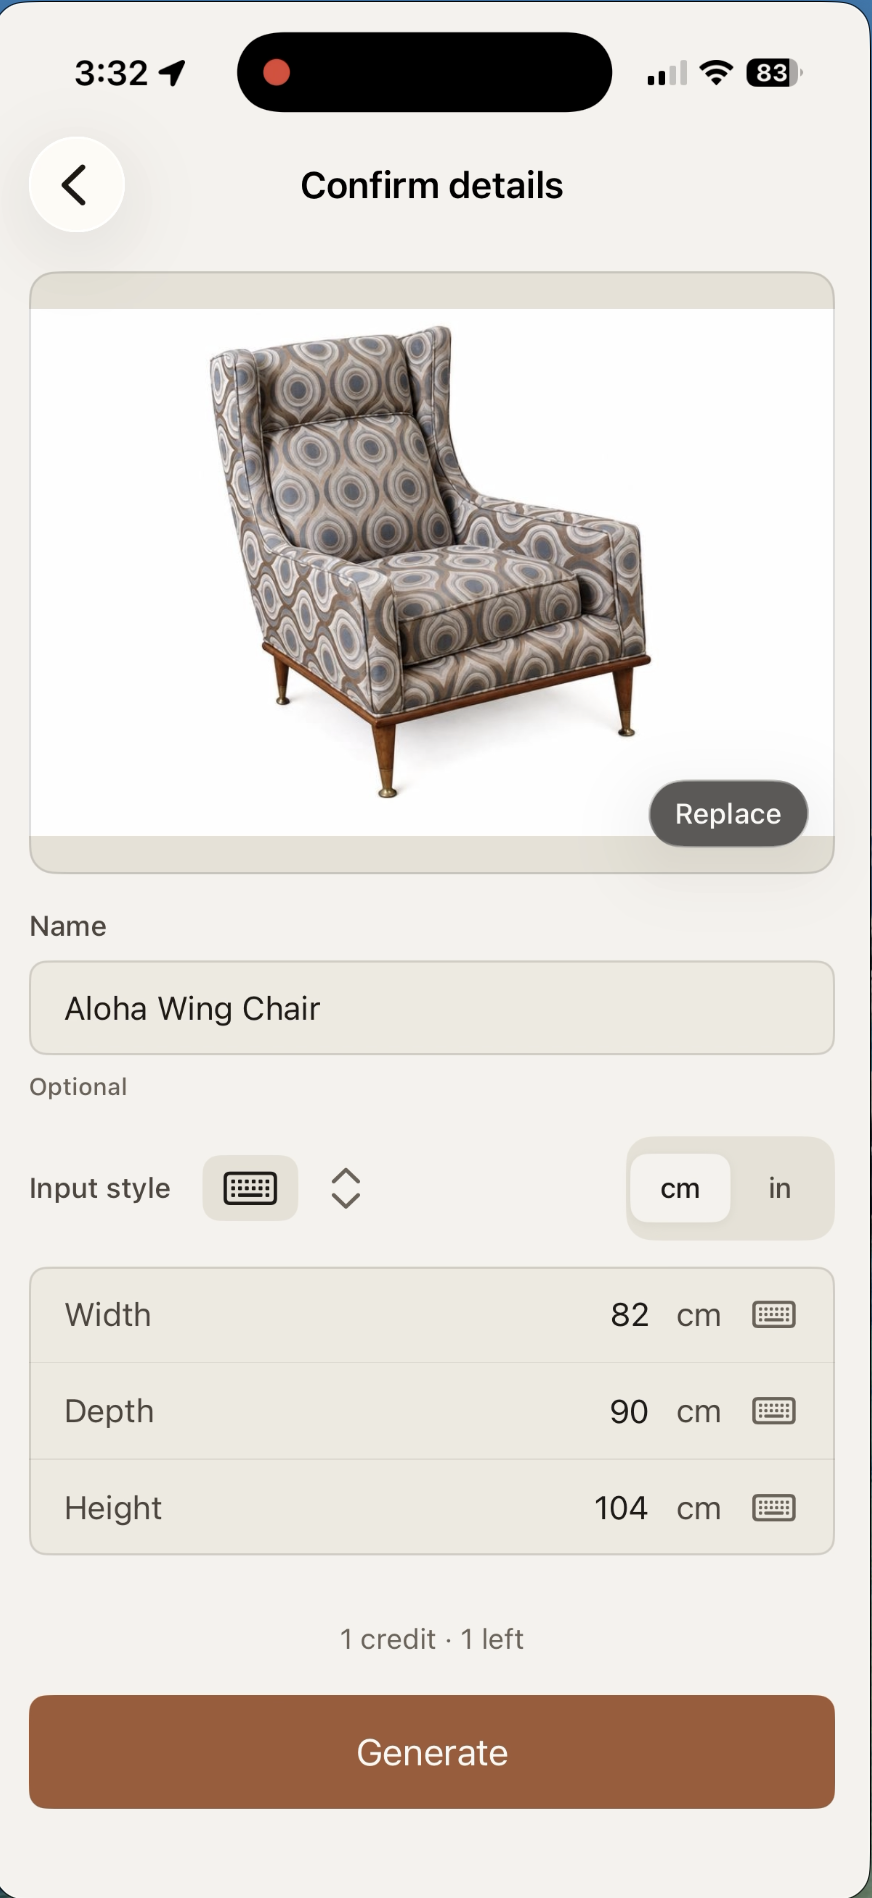
Review and confirm values
-
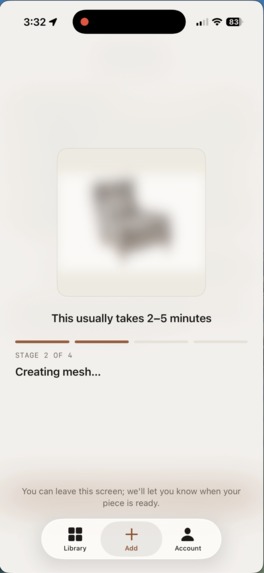
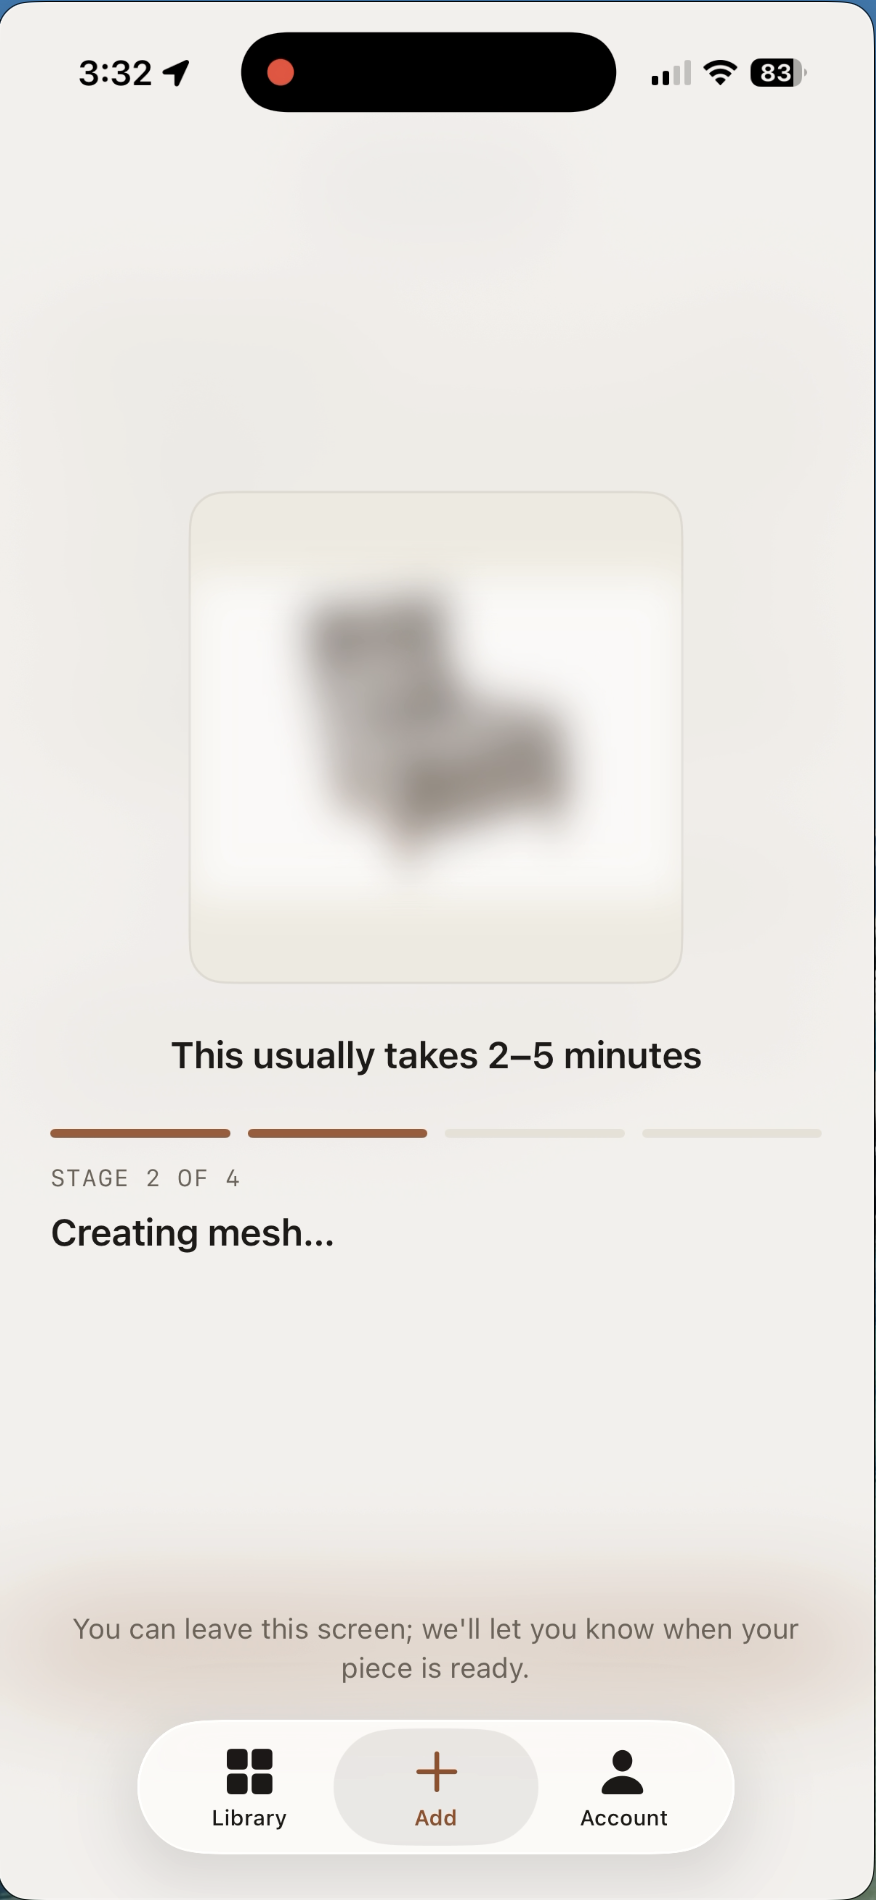
Generating...
-
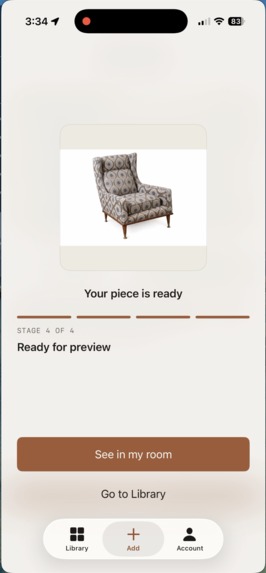
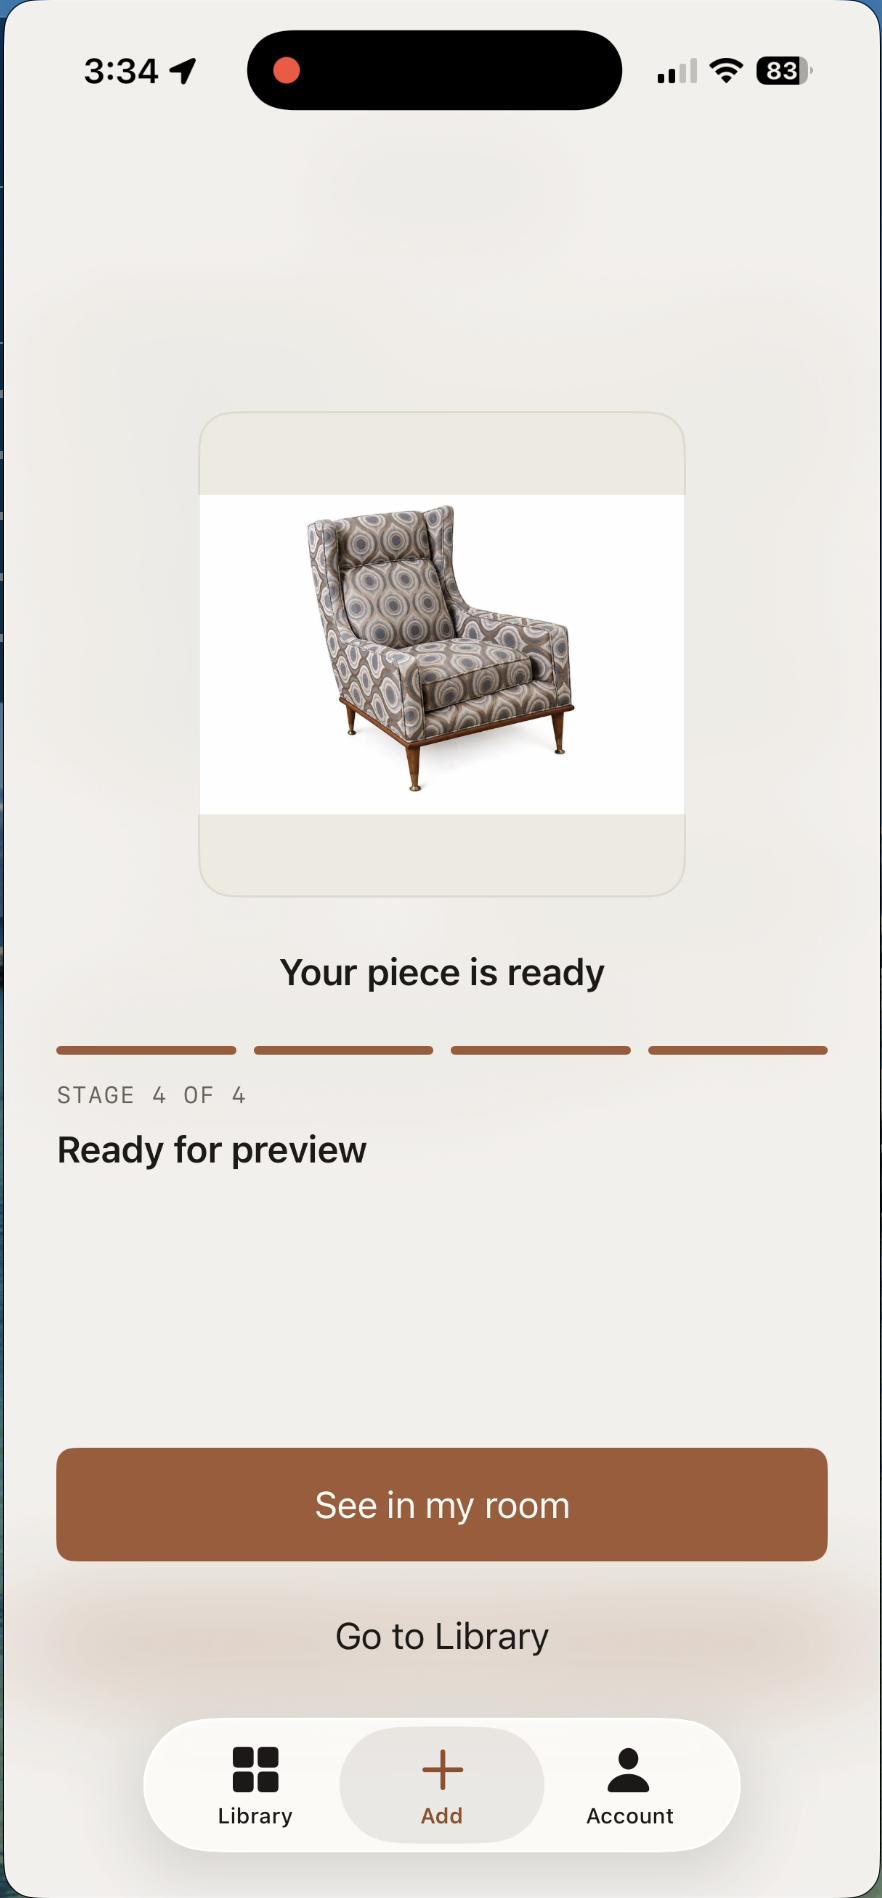
Generation done!
-
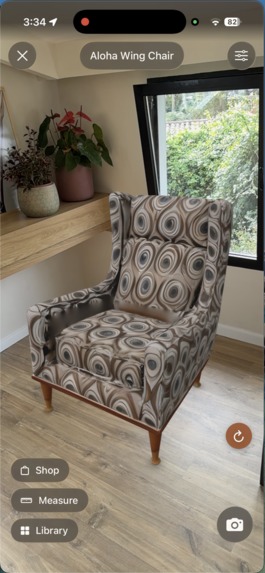
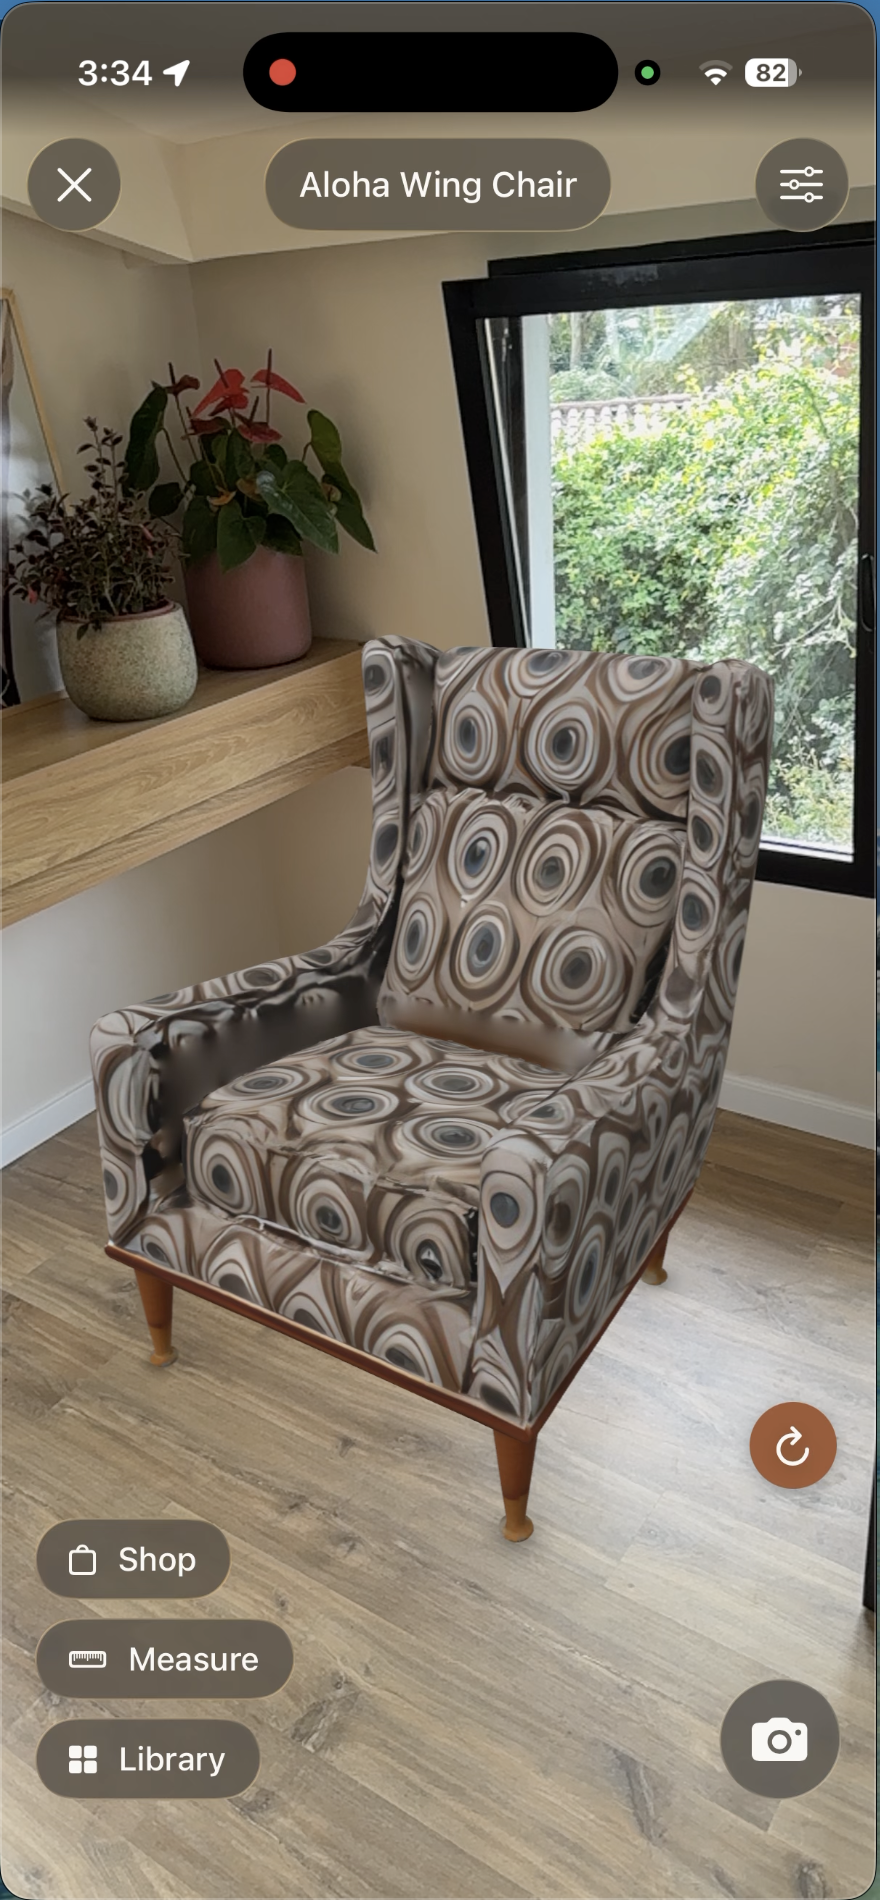
AR Preview
-
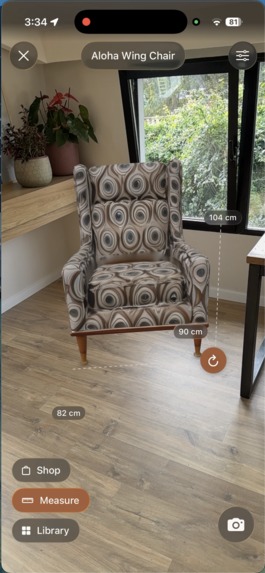
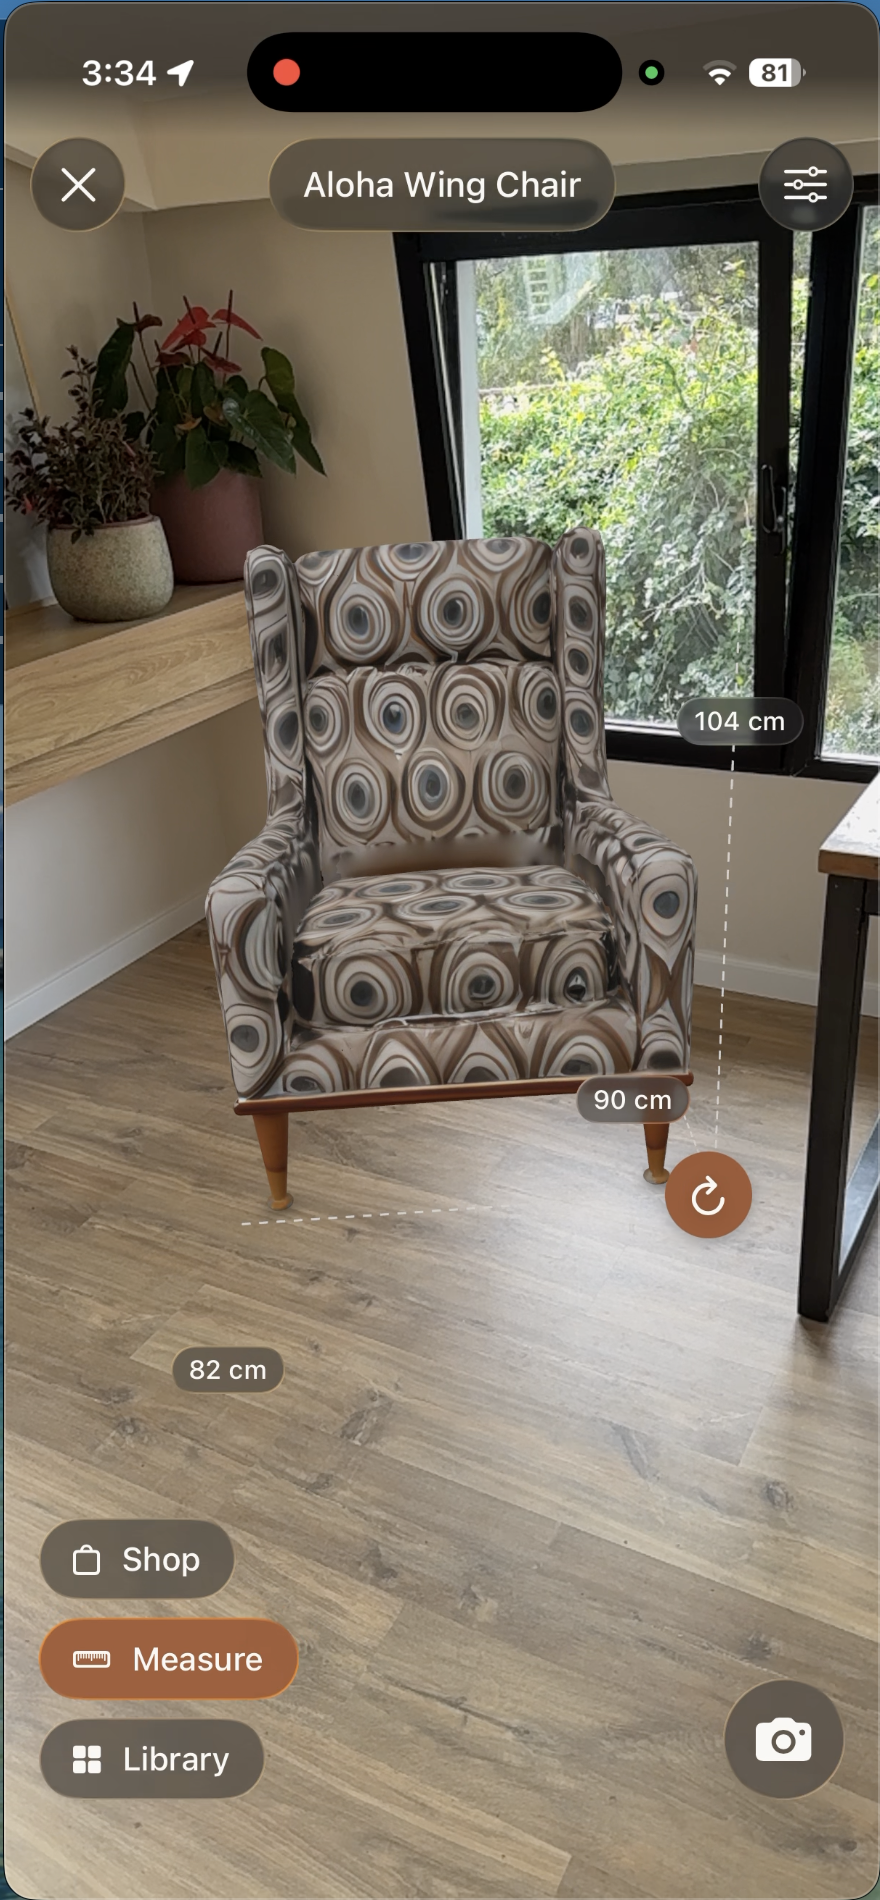
AR Preview with measurements
-
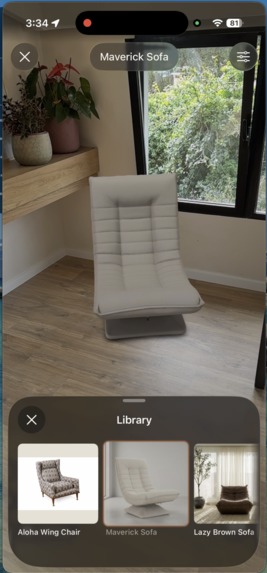
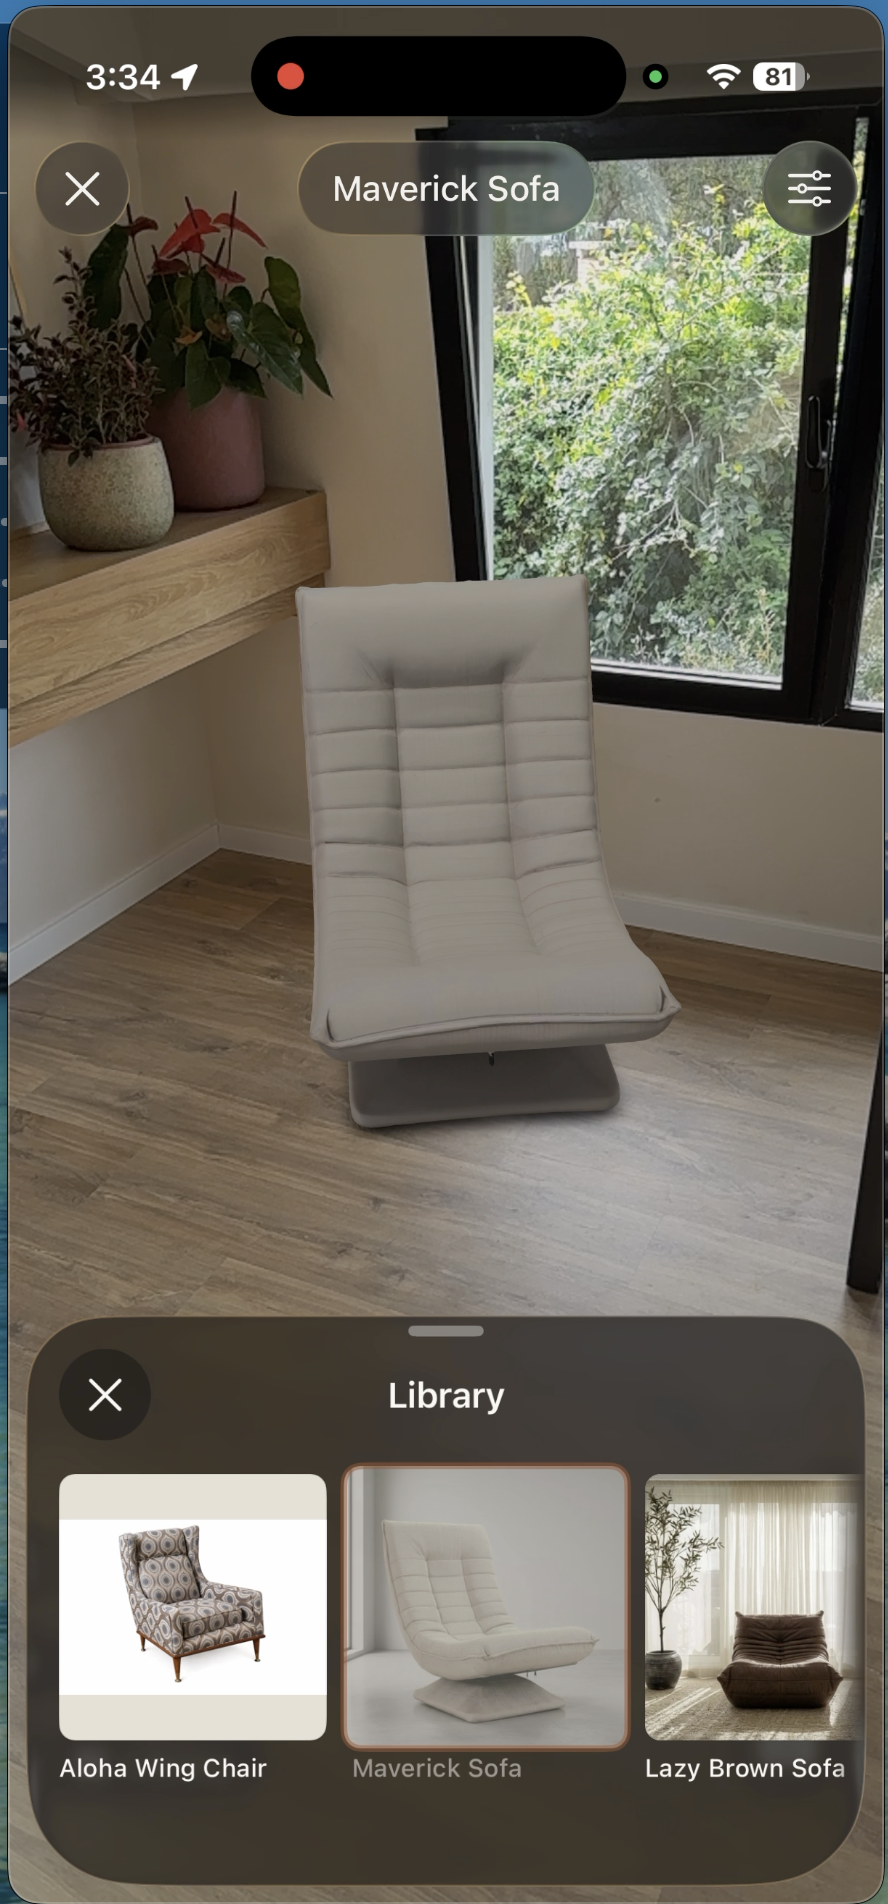
AR Preview with library to swap items
-
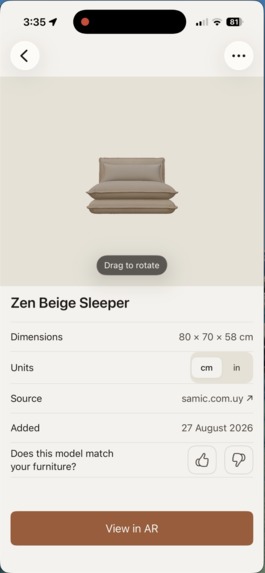
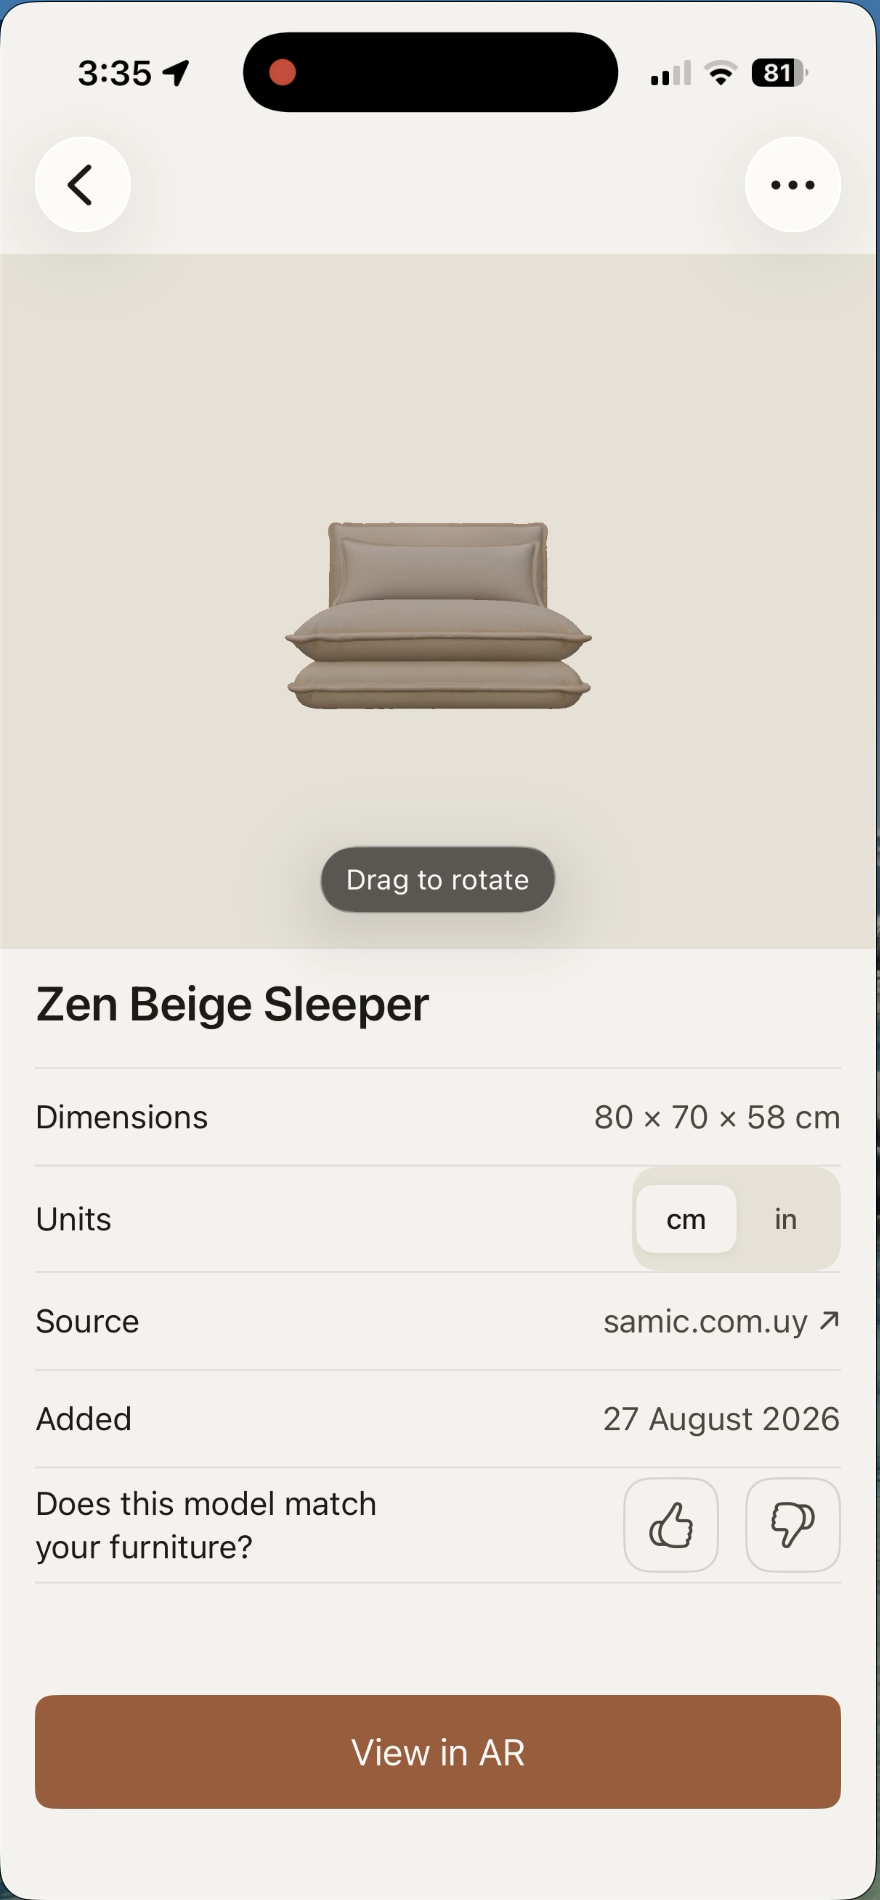
Library item detail
-
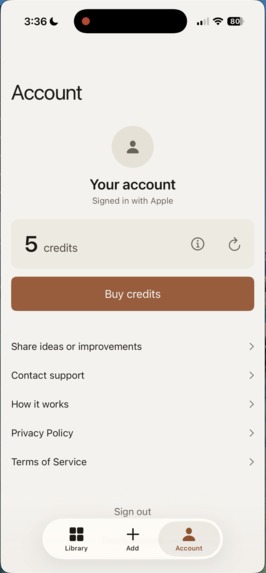
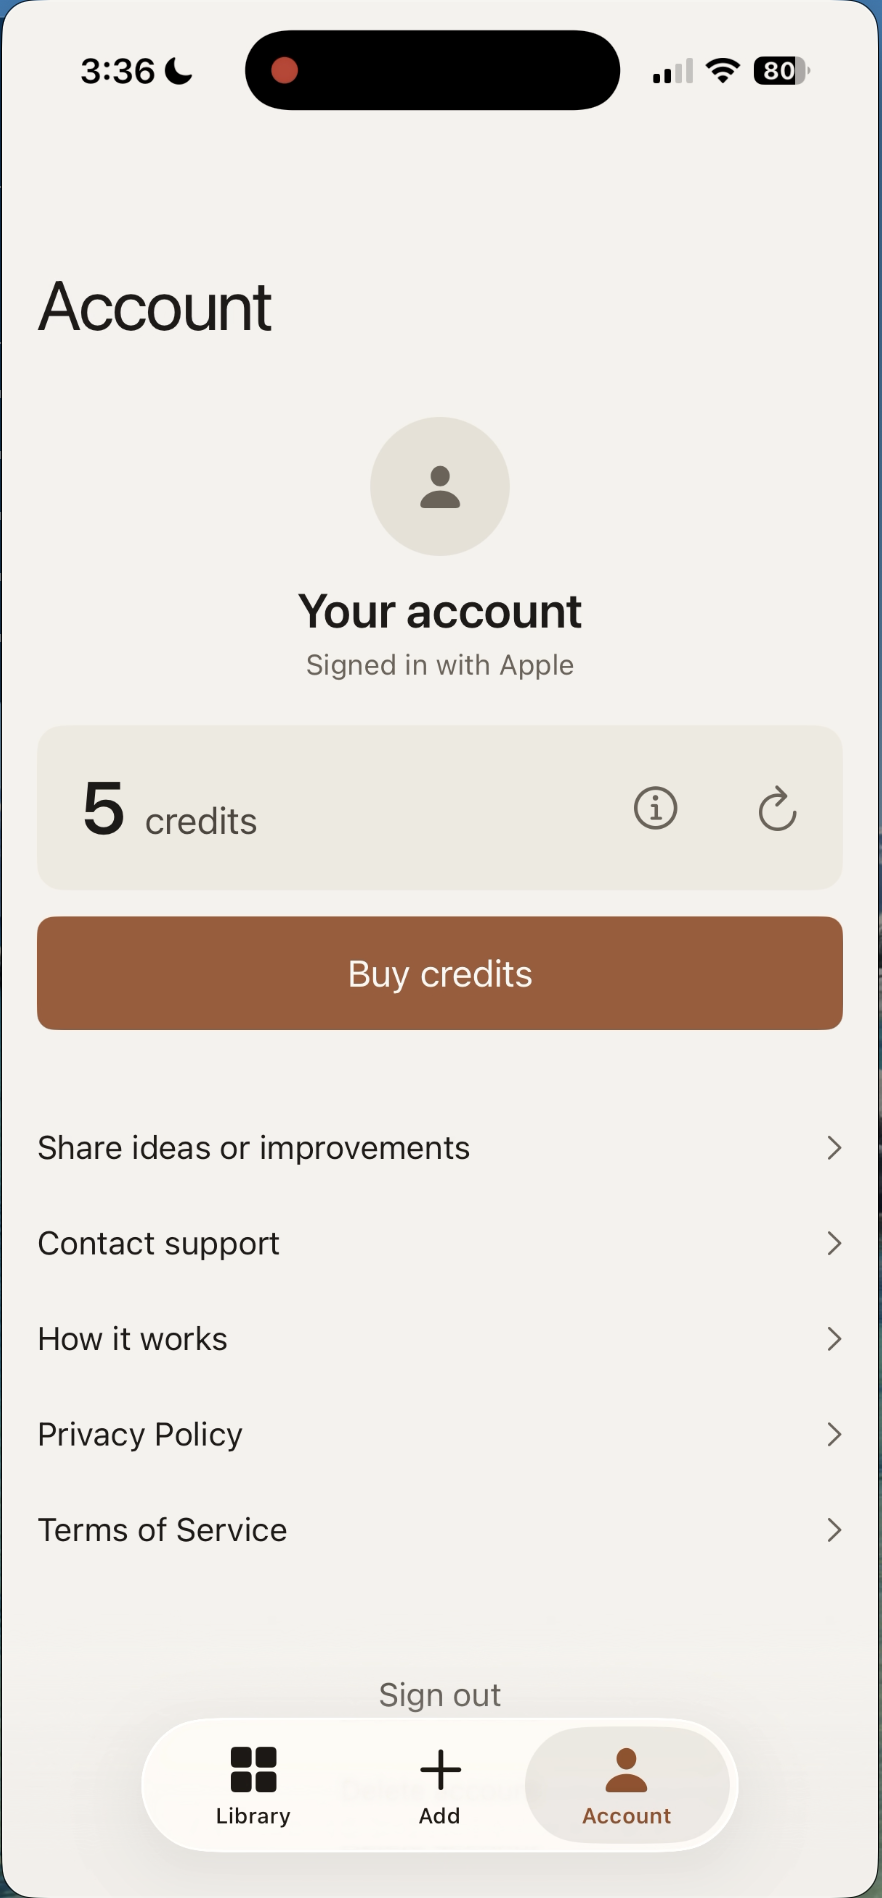
Account
Inspiration
I'm a very visual person. If I can't see it, I struggle to decide, and online furniture shopping is a wall of photos that tell me nothing about how a sofa will look in my room. I wanted to fix that for myself.
I also wanted to build a complete product end to end: research, spec, design, infra, backend, app, payments, beta program, App Store. And I wanted to do it the way products get built now, with AI agents writing the code and helping me make product, architecture and design decisions.
The big constraint was that I'm a solo developer with a full-time job and a family. Ambienta got built in the (sometimes very late) hours left over while preparing meals and brushing a little guy's teeth before bed.
What it does
Ambienta turns a furniture photo into a 3D model and places it in your room in AR, real size, lit by your actual room. Build a library, compare pieces in the same spot, decide before you buy. Reconstructions run on credits purchased in-app.
How I built it
The app. It all started with a small app that allowed me to use different models for the 3D reconstruction part, until I finally found one that actually looked realistic with a lot of different types of furniture. This is very challenging since some pieces have thin legs, weird angles or textures. Once the engine was locked down, I set about building a simple, clean UI that made it easy to generate pieces from a retailer's link or photo. This involved a lot of experimentation on different approaches until I finally landed on what I call "guided link tagging flow". This flow lets users get all the information to generate the model from any retailer site in a few quick taps (with AI mode coming soon!). The UX on this flow was very challenging, it took several iterations to land on something that was both usable and looked good. Then came the boring stuff: handling errors, push notifications, polishing for Liquid Glass, proper gesture and keyboard handling, "how to's", feedback & support mechanisms.
The backend. For the first attempt I tried hosting the reconstruction model (Tencent Hunyuan) on my own VM in GCP. This was very challenging and economically not feasible (lesson learned) so I ended up using a provider called 3D AI Studio (kudos to Jan, its founder, for all the help!). The pipeline looks deceptively simple on the outside: a worker takes one photo in, one USDZ out, but there's a lot going on behind the scenes:
- Engine routing: the job is assigned to the primary reconstruction engine (Tencent Hunyuan Rapid) or, when the primary lane is backed up, to an overflow engine (Tripo P1).
- Queues. Three Google Cloud Tasks queues (standard, a priority lane for subscribers, overflow), each dispatching a bounded number of jobs into the worker. The whole pipeline runs inside one task request, which lets the backend scale to zero when nobody is generating (there is a small cold start penalty time to pay for this, but the economic benefits are worth it)
- Reconstruction: the actual AI step, about 2 minutes. Everything else in the pipeline exists to make its output render well on a phone.
- Hole repair: generated meshes sometimes come back with small tears that look as see-through slivers in AR. The backend tries to patch small boundary loops but leaves intentional openings alone, using the loop's size relative to the mesh as the gate.
- Optimization: recompress textures so the download is small and the first AR frame is fast. This reduced models from 50-70mb to 30mb.
- Scaling: the generator has no idea how big the piece is. We normalize the mesh to the real-world dimensions the user entered (or extracted from the retailer site) so we can provide a true size model.
- USDZ conversion: through OpenUSD and Adobe's glTF plugin in a hand-built Docker image. This step is crucial for iOS so I decide to fully own it instead of outsourcing it (3D AI Studio has conversion tools).
End to end, a typical job takes 2 to 3 minutes.
The process. I started with a PRD document and a vision for the product and brand. Then I moved on to creating specs, implementing a base skeleton app and then I created the design system (Figma, with tokens exported into code). Implementation was done with Claude+Codex using subagents with explicit roles: an architect agent that rules on structural decisions, an implementer, an independent reviewer that never wrote the code, and a QA agent. The backend is a separate agent with its own repo; Claude is able to communicate with other agent sessions, so iOS + backend would often work together to define API contracts and other stuff. My job was product, design decisions, device testing, and sometimes stepping in on certain architecture decisions that were not fully aligned with what I wanted.
Challenges I ran into
The vendor is the bottleneck. The reconstruction provider effectively runs one generation per key at a time. A stress test with five simultaneous jobs got three of them rate-limited outright, and a twelve-job backlog produced a median wait of seven minutes. This single finding drove most of the backend architecture: a capacity gate at intake, a priority lane, and the overflow engine.
Making the model look right on a phone, not just produce a file. The primary engine returns OBJ+MTL with no PBR channels. glTF's default metallic value is 1.0, so every sofa rendered as chrome in ARKit. The fix was pinning metallic to zero at assembly and inlining roughness on the USD shader itself, because RealityKit ignores those values anywhere else. Lesson: the renderer's ingestion path is the spec. Always test on the device, not in a viewer on my Mac.
Finding an agent setup that actually saved time. The first version was one large agent doing everything: planning, writing, reviewing, committing. It was expensive and it quietly made decisions I hadn't asked for. I tried having Codex review Claude's work, then Claude review Codex's. What stuck was routing by the kind of work: an expensive model for architecture calls, a cheaper one to orchestrate, Codex to write code from an approved brief, and a fixed Claude reviewer that never moves to whichever model wrote the code. Plus written conventions and a sign-off rule for anything touching UI chrome app-wide. Some of these things were learned the hard way, like when I came back to the iOS agent swapping Liquid Glass sheets used all over the app for opaque ones as a "bug fix."
Being wrong about what looks good. At one point I built some custom wheel-spinner input controls for entering the measurements, I was super proud of these because I thought the keyboard looked clunky. Boy was I wrong. After several beta testers complained about this, I defaulted to keyboard and left the wheels as a secondary input style.
Accomplishments I'm proud of
- Shipped to the App Store, approved on the first submission, with payments and analytics in the 1.0.
- A photo-to-AR pipeline that works end to end on a backend that costs nothing while idle, with a fallback engine and a capacity gate that keep it honest under load.
- A beta program with real testers whose feedback reshaped the product three times before launch.
- An AI-native workflow with independent review and separate client and backend agents that held up across months of part-time development without the codebase drifting.
- Doing all of it solo, in the margins of a full-time job and family life.
What I learned
Building end to end taught me where the time actually goes, and it's rarely the fun part: payments, store review, capacity planning, and beta logistics cost almost as much as the AR work.
I think AI-native building works when you treat it as management: clear specs, small briefs, independent review, giving the agents tool to verify their work (which can be hard on iOS) and a human who owns every product decision. For someone building in the margins of a day job, this is what made the difference between a side project and a shipped app.
I also learned that "seeing it in your" is a real need, not a gimmick. Testers used it exactly the way I do.
What's next for Ambienta
These are some of the things I have in mind, but I will see what feedback I get from users to determine what actually gets built:
- AI tagging with on-device, so the app can automatically extract all the info (image, name, measurements) from a retailer site without the user tapping through it. Scrapping is done fully on device with Apple's Foundation models.
- Shared projects, so a couple or roommates can build a room together.
- Multi-item placement: place a whole set in one AR session instead of one piece at a time.
- Persistent Arrangements: this can be tricky, technically speaking, but I imagine being able to save and load the exact layout of various items in a given room.
- Lighting options, for previewing a piece under evening light or a different bulb temperature.
- Saved rooms you can work on without AR: scan once, then arrange furniture from the couch.
- Export to SketchUp, CAD tools, and other popular platforms, so reconstructed models go into real design work.
Overall, this was a great learning experience and im very happy with the results. Hopefully you will enjoy it and find it useful too!
Built With
- ar
- arkit
- claude
- cloudflare
- codex
- fastapi
- flowdeck
- google-cloud
- google-cloud-run
- google-cloud-sql
- google-cloud-tasks
- posthog
- python
- revenuecat
- swift
- swiftui


Log in or sign up for Devpost to join the conversation.