-
-
Introduction
-
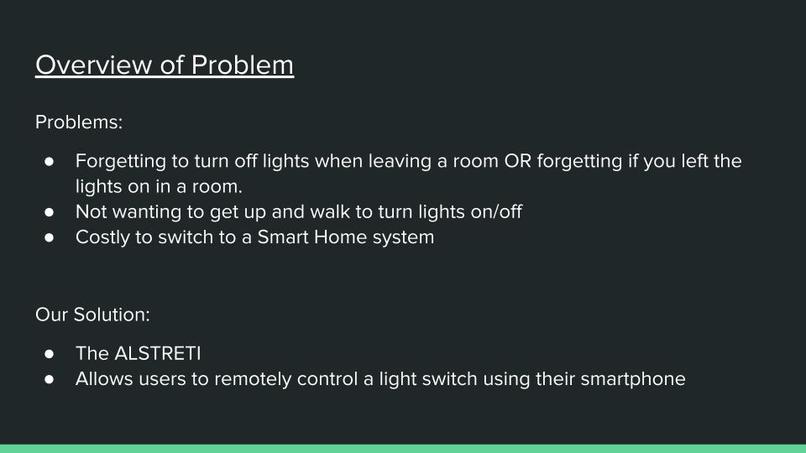
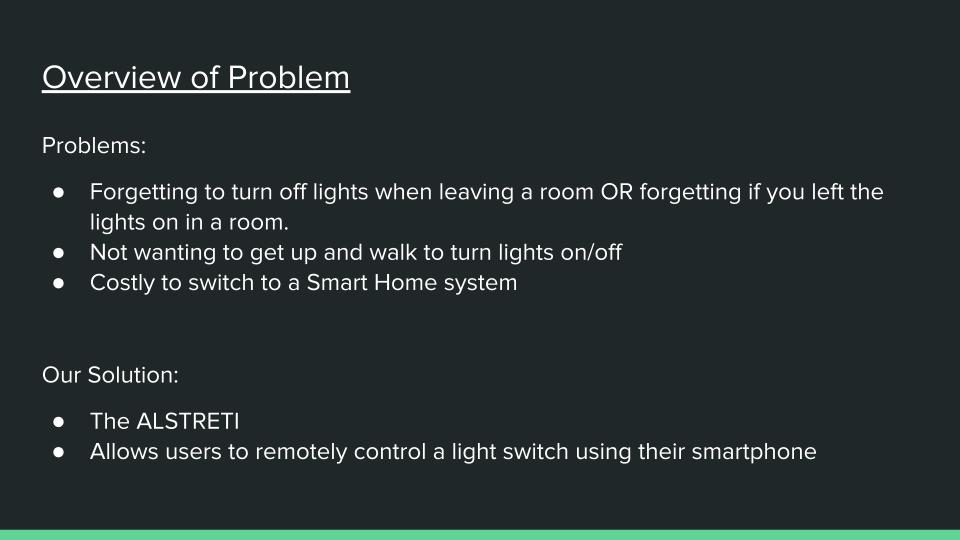
Problem Overview
-

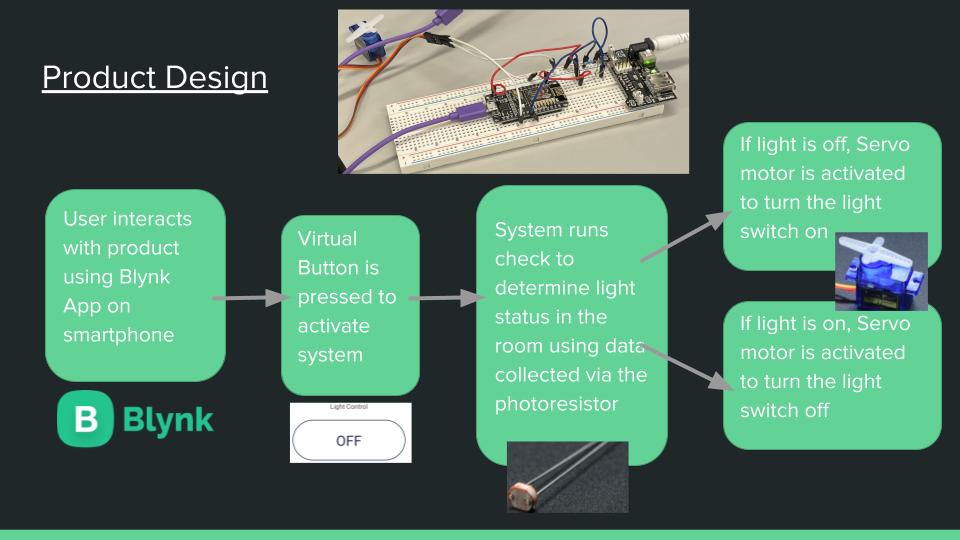
Product Design
-
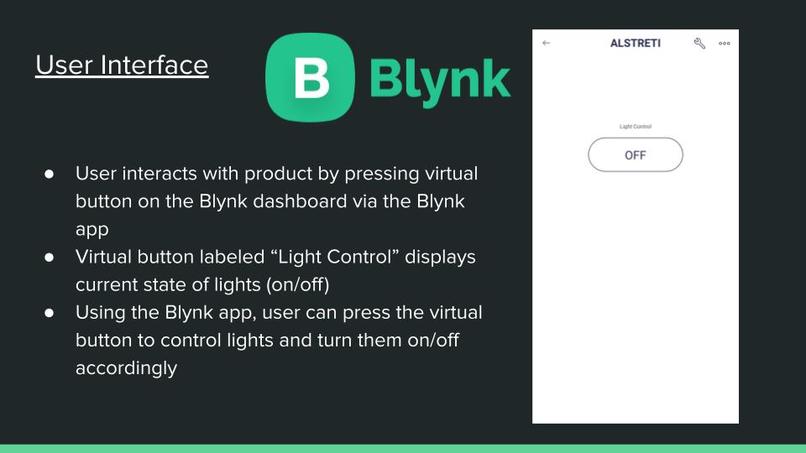
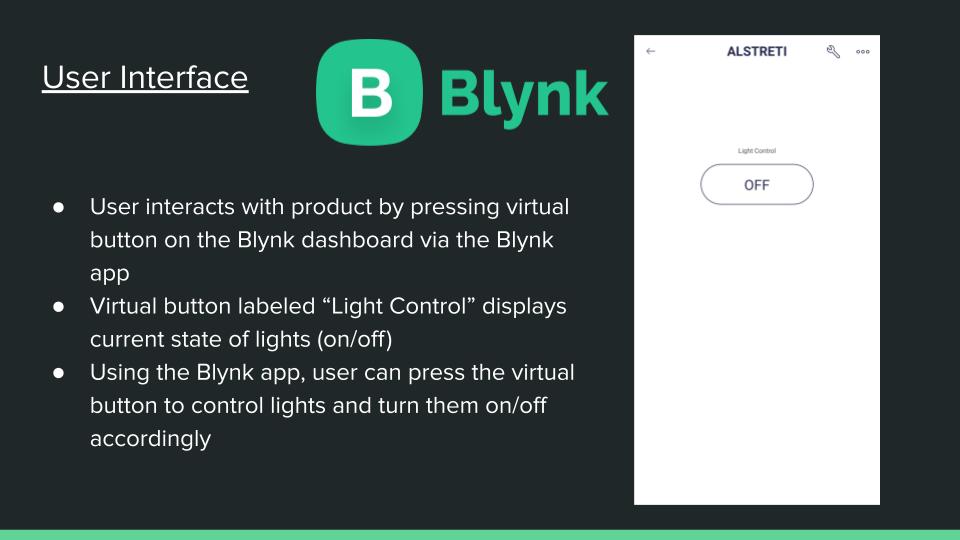
User Interface
-

User Experience
-
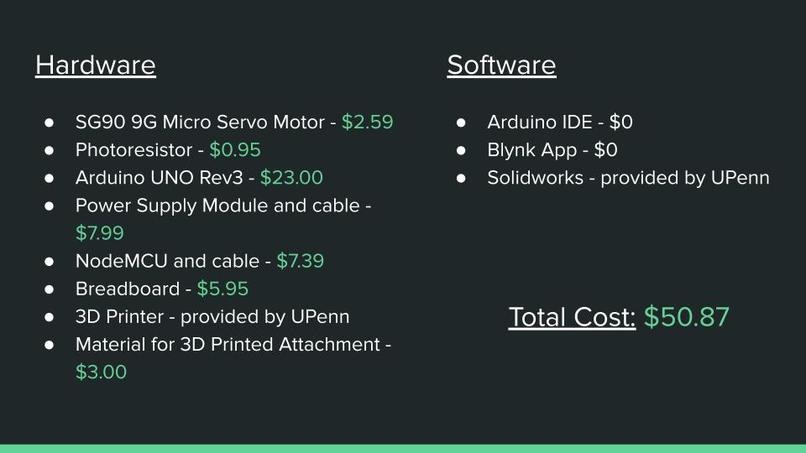
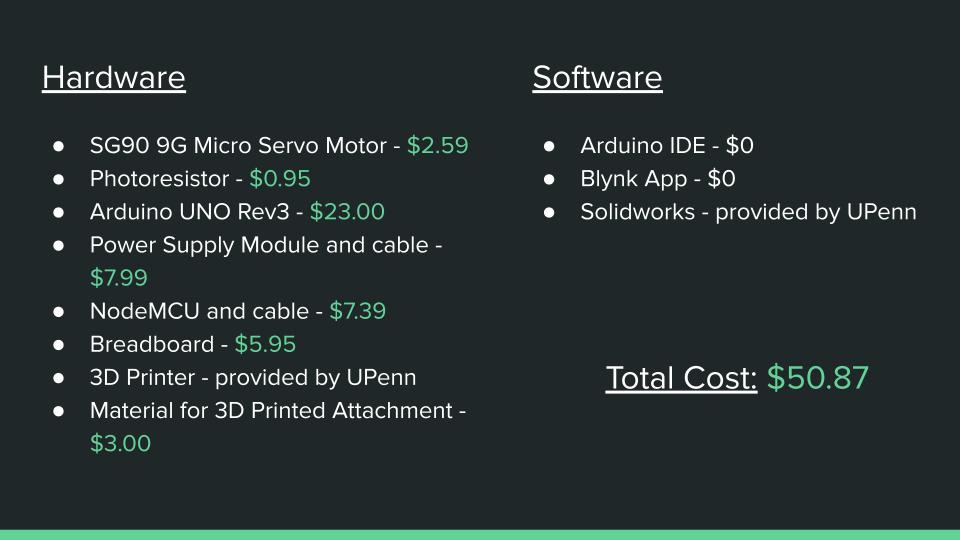
Hardware and Software Costs


Inspiration
One night, Mostafa went to bed, got comfortable after tucking himself in, but then promptly forgot that he left the bathroom lights on. He had to get out of bed, and he couldn't go back to sleep for the next 2 hours. Our group had the genius idea to create the ALSTRETI to make sure this never happens to anyone ever again.
What it does
Essentially, our product attaches to a light switch, allowing the user to control the product using the Blynk app on their phone. The app displays the current light level in the room, and the user has the option to turn the lights on or off, just by using their phone to control the servo motor.
How we built it
We have a servo motor connected to a NodeMCU, which is powered by an external Power Module. The servo is also connected to a 3D printed attachment that mounts onto the light switch. The NodeMCU then connects to the user’s phone through the Blynk app, allowing the user to seamlessly turn the lights off. If the lights are already off, that’s where the photoresistor comes in. The photoresistor reads the light level of the room and based on the values taken in, the code on the NodeMCU tells the servo to either push the switch down or not move at all. The reverse case holds true as well. If the lights are off, it’ll turn them on at the user’s request. And if they’re already on, it won’t move at all.
Challenges we ran into
There were a few different challenges that we ran into during the construction of the Alsreti. For example, integrating the photoresistor was a hard task, especially since it gave such inconsistent light level readings. As a result, it took quite a while to figure out the thresholds for photoresistor values, but switching from a 220ohm resistor to a 1kohm resistor helped stabilize the values, to an extent. In addition, determining the servo angle to move in the desired direction took some testing, and it took some various trials to determine how to display the light levels from the photoresistor on the Blynk dashboard, using the ArduinoIDE.
Accomplishments that we're proud of
We're quite proud of 3d printing the attachment with accurate measurements, and the servo fits snugly into the part. The attachment screws into the light switch outer plating, fitting the majority of standard light switches, specifically single pole switches. Furthermore, we are quite proud of sending to the data to the Blynk app seamlessly, especially since the university wifi and NodeMCU connection can be spotty at times. Most importantly, we're proud of our final working product, worth more than money can buy.
What we learned
We improved our solidworks skills since we had to 3d print the most important attachment for our project. We also learned about the different widgets and functions that the Blynk app offers, and we have a better understanding of how to connect the NodeMCU to the blynk app for any future projects. We also know how to send the photoresistor values to the Blynk app, which allows for endless possibilities in the future.
What's next for Alstreti
Currently, Alstreti has plans to implement Alexa and potentially Siri into the project so that the user can simply turn the lights on or off using specific voice commands. Additionally, Alstreti plans on implementing a better photoresistor for more accurate readings so the user can rely on the product for everyday use. Lastly, Alstreti is planning on adding functionality so that the user can install Alstreti devices throughout the entire home, controlling all the light switches with just one button, if the user prefers.
Built With
- 3dprinter
- arduinoide
- arduinokit
- blynk
- java
- nodemcu


Log in or sign up for Devpost to join the conversation.