-
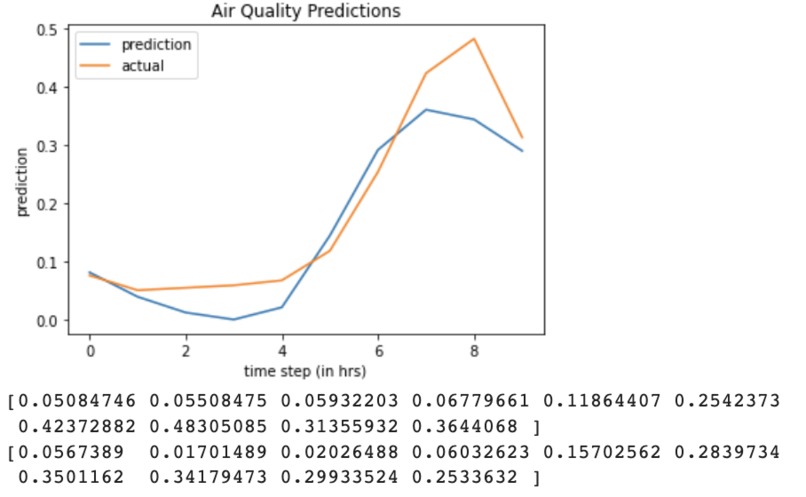
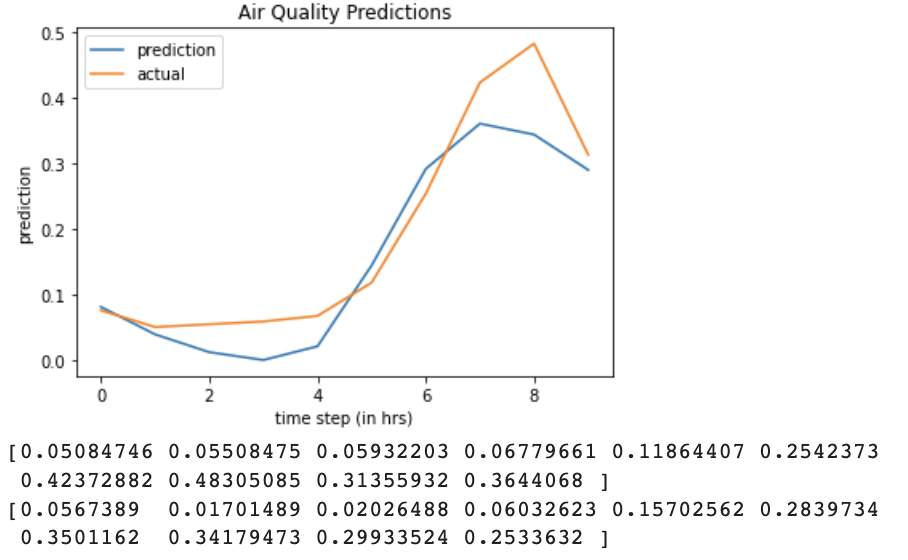
Seq2seq Prediction for 10 units
-
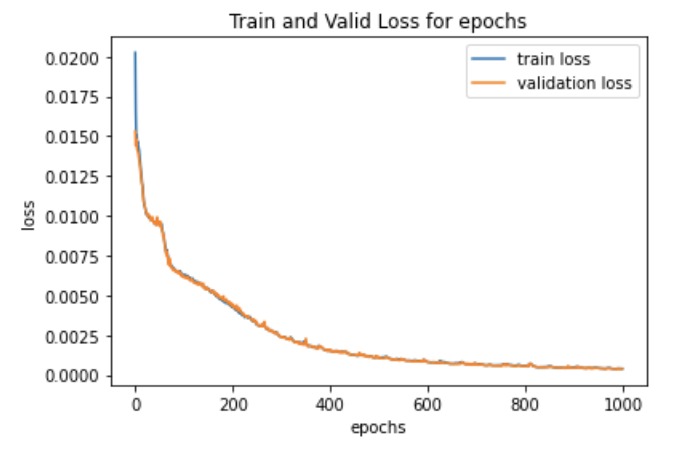
training and validation loss for 1k epochs
-
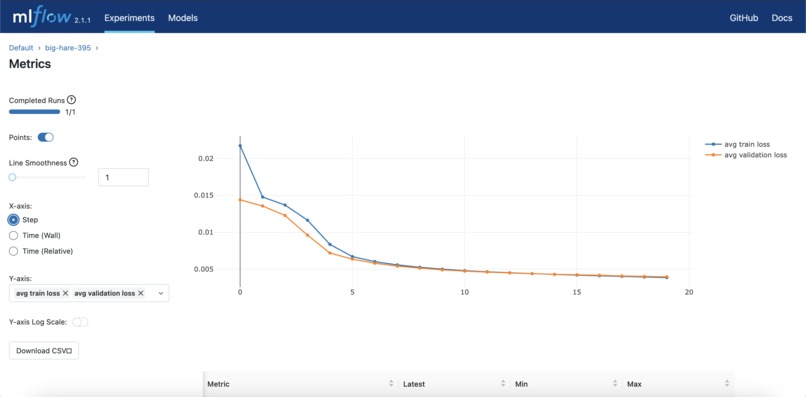
Training and Validation Loss in MLFlow
-
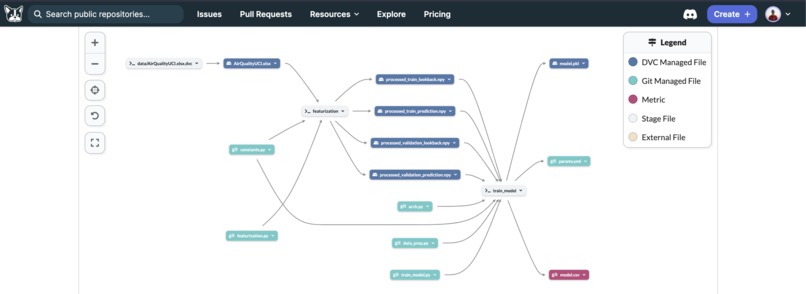
DVC in Dagshub
-
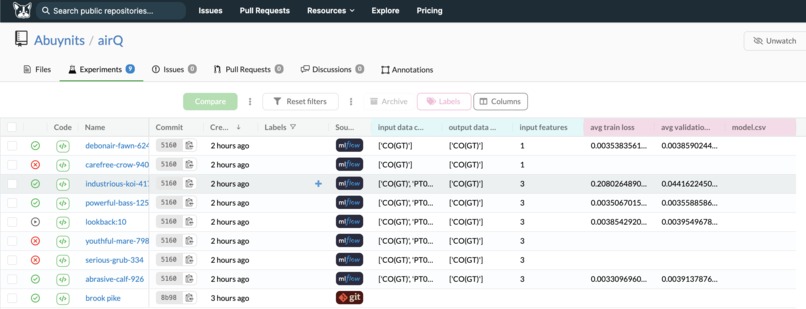
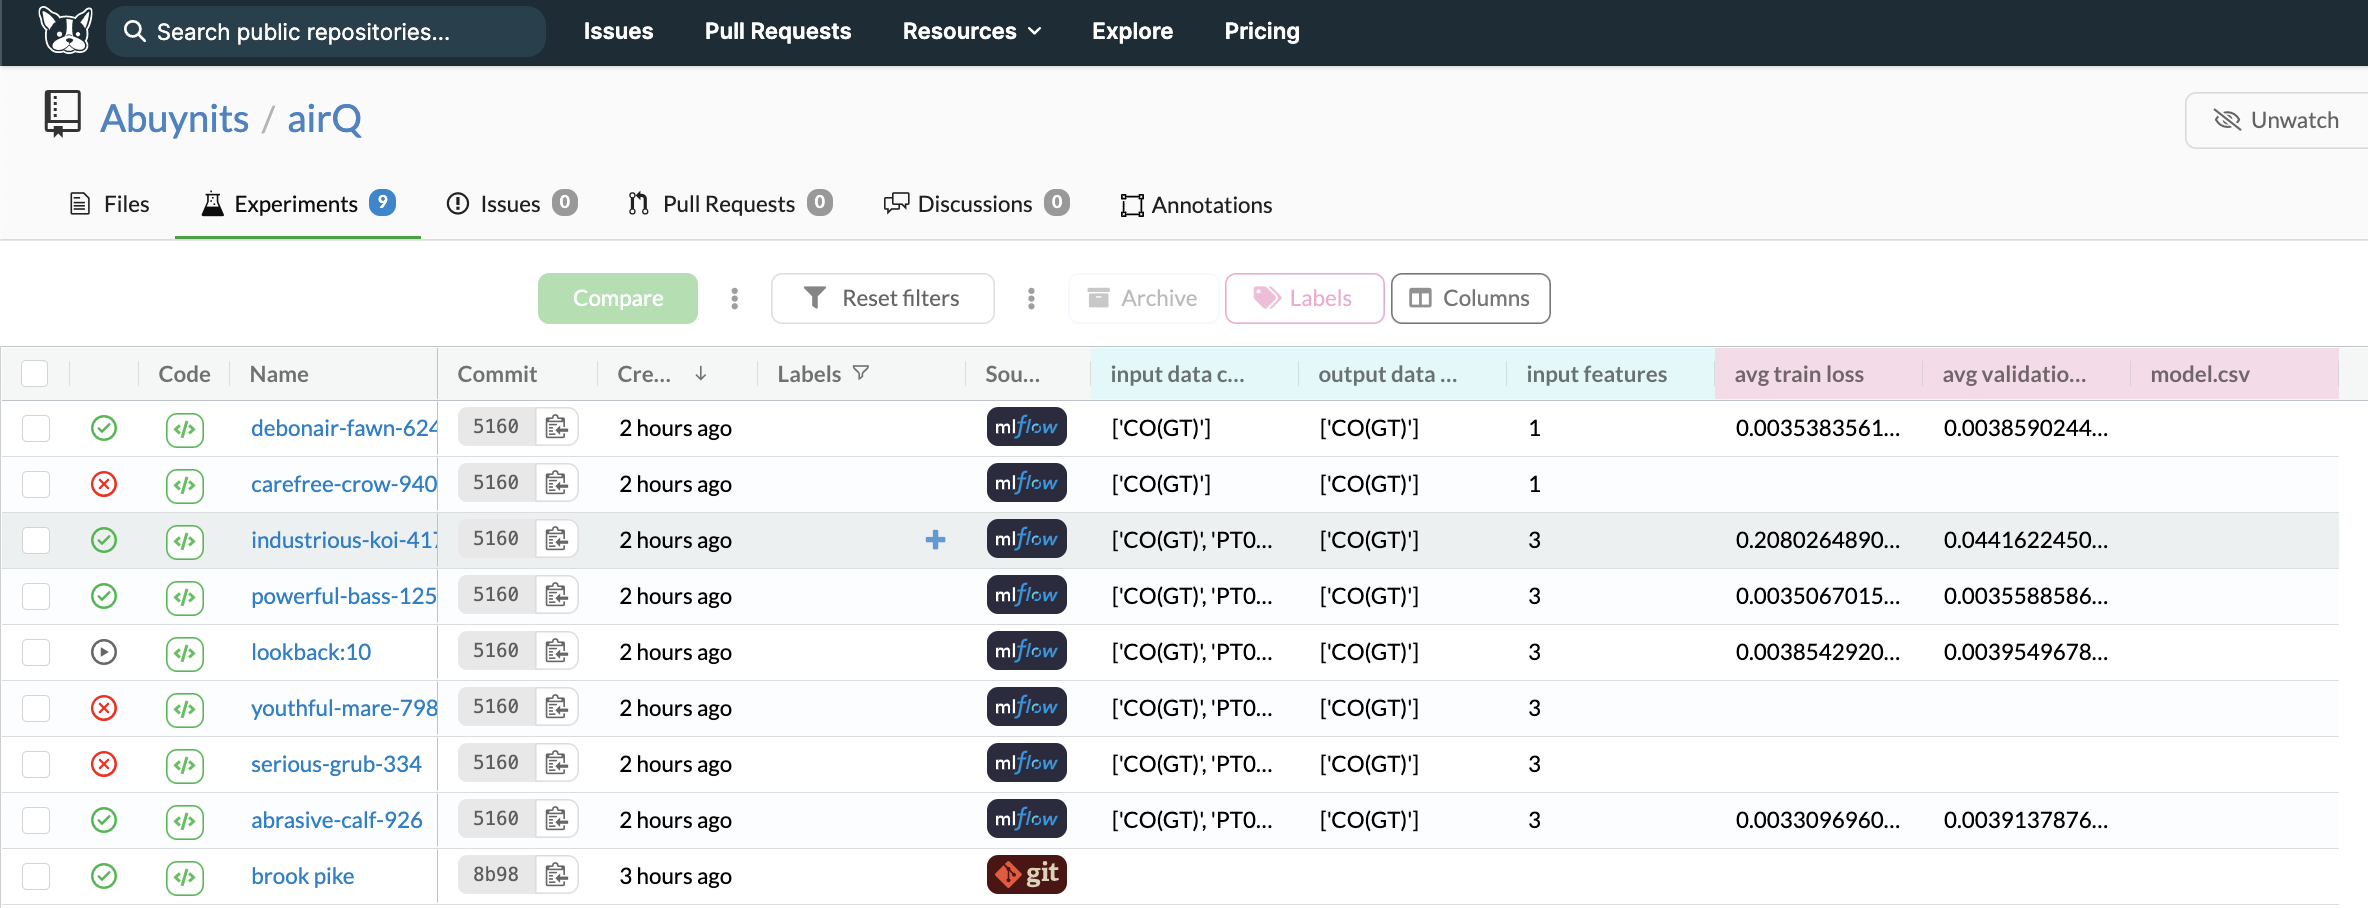
Experiments in Dagshub


Inspiration
With the rise of wildfires on the West Coast, it is important now more than ever to fully be able to understand, interpret, and predict air quality data. That is why we decided to make AirQ, a versatile machine learning model to predict air quality data based on a widely customizable range of inputs and parameters. Trained with data from UC Irvine, is is capable of informing researchers and the general population about future air quality well in advance. Many people don't take wildfires/smoke seriously but it is critical to have early warning systems in place that monitor air quality and can notify residents in advance to close their windows and stay indoors.
What it does
This is a LSTM and seq2seq model (transformer-like model) that predicts specified air quality metrics using input and output features (data columns). One can select the input feature(s), desired output feature(s), loookback range, and prediction range to see which input features have the most weight in determining the output features. One can also experiment with adjusting the models, their architecture, and other hyper parameters without worry about the the implementation. It is built using Pytorch, with DVC and MLflow to allow for easy testing and augmentation through the constant.py file.
How we built it
Preparing the data
We started by finding a data set on air quality, which we found in UC Irvine’s data archive. We then preprocessed this data. To do this we first interpolated missing/malformed data points, and then normalized the data between 0 and 1 to make it ready for training. After preparing the data, we split it into training and validation sets and batched it. We then created custom datasets and loaded them into dataloaders to be used by our model.
Designing the model:
For our model design, we initially started with an LSTM, but after training it, we noticed that even with any combination of hidden layers or lstm cells, the model would struggle with predicting two or more time steps ahead which is why we switched to using a seq2seq model, commonly used in NLP techniques. Such models are based on an encoder-decoder architecture:
- Data is fed to the encoder, and we store the hidden state for the last timestep in the encoder
- we take the last input, and the last hidden state, and feed it into the decoder which produce the required hidden states
- We pass this through a linear layer to decrease the output dimensions from the hidden size to the desired amount of outputs and a new input state to the model.
- This process continues until we generate the required amount of time steps
Training the model:
Learning Rate:
We selected a learning rate of 0.001 and a ExponentialLR scheduler from pytorch with Gamma = 0.99 to exponentially decay the learning rate by gamma as we move through the epochs.
(see more in main.ipynb)
Epochs:
We train for 1000 epochs, saving a model whenever we reach a new best validation loss.
Optimizer:
We use a MSEloss to calculate the loss between our quantitative outputs.
Version Control
We use DagsHub with DVC for our data, git for our code, and MLflow to analyze the training results.
(see more in dags_hub config)
Challenges we ran into
implementing the seq2seq model We decided to use batches and therefore had to adjust the dimensions from
batch,past_time_steps,featurestopast_time_steps,batches,features. This lead to bugs and we still occasionally receive a model that would predict the same sequence every time because of this.Configuring Dagshub
We have grow accustomed to storing all of our data in a single github repo so it took more time to configure a Dagshub repo, learn about DVC, MLflow, but after doing this, we saw the clear benefits of using Dagshub and our development became faster, we didn't have to worry about loosing our weights for each training run, and had a clear split between our data, code files, and ML runs.
- Time
We were also constrained by the limited time of this event, which caused us to not be able to finish the GUI.
Accomplishments that we're proud of
We are proud of building our first version controlled project through DagsHub with DVC and MLFlow. Furthermore, this was our first attempt at creating a transformer-like model which didn't have a lot of existing implementation for non-NLP data, so we had to look into each layer, track the matrix multiplications and really understand the model instead of simply using a provided abstraction.
What we learned
Coming into this project, both of us were unfamiliar with dagshub. We had to learn how to integrate our work with their systems and use it to manage the data pipeline for our model. Additionally, one of our team members came into this hackathon without any prior machine learning experience and had to learn the basics during the hackathon. We will both start using DagsHub for all of our ML projects as there are clear benefits to spliting up data and preventing our google drives from filling up with final_weights.pkl, FINAL.pkl and so on.
What's next for AirQ
If we had more time on this project, we would create a deployable model with a frontend GUI that users could use to dynamically interact with the model and input their own testing data. We would also continue debugging the transformer to really understand why it would give such weird outputs.

Log in or sign up for Devpost to join the conversation.