-
-
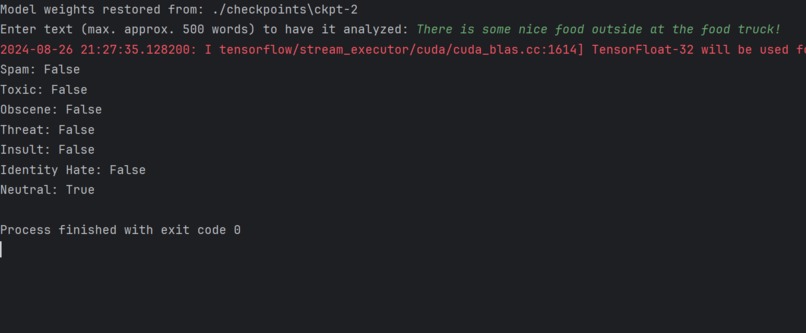
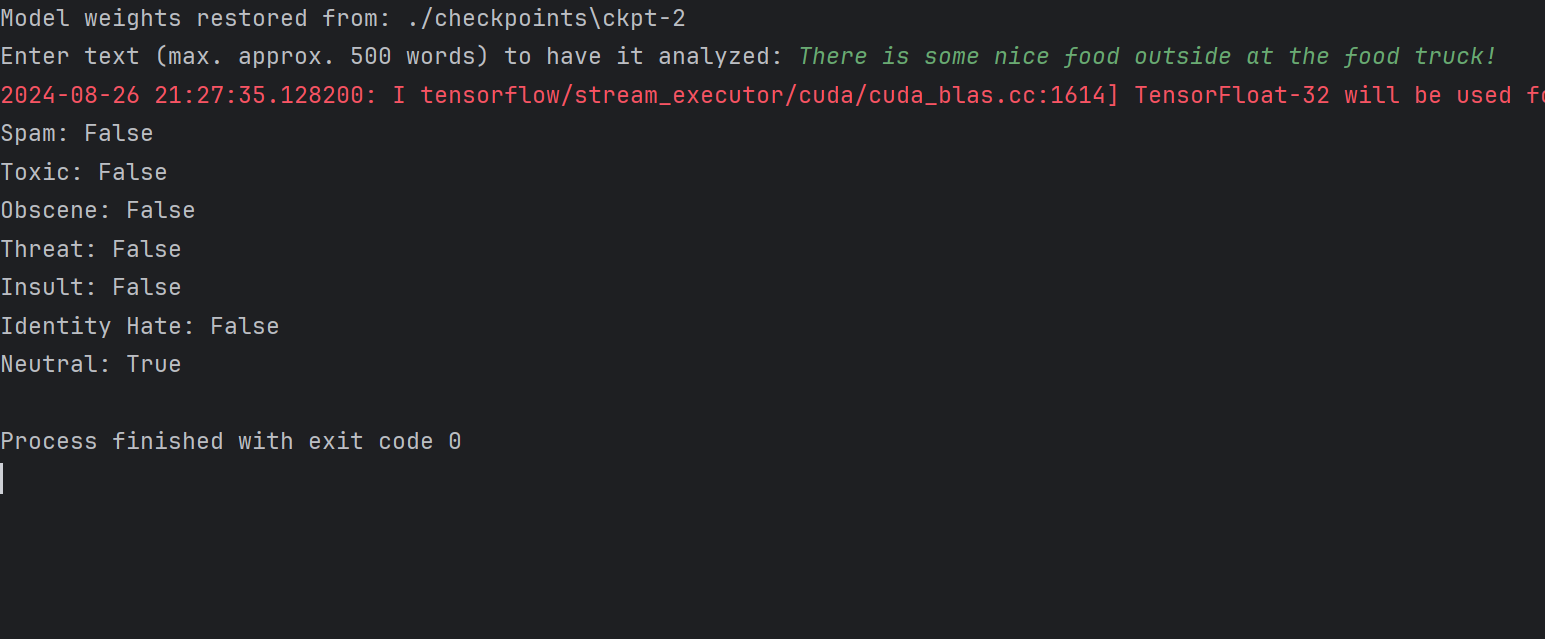
Live data, demonstrating ability to be used with real-world user input
-
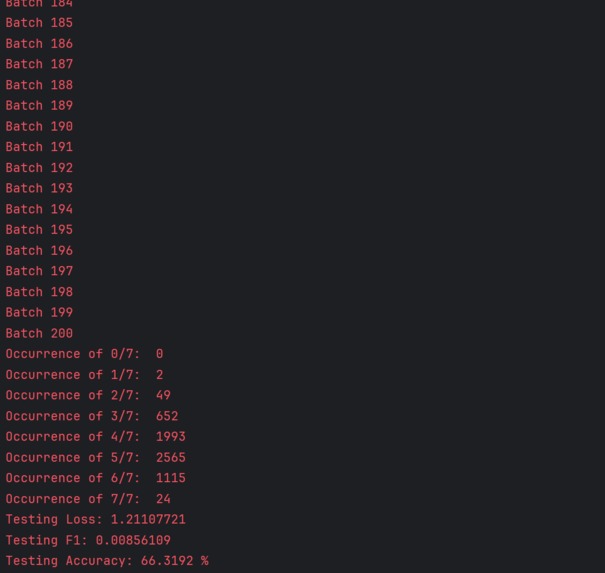
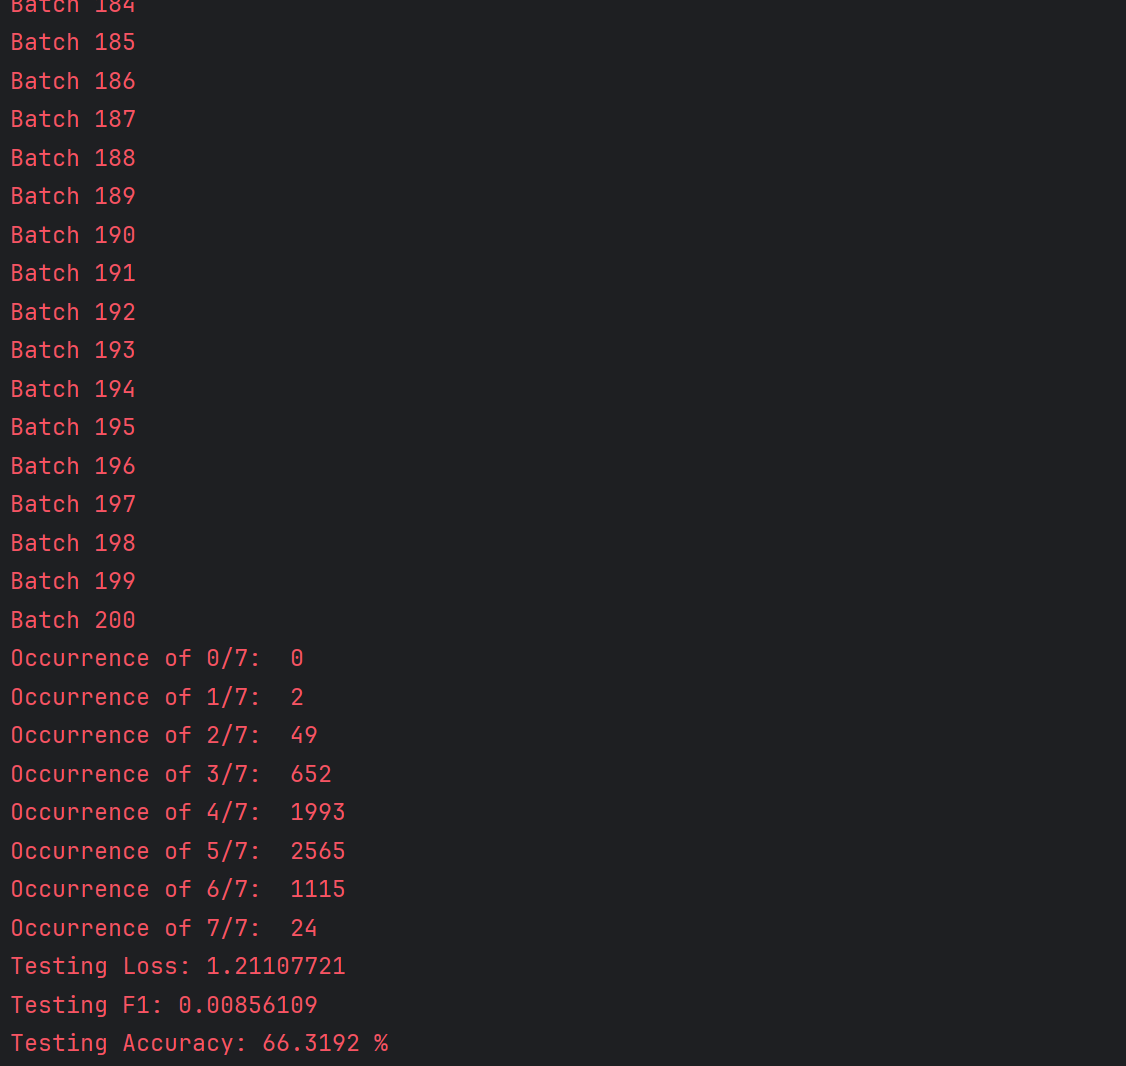
Testing statistics, including loss, accuracy, and F1 score
-
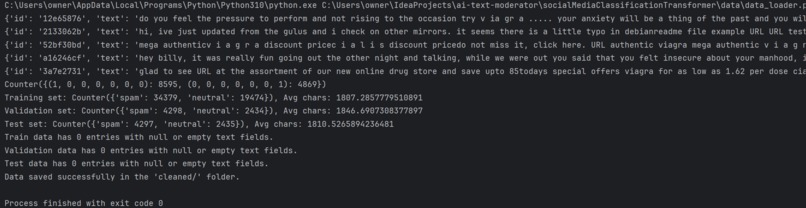
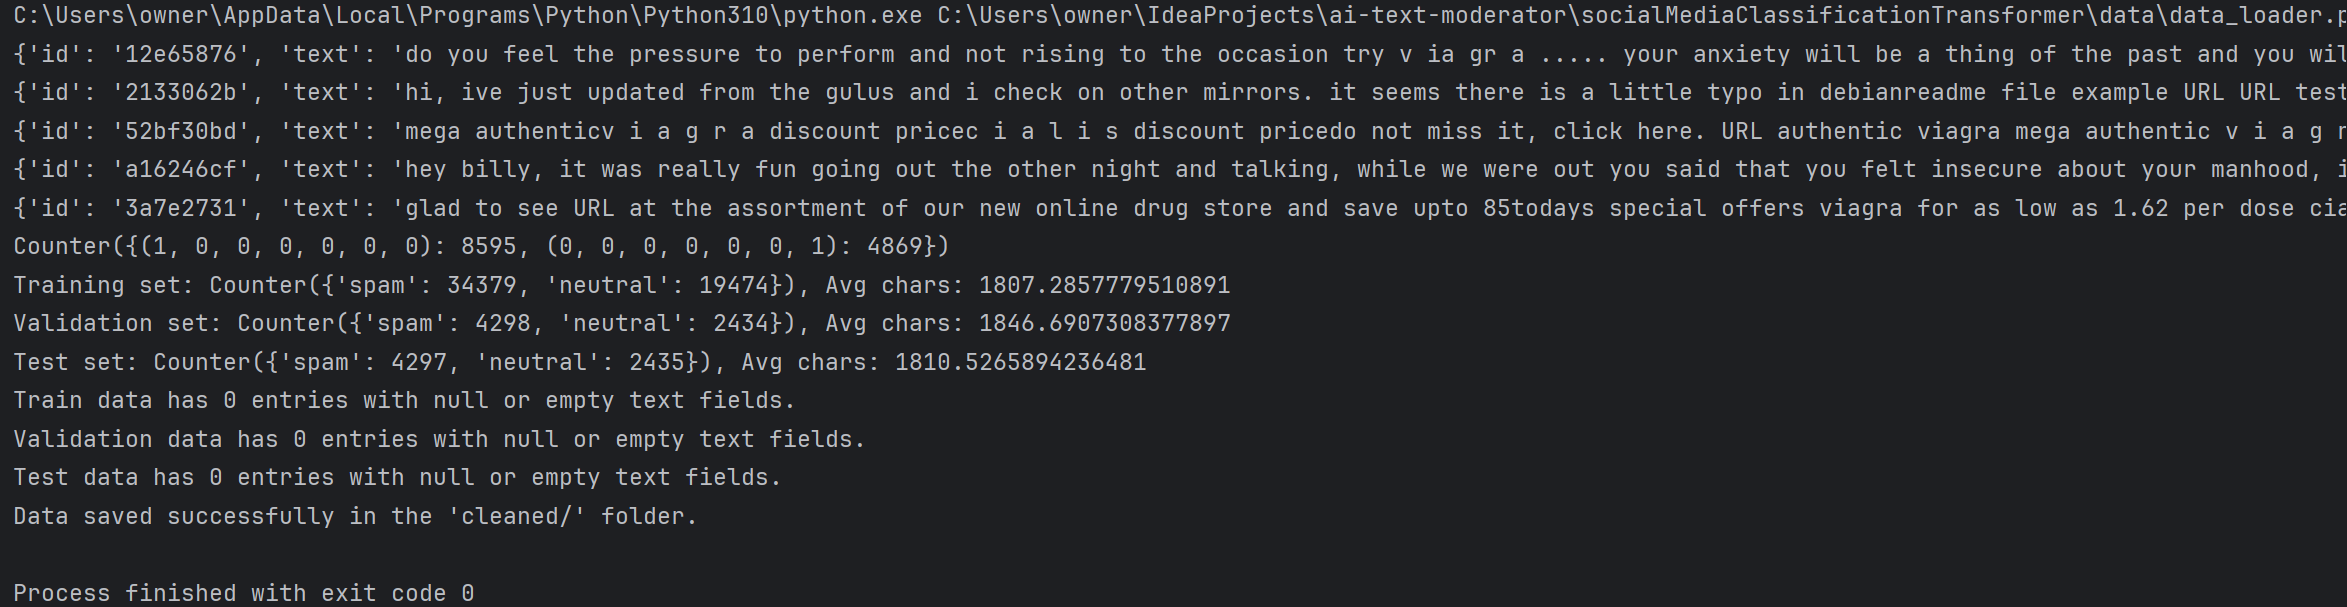
Comprehensive feedback provided when loading data, such as label distribution & average character count
-
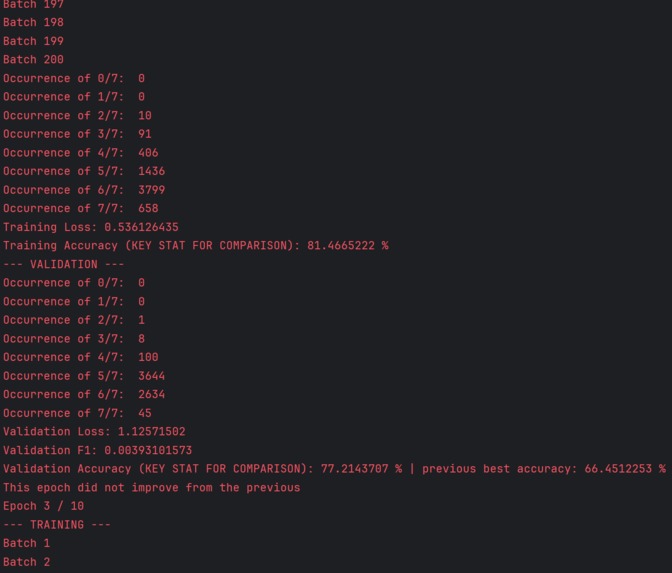
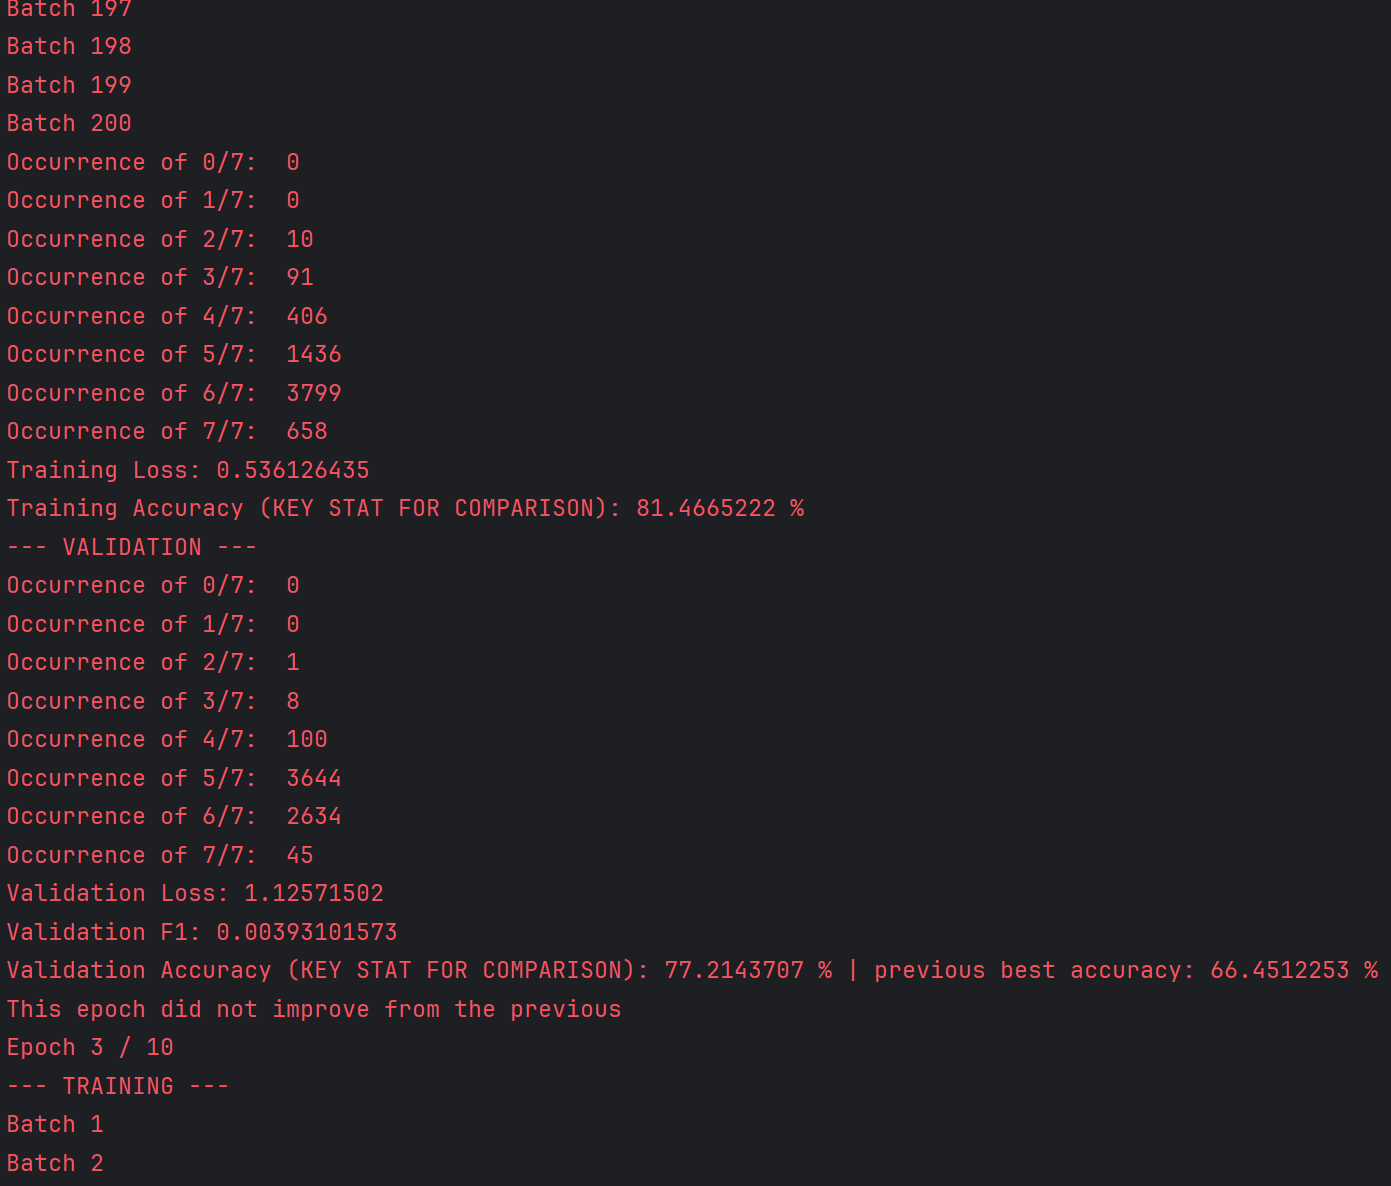
Comparison of training to validation statistics, with automatic evaluations to determine if an epoch’s weights should be saved
Inspiration
As CapoDev Apps’ founder, I am pursuing a cleaner social platform to solve security risks, toxicity, and ingenuine online representations. Content moderation is a cornerstone of mainstream platforms, yet most cyberbullies get away with millions of posts containing harmful comments (with over 60% of youth & 40% of adults being victims). Platforms lost their purpose, yet my solution offers a large-scale approach to moderation.
Through an encoder transformer with innovative features, I have developed a Python model that identifies if short/long-form text is spam, toxic, threat, insult, identity hate, obscene, and/or neutral. With ~3.4 million data points from 3 credible datasets and ~97.6% accuracy on test/validation data, this offers a revolutionary, speedy way to automate content review.
What it does
Through an encoder transformer with innovative features, I have developed a Python model that identifies if short/long-form text is spam, toxic, threat, insult, identity hate, obscene, and/or neutral. With ~3.4 million data points from 3 credible datasets and ~97.6% accuracy on test/validation data, this offers a revolutionary, speedy way to automate content review.
How we built it
The following outlines the overall methodology employed:
- Data loader collecting input from training & testing csv files from the 3 credible datasets
- Processing by cleaning each text input with various methods (lowercasing, removing special characters, representing any URLs or emails as [EMAIL] & [URL] for spam identification, removing extra whitespace, removing formatting details provided at the front of the input for a few csv files, etc.)
- Creating a binary array containing the scores for each label, then splitting each entry across validation, testing, and training in Python pickle files
- Tokenizing the data by loading the 30524-sized vocabulary file, identifying the largest subword within each word found in the vocabulary, then converting it to an id, with each entry now containing the label scoring, the token id array, and an attention mask for identifying filler [PAD] tokens. This was stored in a TFRecord for optimization purposes
- Then, the training loop begins. The embedding, attention, FNN, and classification head weights are initialized, with a unique set of weights for each layer in the transformer. The tokenized data is loaded in batches, with loading & usage happening in parallel
- Each batch runs through the transformer architecture, which involves:
- Embedding the token ids array into a batch size x token size x embedding size 3D matrix, with positional encodings concatenated to this result
- Passing embeddings into multi-head self-attention mechanism, where contextual details are gathered across all heads for each token’s embedding, with softmax and dropout applied
- The embeddings and attention output are residually connected then normalized
- This is passed to the 2-layer FNN, undergoing 2 linear transformations, with a GeGLU activation & dropout in-between
- This is again residually connected with the FNN’s input & normalized
- The output then passes into the classification head, where it undergoes max pooling to gather the most significant embeddings across all tokens, then one final linear transformation. This is followed by either sigmoid activation with thresholds & neutral exclusivity applied to get binary probabilities which is then used to get the loss from binary cross entropy, or sigmoid cross-entropy loss calculation applied directly to the logits with probabilities remaining in decimal form after a sigmoid activation
- After each batch, the loss, number of correct labels for each input sequence, and gradient backpropagation with the Adam optimizer is calculated/applied
- After all training batches, the average loss and percentage accuracy to get any given label correct is displayed to compare to past epochs, with a loss under 0.5 & accuracy over 75% being considerably good
- Then, the same process in step 6 is repeated for the validation data, without gradient backpropagation & with the addition of the F1 score being calculated. The average loss, F1 score, and accuracy (both previous best & current validation accuracy) is computed & displayed.
- As mentioned, the validation loss, validation accuracy, and differences between validation & training loss are used to determine if early stopping should be deployed to avoid checkpointing gradients without improvement or which demonstrate overfitting/lack generalization
- After training several models with various tuned parameters & finding a model with considerably effective validation loss, F1, and accuracy, as well as training loss, the checkpointed gradients are passed into the testing dataset. The same process as in Step 6 occurs (without backpropagation), with testing loss, F1, and accuracy displayed.
- Any of the checkpointed datasets can then be tested on live user input, with the process in Step 6 being modified for a batch size of 1 where a user can enter input into the terminal and have it classified in real-time.
Challenges we ran into
Many technical challenges were faced & creatively resolved, with the top ones including:
- Excessively slow training. In the beginning, each batch containing 32 sequences could take up to a minute, yet thousands of batches would be required to be processed at this batch size to create a considerably performant model. After significant research & usage of nvidia-smi in the terminal, I pinpointed the issue to be the usage of my CPU during data loading & training, as well as the usage of eager execution in TensorFlow. To address this, I reviewed my NVIDIA settings to ensure my computer started utilizing my NVIDIA GPU, yet I still noticed it was not being used. I then read TensorFlow’s documentation to identify that the last version of TensorFlow-gpu was 2.10 (with future versions being integrated into TensorFlow), yet the current version (at the time of development) I was using was the latest TensorFlow, at 2.17, which was not utilizing my GPU. I decided to sacrifice the latest features of 2.17 for GPU utilization in 2.10 (as well as Python 3.12.0 due to needing an older version at 3.10.0), understanding the usages of TensorFlow & Python throughout my code were mathematical tools integrated in both versions. With TensorFlow-gpu, along with CUDA 11.2 & cuDNN 8.1, the GPU was now utilized. Eager execution was replaced with TensorFlow graph execution using @tf.function annotations on the majority of functions involving intensive computational tasks understanding its efficiency in a TensorFlow-based application.
- OOM (out-of-memory) errors. Due to the extensive number of data points, along with a complex transformer architecture with many customized features (i.e. GeGLU, attention heads), I continuously had training cut off early with GPU memory running out. To address this, I had to sacrifice my GPU resources from other applications on my device & reduce the precision of mathematical computations by adding a memory growth option & setting the global policy to float16. I also had to reduce the layers of my transformer & number of attention heads, and added a steps feature where users can customize exactly how many batches from the training, validation, and testing sets to run through before ending the cycle given that many computers cannot process over 3 million data points in a reasonable time frame. Understanding functionality takes precedence over model tweaks, these actions were taken & have proven to be successful.
Accomplishments that we're proud of
Some of the most inventive features include:
- NVIDIA GPU optimization using TensorFlow-GPU-10.0.0, CUDA-11.2, cuDNN-8.1, TFRecords for tokenized data, and initializing TensorFlow graph execution, parallel batch loading/processing & dynamic memory growth
- One-of-a-kind parameters for customizable hypertuning - i.e. enabling either binary cross entropy applied to binary probabilities (with thresholds & a neutral exclusivity rule applied) or sigmoid cross entropy on logits for loss calculation
- Considering a combination of validation loss value decreases, validation accuracy improvements & training-to-validation loss gaps (to avoid overfitting) to determine if each epoch’s weights should be checkpointed; plus, a patience parameter is used to early stop training if 1+ epochs show no improvement
What we learned
The model training process is highly effective given the many parameters users can tweak, both during training and testing. It enables easy scaling, with one location to add layers to the model, add attention heads, try out different loss calculations, increase the learning & dropout rates, increase the step count to review a significantly greater amount of data, and much more. This is not only done to enable users with various computer performance levels to use my model, but to also extend the horizon of possible combinations to find the best model for specific purposes. Whether a user prefers a model with great processing speed & decent performance, a highly performant model that requires greater time to process, a model that performs effectively for a specific label or length of text, or another purpose, these parameters cover the entire training process to offer such freedom.
What's next for Multi-Label Text Classification Transformer Model
We aim to further optimize the model through deploying more advanced, time-consuming hyper-tuning strategies for the model to align with the goals of our upcoming social app. Stay tuned!
Complete Report
Found here: https://docs.google.com/document/d/1tZsWFJ38rv13aUw0n1uIgANljv0hqC0YOihRFfJ73fg/edit?usp=sharing


Log in or sign up for Devpost to join the conversation.